Canadian Coin Holder


Print Profile(1)
Description
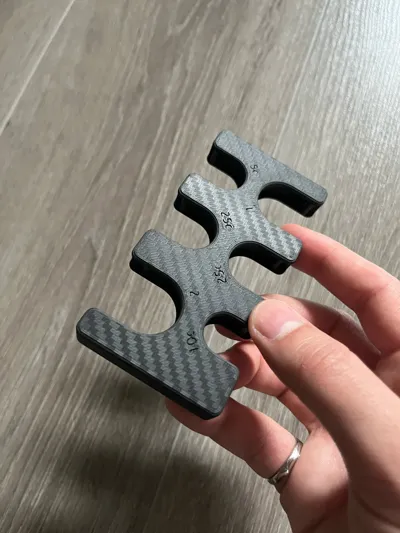
🇨🇦 Canadian Coin Wallet – Pocket-Sized & Practical
A compact, 3D-printed coin holder made for Canadian change – perfect for travelers, minimalists, or anyone tired of loose coins rattling in their pocket.
🛠️ Original Design – Inspired but Built from Scratch
This model was fully designed from scratch by me in SolidWorks as a fun personal project. While it’s clearly inspired by the overall form and function of Japanese-style coin holders and similar concepts, including Rick’s and JA Design’s popular wallets, this version is an original creation made specifically for Canadian coins.
If you enjoy this concept, feel free to check out both Rick's models and JA Design's models for more variations and ideas.
🪙 Capacity & Coin Fit
This wallet is designed to securely hold a total of $15.40 in Canadian coins:
- 10 × 25¢ (Quarters)
- 7 × 10¢ (Dimes)
- 4 × 5¢ (Nickels)
- 4 × $1 (Loonies)
- 4 × $2 (Toonies)
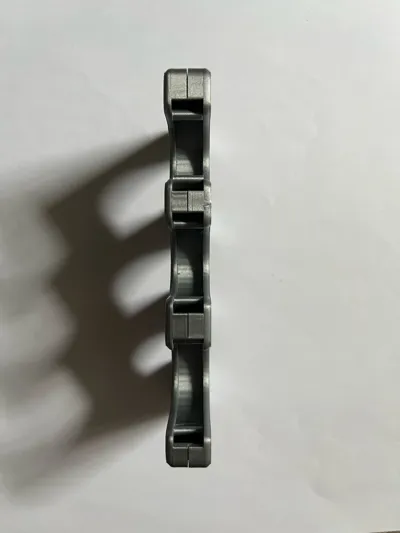
All components snap together using a clean friction fit – no glue, screws, or supports needed.
📐 Dimensions
- Length: 105.78 mm
- Width: 52.65 mm
- Thickness: 12.36 mm
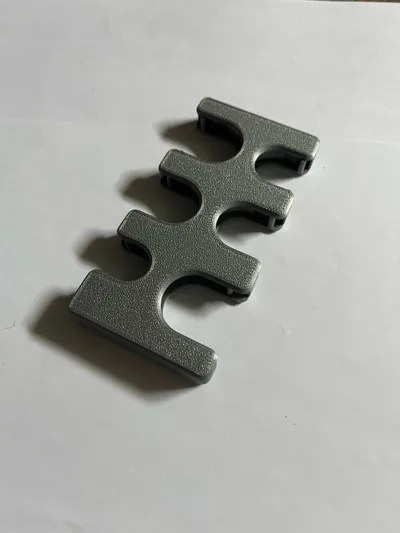
🧩 Assembly Instructions
- Wait until the print has fully cooled before removing it from the bed to avoid warping.
- Align the internal coin channels with the circular slots inside the frame – make sure each layer is oriented correctly.
- Gently press the three parts together: top cover, bottom cover, and the main frame.
- Note: the pieces don’t "click" together firmly — if overfilled with coins, the wallet may pop open. Once you confirm proper alignment, I recommend using Glue to permanently secure the layers together.
Comment & Rating (33)