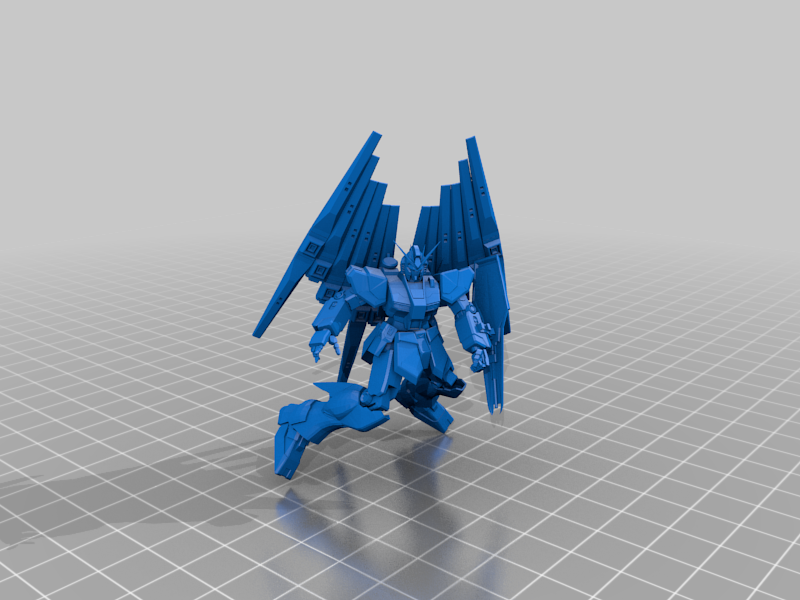
Nu-Gundam RX-93


Print Profile(1)

Description
🛰️ Model: Nu Gundam RX-93
🎨 Original Design by: namhias
🛠️ FDM-Optimized by: JediMaveriC
If you enjoy this model, support the my Mechbay: https://ko-fi.com/jedimaveric
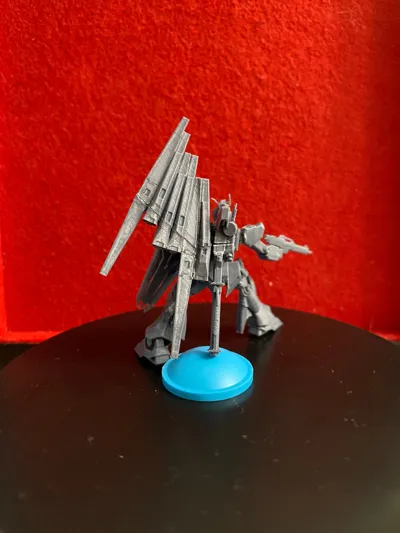
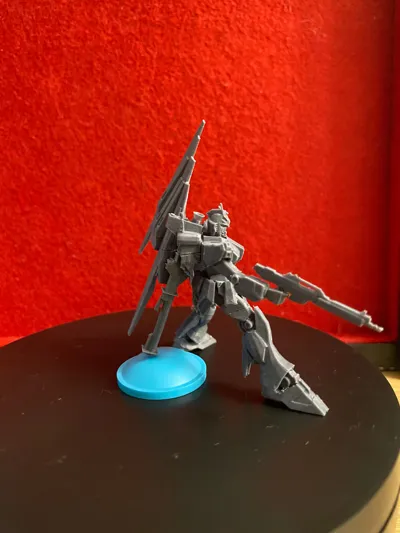
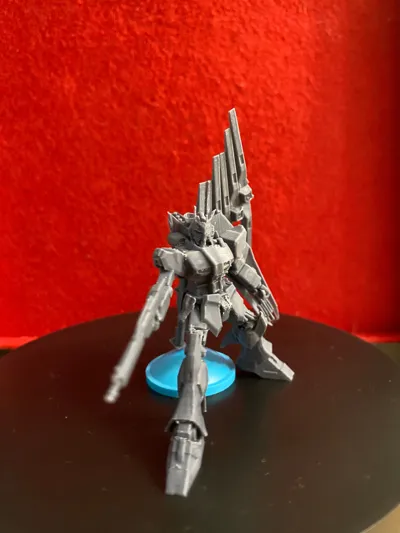
Looking for a 3D printable Nu Gundam RX-93 model optimized for FDM printing? This is the iconic Amuro Ray’s Nu Gundam, a centerpiece of the Universal Century and one of the most powerful mobile suits in the Gundam universe. Designed for the final battles of Char’s Counterattack, the Nu Gundam is a symbol of hope and overwhelming firepower, featuring its signature Fin Funnel system.
This detailed Gundam RX-93 3D model has been split into parts for better FDM printing results. Be aware: some small elements may come loose during support removal, so careful handling and gluing are essential for a clean build. THIS IS A COMPLEX BUILD
Nu Gundam RX-93 3D Model Assembly Guide:
- Glue the waist parts together. Be careful – the skirt armor may detach, so handle it with care.
- Legs:
- For the right leg, remove supports carefully. The foot may come off; glue it back on after when posing the leg assembly (later).
- For the left leg, use the peg in the hip to align and press-fit. If the peg interferes, trim it off and use glue.
- Attach the right leg jet cover to the calf and glue the right foot in a standing pose.
- Torso and head:
- The head might separate when removing supports – glue it back later. (Take extra care when handling it, the V-fin is very fragile)
- Glue the torso to the waist and the head to the torso.
- Backpack:
- A fin funnel element may detach when removing supports – glue it to the top part of the backpack first.
- Glue the backpack to the back of the torso.
- Right arm: Glue it directly to the torso.
- Left arm and shield: Glue the left arm to the shield, then attach the assembly to the body. You may need to trim the attachment point for a flush fit.
- Fin Funnel:
- It’s common for a single fin funnel to come off when removing supports. Glue it on after you are done with the fin funnel assembly. Then attach the full assembly to the backpack and shield.
If you enjoy the model, be sure to support the original creator!
Boost Me (for free)
If you like having ready-to-print models delivered to your door, please boost me.
Check out the BattleTech mech collections:
Light | Medium | Heavy| Assault |
Comment & Rating (0)