Sega Saturn USB-C PD Mount for VA0 models


Print Profile(1)

Description
Sega Saturn USB-C PD Mount for VA0 models
Boost Me (for free)
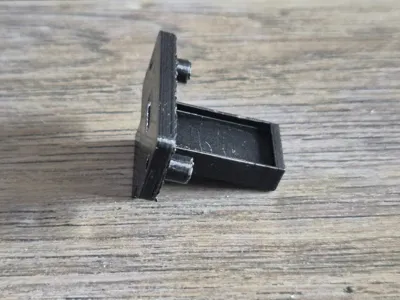
I designed this USB-C bracket specifically for the Sega Saturn VA0 models. These models had the PSU mounted to the top case, which made placing a new, modern PSU impossible. I've designed a bracket to fit perfectly on top of the Sega Saturn and a VA0 USB-C port.
It makes the installation much cleaner and tidier.
This method is intended only for those with soldering experience.
No cutting is required. Soldering is required for wire installation.
Please follow the steps below, before proceeding.
Tools required:
RETROSCALER SaturnPSU (Required!)
USB-C power brick (30 watts or more)
2x M2.5 Screws
2x M2.5 Screw nuts
3D Printer
Hot Glue or Super Glue (Optional)
Recommend using PETG filament.
Installation
To replace the power supply unit (PSU) in the Sega Saturn, follow these steps:
1. Begin by removing the Phillips screws located at the bottom and back of the Sega Saturn.
2. Carefully lift the lid, but do not remove it completely. Disconnect the cable that connects the PSU, LED light, and CD drive.
3. Once the cables are disconnected, you can fully remove the top lid.
4. Next, take out the original PSU. Exercise caution when removing it, as the PSU may still hold a charge.
5. Install the new PSU in its place. For a clean installation, it’s recommended to use the Saturn PSU bracket that I designed.
6. Prep your new USB-C Board by filing the top of the board, until you reach the top ground pins. Take your time.
7. Solder the positive (RED) and ground (BLACK) wires to the USB-C board.
8. Install the USB-C board into the 3D mount. I recommend adding a small amount of hot glue before placing the board into the 3D mount. This will be a tight fit, so take your time.
9. Install the USB-C bracket into the top case. The screw nuts should placed inside of the metal screw mount. Hold it while screwing the 2.5 M screws.

10. Remove the large the large clear cable protector for the power button. If not removed, the case will not shut when reassembling. I recommend soldering the wires off and removing them, or you could cut them off. - Some VA0 models have different clear cables used.
9. Screw everything back up and play.
Make sure to handle all components with care!
Please note: This will only work with the VA0 models of Sega Saturns.

License
You shall not share, sub-license, sell, rent, host, transfer, or distribute in any way the digital or 3D printed versions of this object, nor any other derivative work of this object in its digital or physical format (including - but not limited to - remixes of this object, and hosting on other digital platforms). The objects may not be used without permission in any way whatsoever in which you charge money, or collect fees.
Comment & Rating (0)