Search models, users, collections, and posts

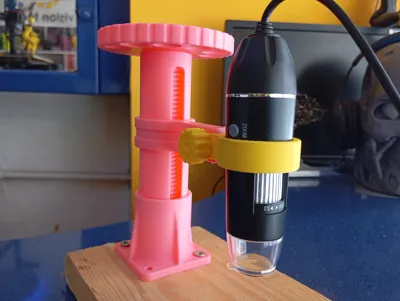
adjustable linear tube guide plus camera holder

IP Report
GIF

Print Profile(5)

All
A1 mini
P1P
A1
H2D Pro
X1 Carbon
X1E
P1S
H2D
P2S
X2D
H2S
X1
H2C
A2L

100mm travel bundle unit and accessories
Designer
5.6 h
1 plate
4.4(8)

accessories only
accessories only
Designer
3.3 h
1 plate
5.0(1)

0.2mm layer, 3 walls, 15% infill
Designer
12 min
1 plate
5.0(1)

150mm travel mechanism unit only
Designer
3.5 h
1 plate
3.5(2)
Click to see more

Open in Bambu Studio
Boost
169
315
31
11
201
87
Released 

Description

Thanks for reaching out!

Here we have a rule not to use a single Ai image. This means every image you see in posts or descriptions are real photos.

Another rule is not to upload designs that are not tested by us  first. So what you see is what you will print indeed.

Hope you like our work and maybe support us. Remember that you can support us for free just by like, follow, share and boost our work.

Boost Me (for free)

drop your spare boost if you liked this model


UPDATE 30-06-2025:

I added a profile that includes an unstuck tool key too help you unstuck the guide from the tube without risking to brake the threads of the wheel… so follow new assembly directions….


One of my best designs so far!

I upload all the stl files also.


demo:

https://www.youtube.com/shorts/GPvotVMgSj0


this is a very unique designed and used fussion to make it true.

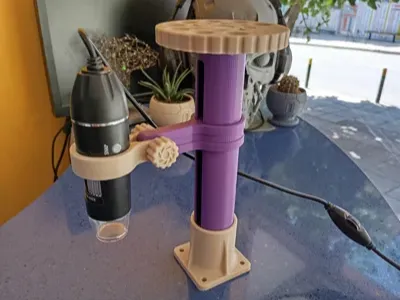
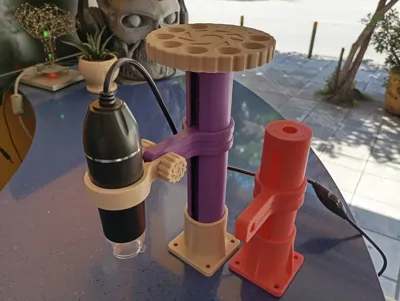
An adjustable bracket for general purpose use.

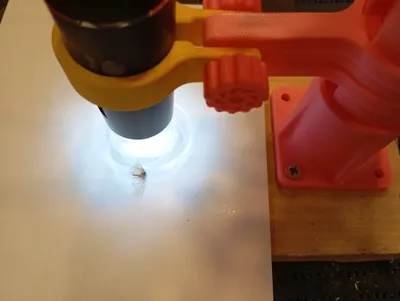
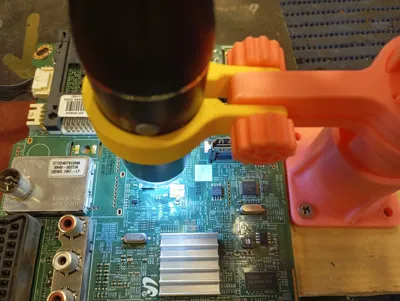
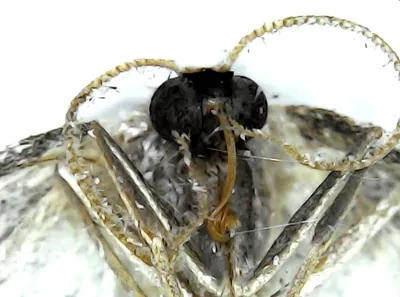
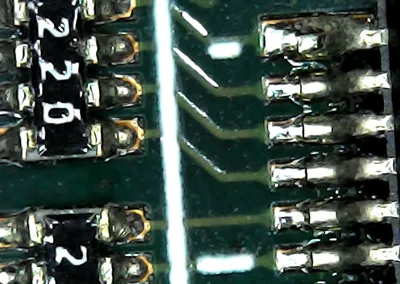
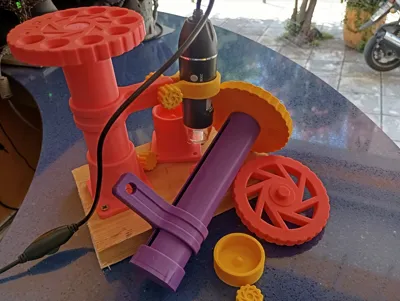
my current project is for mounting a usb microscope camera.

i want to inspect pcb most.

Other attachments to fit on the bracket will be designed in the future for sure.

i wanted to designed something that would be universal for my project so…


trying to keep the limits of a1 mini.


I include 3 profiles.


100mm travel profile has the accessories also

150mm travel profile only

accessories only


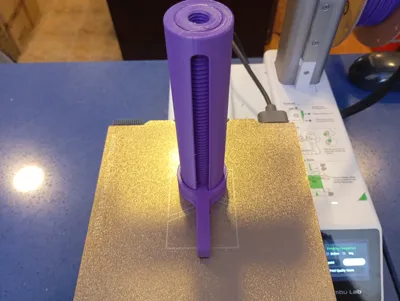
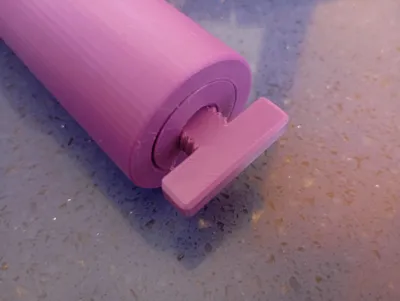
The whole linear unit mechanism is printed in place without supports. Just print and use it.

Every revolution of the wheel will move 3mm the bracket.


one more profile includes the accessories I will use for the microscope camera project.

I upload all the accessories on .step files in case someone want to design their own accessory for the units.
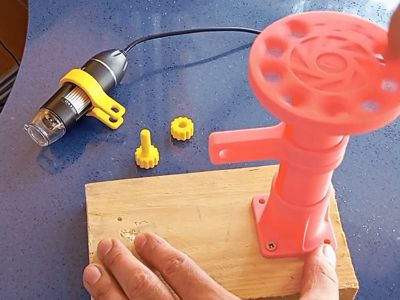
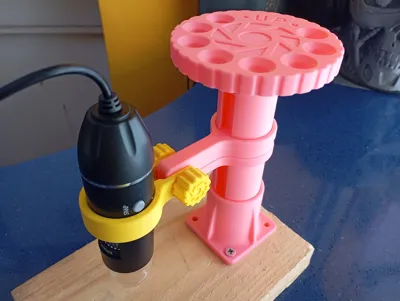
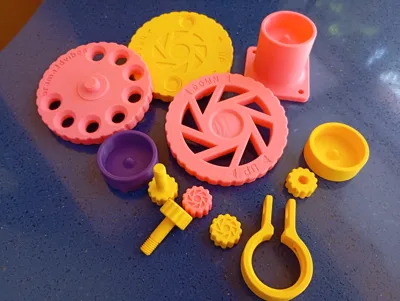
  • a wheel

I made the wheel with holes so to turn it with my fingers. 

The wheel is attached on the unit with m12 thread.


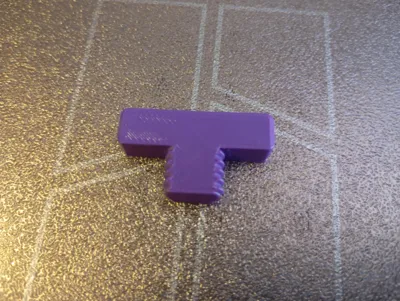
  • a microscope camera holder for the bracket

    To install the bracket on the camera just slide it from the bottom until you here the click!


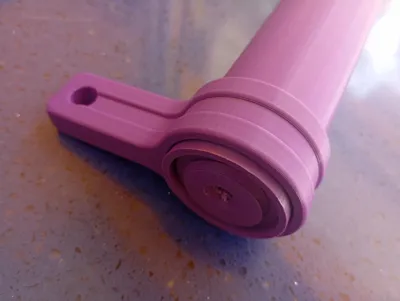
  • a base for the linear unit.

The base I upload is designed with a snug fit to the tube so not to use even glue but you can do it if you wish so.

there are 4 holes at the bottom of the base so to mount it on a plate.

I will use a wooden plate for my project so to be more weight steady.


  • nut and bolt to mount  the camera holder

This is 8mm thread. If you wish use real life bolt and nut M8.


ASSEMBLY INSTRUCTIONS.


Its really ease to get it work since the whole mechanism is already print in place.

First use the unstuck tool key and screw it on the top until is well tight.

In that point continue to screw until you here the click means that the guide is unlocked and moving up already.


TIP: If you feel that you put a lot of force help it by moving the bracket a little bit left - right.

unscrew the tool key and screw the wheel on top until its tight enough.


Move the guide  far enough so to mount the unit in the base.


If you wish extra lengths, mods or accessories just ask me if i can do it.

for now there are 2 travel lengths. But i will upload bigger volumes if needed by the community…


please feel free to share, like, boost and follow  as you wish!


added them on my tools and gadgets collection here:

 https://makerworld.com/en/collections/7706686-tools-and-gadgets


🙏 Please don't leave negative feedback if you don't doublecheck that you used your own well working filament profiles and be very sure that you build plate is well cleaned! 

The designs we upload are well tested so you don't have to worry about them. we never upload a design without fully tested them first!


🙏 Feel free to Follow, Boost, Like & Share this work — your support means the world and helps us bring more designs.


ways you can support our work:


Membership

don't forget that if you are looking for a commercial license of my designs or simply you want to support our work hit join to subscribe here on makerworld or go to our page on patreon and subscribe there!

Join
  • Dont forget that you can support us for free just by following and sharing our facebook, instagram, patreon, youtube and makerworld accounts. 

Comment & Rating (31)

(0/1000)

Print Profile
100mm travel bundle unit and accessories
Looks great and should fit Thanks
Show original
profile
1
Reply
The linear unit mechanism is not included in the file bundle.
The designer has replied
designer
2
Reply
please explain friend so to resolve the issue. do you need to include the unit with the accessories in one profile? if yes witch unit is suitable for you? the 100mm or the 150mm? it is supposed to print the unit you want and then print the accessories... please let me know if I missed something so to correct it!
0
Reply
dear friend I tried to upload everything. can you check now? i included all the stl files and the step files for the accessories and i have reuploaded the 100mm length profile so to be a bundle indeed...
0
Reply
Replying to @oramafanis :
Thank you.
0
Reply
Boosted
This is exactly what I am looking for! But what material did you use? I printed the linear rail but it does not budge. The screw on the wheel keeps breaking when I try to move the lever. Currently I am already on the 2nd linear rail and 4th wheel. Thanks!
The designer has replied
0
Reply
dear friend. thanks a lot for your feedback. if the guide is more stack than it should be try to break the fuse with your bare hands first then it should spin like normal. some printers hate small tolerances and the screw on the wheel might brake on bigger force. before you try to screw all the way the wheel just try first to separate the guide from the tube. if you see that this is impossible then it seems that your machine maybe overextruding. I printed this both with petg and pla. don't print another wheel. just glue it on top of the axis with a drop of glue. but first separate the guide with you hands. if you wish I can send you a file with looser tolerances to test....
0
Reply
UPDATE! dear friend thanks a lot for the feedback! it seems that the guide is more stack than should be. This is the first feedback for something like that and i paid the necessary attention! please find the new profile with the unstuck tool key i have added and have a look at the new assembly instructions. you dont have to print more wheels. just glue it on the top with care not to fuse the main thread with glue.... please tell me if this helped you... please inform me with the update,,,,,
(Edited)
0
Reply
Boosted
Replying to @oramafanis :
Hi, The unscrew key helped a lot loosening the lever. Thank you very much!
0
Reply
hello would it be possible to have a 250 mm linear unit of course I boost then thank you in advance
The designer has replied
Show original
0
Reply
do you want 200mm i have it ready! i must dig a lot to the files for that!
0
Reply
Replying to @oramafanis :
yes that will be very good thank you very much
Show original
designer
1
Reply
Replying to @user_275784364 :
ok I will sent you a pm. please answer so to be able to attach the file.
0
Reply
Print Profile
100mm travel bundle unit and accessories
Tried multiple times with different filaments, the screw is always stuck and even forcing a lot it didn't unlock. It is a pity, because otherwise the model was great.
The profile uploader has replied
profile
1
Reply
dear friend I am sorry for that. did you print my profile? I wish I could help . a photo may help investigate!
0
Reply
Unfortunately I have printed 3 times and always failed to release the mechanism or the tool, I print from PET-G to MK4S 0,2 4 perimeters and unfortunately the tolerance is apparently so small that it cannot be released.
The designer has replied
0
Reply
hi friend I am sorry for that. I keep the tolerances tight so to have a more steady result. please tell me did you try to release it with the key tool I uploaded as a profile for this exact purpose? please give me feedback for this.... it helped a lot of people. if you tried it already maybe I must upload a profile with looser tolerances for folks that print this fused.... but please try the key tool first....
0
Reply
this key tool....
0
Reply
Print Profile
150mm travel mechanism unit only
Other Issues:Sorry for the vote, the idea is good but the design is terrible... the thread is not designed for 3D printing, and whether the parts fit together depends entirely on your print profile. Printed it twice, I want to try one more time with a 0.2 wall offset, but I'm not sure if it works....
The profile uploader has replied
profile
1
Reply
sorry to hear that. it is a challenge print Indeed. I am not sure what didn't work for you though. maybe some photos will help me understand your problem. there is no need to tweak the profile so much for this...
0
Reply
I'm having (for the first time... I'm know what I'm doing) overhags-overstrusion on the seam and other places
0
Reply
Print Profile
100mm travel bundle unit and accessories
profile
1
Reply
Boosted
Print Profile
100mm travel bundle unit and accessories
0
Reply
Print Profile
100mm travel bundle unit and accessories
0
Reply

License

If you want to use this model commercially, please join my membership.
Join Now
This user content is licensed under a Standard Digital File License.

You shall not share, sub-license, sell, rent, host, transfer, or distribute in any way the digital or 3D printed versions of this object, nor any other derivative work of this object in its digital or physical format (including - but not limited to - remixes of this object, and hosting on other digital platforms). The objects may not be used without permission in any way whatsoever in which you charge money, or collect fees.