Search models, users, collections, and posts

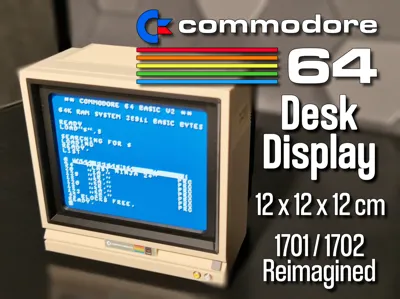
Commodore C64 Desk Display - 1701/1702 Reimagined

IP Report

Print Profile(2)

All
A1 mini
A1
X1 Carbon
P1S
P1P
X1
X1E

For A1 and A1 mini - 0.2mm layer, 2 walls, 15% infill
Designer
13.9 h
7 plates
5.0(4)

0.2mm layer, 2 walls, 15% infill
Designer
13.6 h
7 plates

Open in Bambu Studio
Boost
83
209
14
16
118
25
Released 

Description

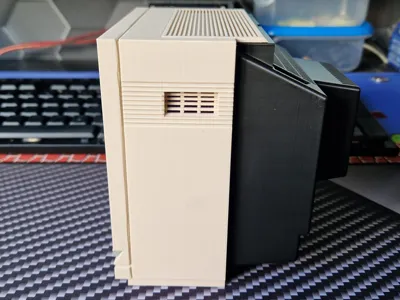
Miniature Commodore 1702 – A Tiny Tribute with a Big Heart

NOTE: This model requires a fair amount of post-processing to match the preview images. Some parts will need to be glued carefully and with precision (button and RCA connectors). Additionally, you'll need to print and hand-cut stickers for both the front and back sides. For one of the back stickers, 3 small holes (5mm) must be manually cut for the chroma/luma/audio section. Removing supports can also be a bit tricky. Please keep all this in mind before starting your print. Assembly instructions are below the info text.


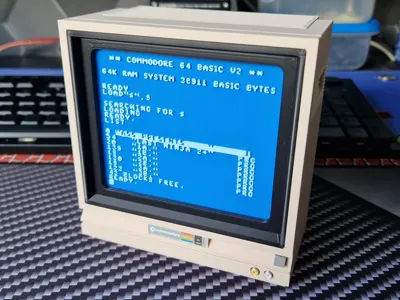
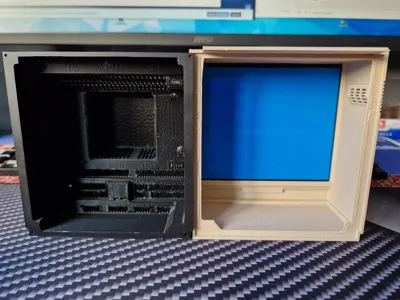
Originally I wanted to create a small desk sculpture in the spirit of my earlier Amiga piece (https://makerworld.com/de/models/1381766-amiga-guru-meditation-a-classic-reimagined-in-3d#profileId-1430326) but it turned into a full-on passion project. The result is a highly detailed mini version of the iconic Commodore 1701/1702 monitor, lovingly modeled and packed with retro charm.


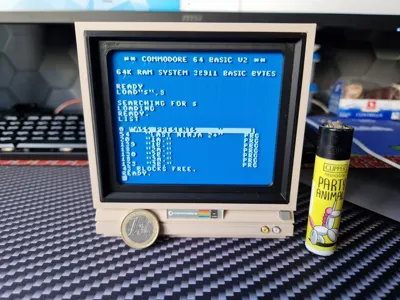
At roughly 12 × 12 × 12 cm (4.7" × 4.7" × 4.7"), this little beast is small in size but big in character. I went all-in on the details:
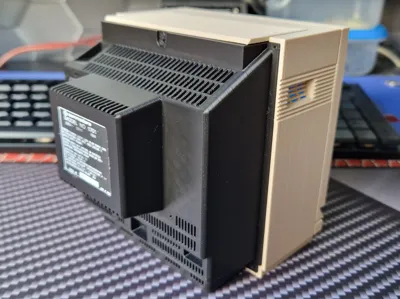
– Every line and groove on the front and back
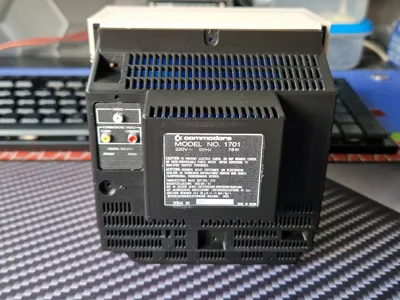
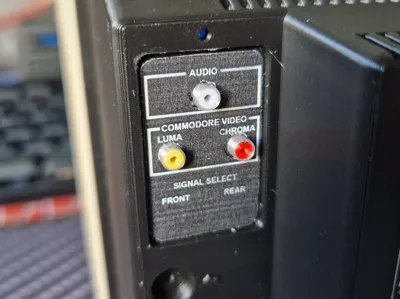
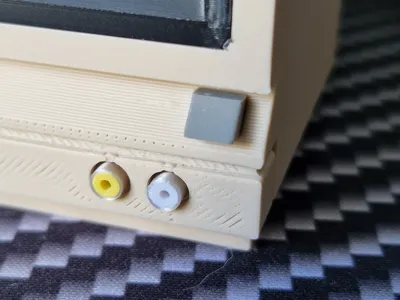
– Authentic RCA (Cinch) connectors, power button, rear vents
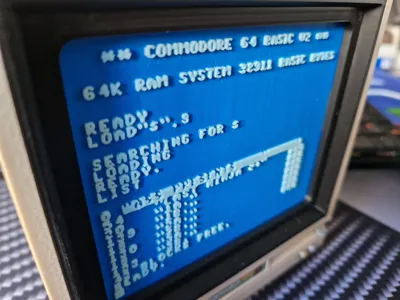
– A classic retro screen look
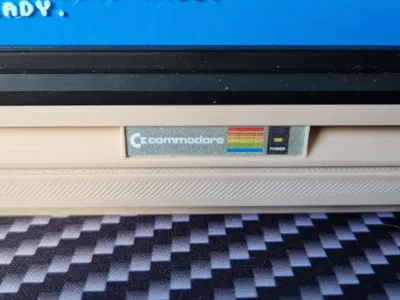
– And yes—stickers! (You’ll find the printable sticker sheet linked at the end.)


No paint, just pure printed texture and layered design. I wanted to recreate the essence of the original unit as faithfully as possible—something that feels like it came straight off a 1980s desk, albeit a small one. :D


This monitor has a special place in my heart: It was the monitor for my very first computer when I was six years old. That connection is what drove this from “quick project” to “tiny love letter”.


I Hope it brings a smile to fellow C64 fans. 💾🧡


Links to the sticker files are at the bottom of the post!


Assembly instructions:
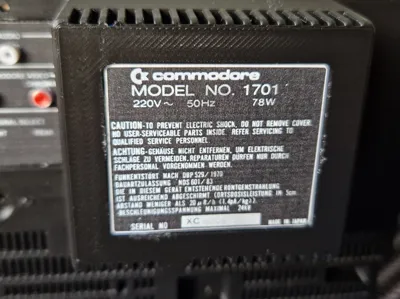
Apply small dots of superglue carefully to the outermost areas of the corners and edges. Take care not to use too much, or it may seep out in the next step.


Carefully lower the bezel onto the “screen”, making sure it's centered, and let the glue set.


Align the bezel within the opening and press down on all four corners at the same time until it sits flush with the case. This step shouldn’t require any glue, as the part is designed to be a press fit.


Apply superglue to the green-marked area and press the back cover into place. Alternatively, you can use 1.5 mm screws instead of glue in the four corners.


(Please bear with me, it's already assembled.) Apply glue as shown on the top side to attach the top grill. Mind the orientation - the sloped side needs to point to the back.


Remove the brim and press the two parts of the RCA jacks together. If they don't fit properly, you may need to slightly trim the base to compensate for elephant’s foot.


Use just a single small drop of superglue to secure the RCA connectors and the front button to the case. Be careful to keep the front button properly aligned.
Now print the stickers, cut them cleanly (follow the outside of the white line around the largest sticker), and carefully make round holes in the green-marked areas. An X-Acto knife works best for this task. Then apply them to the center of the front case and the according spots on the back.


Stickers:

Download this image and print it at 100% scale to ensure the correct size, and cut them out carefully for the best fit.

https://imgur.com/dYonCCu

Comment & Rating (14)

(0/1000)

Thank you for putting so much love and care into this model. Like you, I had this monitor (along with the c-64 and 1541 disk drive). My first computer was the Vic-20 and I learned basic on that as a teenager. I'm gonna start printing this tonight! Such a fun trip down memory lane! Nice Work! Edit: I just HAD to come back here and post a picture. It took me longer to get to this little project, but I'm super happy with how it came out. Thank you again for making this model...it really brings a smile to my face. Gonna find JUST the right spot to display this one! Cheers!
(Edited)
The designer has replied
designer
5
Reply
Thanks a lot for all the kind words! You're very welcome—I'm glad I could bring back some old memories! I hope the print turns out well. If you have any questions, feel free to send me a message or leave a comment here. :)
1
Reply
what specific colors of filament should I buy to match these colors?
The designer has replied
designer
1
Reply
I used El egoo Matte Beige for the front, Creality Blue for the display background and El egoo Matte Ice Blue for the font. (I have to write El egoo separated or it get's flagged as spam).
3
Reply
Replying to @grenzdeb1l :
thank you!!!!!
1
Reply
Please add a profile for the A1 mini as well, I adore your project!
The designer has replied
Show original
designer
1
Reply
I have added profiles for A1 and A1 Mini. Have fun printing! :)
0
Reply
Replying to @grenzdeb1l :
Thank you, friend! I can’t wait to print it!
Show original
designer
1
Reply
Boosted
this takes me back to my teens
The designer has replied
designer
1
Reply
You're very welcome :) Thanks for the boost! <3
(Edited)
0
Reply
Print Profile
For A1 and A1 mini - 0.2mm layer, 2 walls, 15% infill
profile
1
Reply
Print Profile
For A1 and A1 mini - 0.2mm layer, 2 walls, 15% infill
profile
1
Reply
Print Profile
For A1 and A1 mini - 0.2mm layer, 2 walls, 15% infill
0
Reply
Print Profile
For A1 and A1 mini - 0.2mm layer, 2 walls, 15% infill
0
Reply
No more