Electric Lifting Cylinder for 1:10 Models


Print Profile(1)

Description
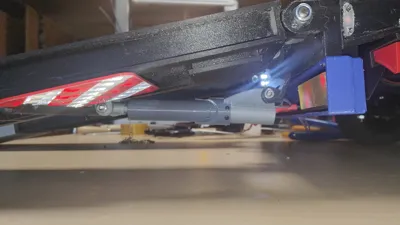
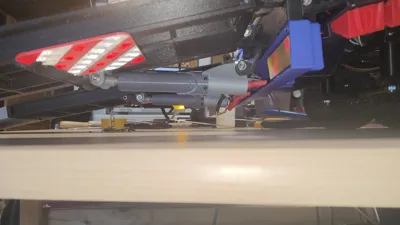
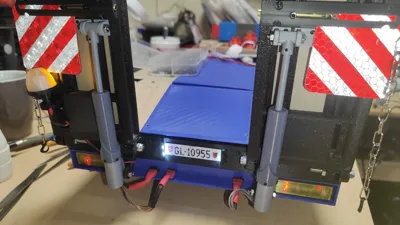
To create a realistic and functional 3D-printed 5-axis low loader (1:10), I developed lifting cylinders for the ramps. It was the crowning achievement of a project lasting several months.
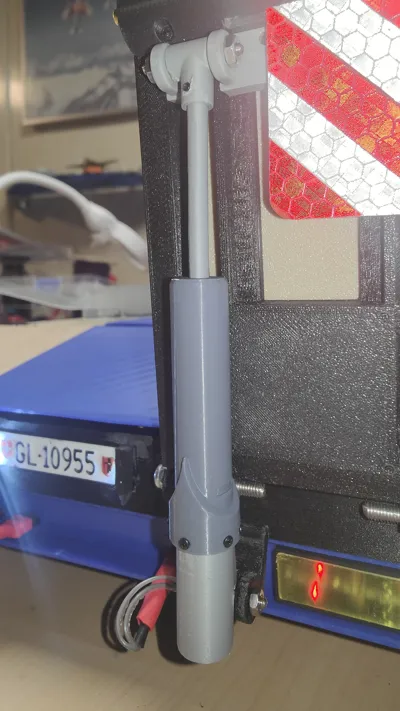
The lifting cylinder itself is relatively simple yet functional in design. To assemble the functional unit, you will need a small 3-6V geared motor, five 2 x 3 mm self-tapping screws, a 3 mm nut, a 4x7x4 mm ball bearing, and a 59 mm long 2 mm threaded rod. In addition, 2 wires and a toggle switch are required for each cylinder. Power is supplied by 4 AAA batteries.
Assembly is quite simple:
After preparing the motor, it is installed in the bottom of the cylinder.

Next, prepare the adapter. Use a tap to create a 2 mm thread. Install the 2 mm threaded rod into the thread.
Loosely place the prepared adapter with the threaded rod onto the existing gear.

Now prepare the bearing adapter. Insert the ball bearing into it. Slide it over the threaded rod all the way down until the threaded rod adapter runs in it.
Insert the 3 mm nut into the cylinder rod, ideally securing it with a small drop of superglue. CAUTION: Allow to dry before proceeding.

Screw the resulting lifting rod onto the thread and tighten it halfway.
Now attach the cylinder sleeve by inserting the lifting rod and the cylinder bottom with the motor.
Finally, carefully drill five holes in the cylinder bottom (motor mount) using a 1 mm drill bit at the five holes and insert the five self-tapping screws.

As a final step, fit the two motor retainers into the recesses on the cylinder sleeve. CAUTION: Do not glue, all parts are extremely precisely fitted and hold without glue. If necessary, carefully work with a file to adapt it.

I will soon upload a corresponding description with all the necessary parts and assembly instructions.
Comment & Rating (3)