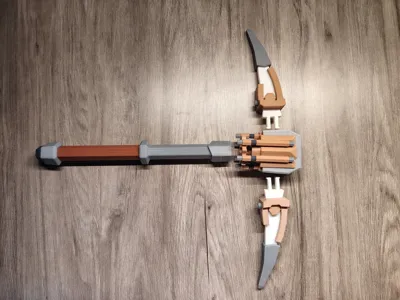
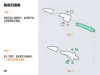
Deep Rock Galactic Standard Pickaxe


Print Profile(3)


Description
Management, given the dwarves’… enthusiastic approach to equipment during work—particularly the incident this month involving a new recruit, four Killer Black Beers, and the subsequent demolition of four entire pickaxes in a fit of pique—the team couldn’t even return to base. The technical department has dispatched blueprints for standardized pickaxes for emergency use (such as promptly responding to teammate R&S requests).
As a veteran miner with 1000 hours under my belt, though retired and enjoying a leisurely two-year post-corporate life—no more firsthand mining for me—I remain keenly interested in the corporation's progress, often observing management XD. My first fledgling design is realized in the quintessential DRG tool—the pickaxe—may all discerning dwarves find joy in its use.
Detailed explanation below, or skip directly to assembly instructions (I can’t wait myself)
Design Musings:
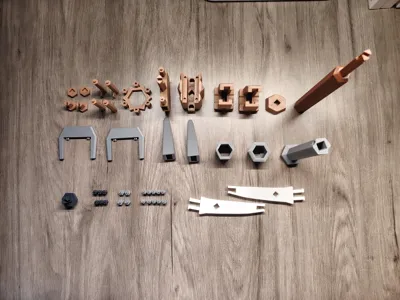
1. For ease of use and reduced printing hurdles, the finished product is separated by color. No AMS, no hardware required. In the absence of strenuous use, assembly may even proceed without adhesive. However, a small amount of glue is recommended at key points for enhanced stability. The final dimensions are kept to 30cm, adhering to most dwarves’ ergonomic specifications and facilitating A1 mini printing.
2. The initial hexagonal clasp design proved unsatisfactory, with difficult tolerance control and component fragility. A quadrilateral alternative was adopted, resolving certain overhang printing errors. This introduced a new assembly challenge, however, requiring alignment with the outer hexagonal perimeter—otherwise a slight skew may occur, for which I beg the indulgence of our dwarven Einsteins.
3. To facilitate printing and assembly, certain aspects of component authenticity were sacrificed in favor of refined dimensions and structure.
4. The handle defaults to vertical orientation printing for improved surface finish. Tested strength is sufficient, but horizontal placement may enhance durability for more vigorous wielding.
5. Increasing infill in the pickaxe head component will create a heavier feel, which necessitates increased strength in the primary structural elements.
6. This product contains small parts; please keep away from small dwarves and pets to prevent accidental ingestion!
7. The small screw clasps are quite diminutive; it is advisable to print two or three extra copies to prevent breakage due to excessive force or insufficient material resilience.
8. Due to technical limitations, the design may present areas of suboptimality or avenues for improvement. Feedback from all dwarven Einsteins is most welcome.
——————————————Assembly Instructions——————————————
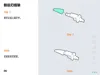
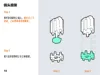
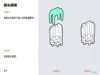
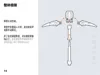
1. The pickaxe consists of five parts: the front blade, the rear blade, the head, the shaft, and the handle.
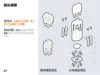
2. Align the clasps and hexagonal outlines during assembly; insert one side and gently press the other to secure the connection.
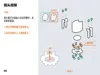
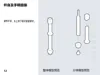
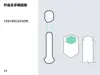
3. The head and front/rear blades utilize multiple screws in small, medium, and large sizes. Sixteen small screws are required in total—six with upper recesses and ten without—for assembly onto the head. Eight medium and large screws (four per side) are used for attaching the front and rear blades.
——2025/07/24 Update——
A 40cm version has been added. The small clasp structure has been modified for improved fracture resistance. A default of 15% infill with two walls is used, with a 50% infill modifier applied to the two slightly longer structural components. Glue is recommended for secure fastening. The overall weight is double that of the 30cm version, approaching 280g.
The handle length practically reaches the maximum printable size for the A1 mini, necessitating a horizontal print orientation. For improved surface quality with larger printers, vertical printing is possible, remembering to activate the brim.
Documentation (16)


License
You shall not share, sub-license, sell, rent, host, transfer, or distribute in any way the digital or 3D printed versions of this object, nor any other derivative work of this object in its digital or physical format (including - but not limited to - remixes of this object, and hosting on other digital platforms). The objects may not be used without permission in any way whatsoever in which you charge money, or collect fees.
Comment & Rating (28)