Line Level - fully printable


Print Profile(1)

Bill of Materials


Description

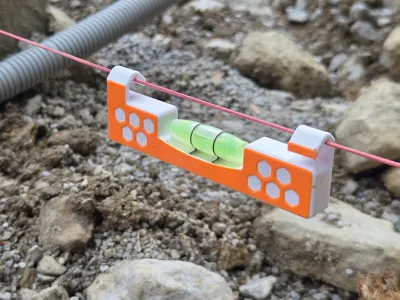
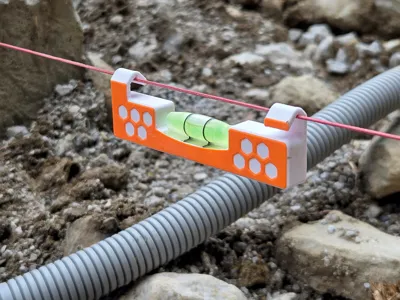
This line level is completely 3D printed. It is a nice to have tool for a level batter board.
This should be seen as a proof of concept what can be achieved by 3D printing.
Libelle / Bubble types
Oh, I lied when I said there is no external stuff involved. You for sure need liquid to make the bubble glass work. Therefore I did a few tests with different liquids.
And no, you can't use water because of adhesion.

- Vegetable Glycerin with Alcohol Color
- too slow in response
- sticks too much to the surface and doesn't level out
- Isopropyl Alcohol with Alcohol Color
- works perfect
- rapseed oil
- slower in response but working
- bad visibility
- olive oil
- slower in response but working
- pumpkin seed oil
- slower in response than the other oil based varants
So the clear winner is the bubble filled with colored isopropanol.
Printing
You have to print the bubble glass / libelle first.
The print has to be done in clear PETG.
There are two Versions in the profile.
The one perimeter version gives more visibility but tends to leak when not printed perfectly.
On the two perimeter version the bubble is a little bit less visible but there is a lower chance of leakage.
On the main level you have to add a pause on Layer 51. The printer will stop there and you can insert the bubbles. After inserting them you can resume the print.

(right mouse at L51, add pause, slice again)

(insert bubbles during pause > resume print)
Filling the Bubble Glass
!!!!!! DISCLAIMER WARNING !!!!!!
Isopropanol is a highly flamable liquid and since there is open fire involved to close the bubble glass you should do this procedure outside or in a fire safe place. When you spill during filling, be prepared to light the bubble glass on fire. When you don't spill liquid nothing should happen, but be prepared.

Put a few mililiter of isoprpyl alcohol in a waterproof container and color it with a few drops of alcohol color. It's the same color you use for coloring epoxy. Maybe it could work with normal foodcolor also but I didn't try it yet.

By using a syringe you can easily fill up the printed vial.

There is a small indicator (just one layer) which marks the fill height.
Now close the bubble by using a lighter as a heat surce. Again be very cautios on this step. Use wet fingers when pushing the tube together to not burn yourself.
Testing
After you have closed the Bubbles you should test them. They have to be perfectly printed on the inside and you can only see errors after they have been filled. Any kind of stringing or blobs will affect the movement of the bubble. Therefore I suggest to print a few more bubble glasses and try them out before printing them in place.
To make sure you have no leaks, you should leave them for a day or so to check if they loose liquid. You can speed up the leakage test by heating the air inside to about 40-50C°. Just put them into your printer during a printjob.
License
You shall not share, sub-license, sell, rent, host, transfer, or distribute in any way the digital or 3D printed versions of this object, nor any other derivative work of this object in its digital or physical format (including - but not limited to - remixes of this object, and hosting on other digital platforms). The objects may not be used without permission in any way whatsoever in which you charge money, or collect fees.
Comment & Rating (9)