BambuLab X1C SmartLight Riser


Print Profile(1)

Bill of Materials


Description
Short Description:

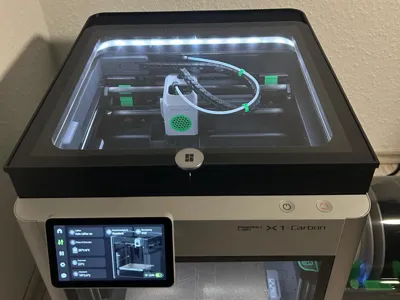
A functional SmartLight riser for the Bambu Lab X1C, featuring an integrated LED profile, diffuser, and recessed module compartment—accommodating a 2-channel relay board and centralized wiring. LED strip control is directly achievable via Bambu Studio, Bambu Handy, or the printer menu, provided the factory Bambu LED's supply voltage serves as the control signal for the relay board.
Integrated cable guides ensure neat, structured cable management and a tidy overall aesthetic.
Special Feature:
The glass cover slides back approximately 2 cm, allowing for printer interior ventilation as needed—without complete removal of the cover.
Detailed Model Description:
Introduction
The BambuLab X1C SmartLight Riser is a practical enhancement for your 3D printer, providing an improved lighting solution with an integrated LED profile. The incorporated module compartment for the relay board and centralized wiring enables clean and efficient cable routing. This ensures not only optimal illumination of the printing area but also a tidy workspace.
Technical Details
Compatibility
The riser is precisely designed for the Bambu Lab X1C and P1S models and can be directly mounted without any additional adjustments.
Dimensions
Overall dimensions are approximately [409 × 391 × 60.5 mm]. This allows the riser to seamlessly integrate with the printer housing while providing ample space for electronics and cable routing.

Recommended Material
The riser can be 3D printed from various materials depending on the application. PETG is recommended, offering a good balance of strength, temperature resistance, and printability. An optimized PETG print profile has been uploaded.
Module Compartment
The recessed module compartment is designed for a 2-channel relay board. It also serves as a compact connection space for centralized wiring—ideal for clean, maintainable electronics integration.
Cable Management
Ingeniously placed cable channels allow for the invisible and structured routing of all wires. This enhances both the aesthetics and operational reliability.
Bill of Materials
Relay Module
2-channel relay board for switching LED strips and optional components (e.g., Bento Box).
Sealant Tape
Self-adhesive sealant tape for sealing the glass plate to the riser. Reduces dust and vibrations.
JST Connectors
JST connectors for tapping the LED control signal. Extended with 0.5 mm² wire.
LED Strip
RGB or single-color, matching the desired light color and voltage.
Magnets Ø4×2mm
For lid attachment—6 pieces in the riser, 6 pieces in the lids.
In MakerWorld parts list
Filament (PETG)
Recommended for good temperature resistance and strength.
In MakerWorld parts list
Additional basic tools and consumables are required for installation:
External Power Supply
For safe and stable power supply of the LED strip with the required voltage (e.g., 12V or 24V, depending on the LED type)
- Wires
- e.g., 0.5 mm² wire for control signals
- larger cross-section (e.g., 0.75–1.0 mm²) for the supply wires of the LED strip
- Soldering Iron and Solder
- Adhesive (e.g., super glue, hot glue)
- if necessary, heat-shrink tubing or insulating tape for electrical insulation
Functional Integration & Control
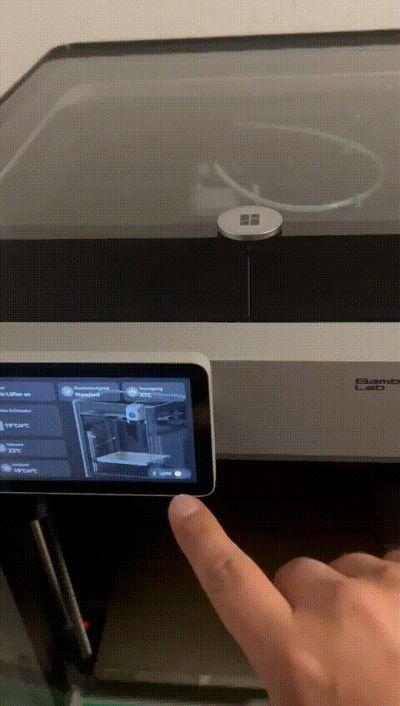
Enables direct control of the LED strip via Bambu Studio, Bambu Handy, and the printer menu itself by using the supply voltage of the factory-installed Bambu Lab LED lighting as a control signal for the relay board. This achieves seamless integration into the existing control system—without additional external control units.
The necessary tapping of the 5V line is done at the 2-pin connector of the original chamber LED. Further details can be found in the official Bambu Lab Wiki at the following link:
https://wiki.bambulab.com/en/x1/maintenance/replace-the-chamber-ledCentralized wiring in the integrated module compartment simplifies installation and ensures optimized, tidy cable management. The LED diffuser used ensures homogeneous illumination of the printing area—without harsh light edges or distracting reflections.
Note:
Use of the LED control signal and all electrical extensions is at your own risk. No liability is assumed for damage caused by improper connection or integration of additional components.
Advantages of the Riser
Optimized Lighting
Integrated profile for easy integration of LED strips for even and improved illumination of the printing area.
Centralized Electronics Mounting
Integrated module compartment provides space for the relay board and centralized wiring—reducing external wiring requirements.
Seamless Control
Using the factory LED's supply voltage as a control signal allows direct control via Bambu Studio, Bambu Handy, and the printer menu itself.
Cable Management
Integrated cable channels enable neat cable routing and a tidy overall appearance in the printing chamber.
Ventilation
The sliding glass cover allows for easy ventilation of the printer's interior without having to completely remove the cover.
Easy Installation
Precise fit for Bambu Lab X1C/P1S—no additional adjustments or modifications required.
Assembly & Installation
The following steps show the recommended installation sequence for the riser and electronics. Each step is illustrated with a corresponding image.
Glue the Guide Rail:
Align precisely and glue to the designated surface (marking A to A, B to B, etc.).

Glue the Mounting Clips:
To stabilize the unit—especially with the panel open.

Glue the Riser:
Attach precisely to the prepared surface. Ensure exact alignment.

Glue Magnets into Riser:
6 pieces Ø 4 × 2 mm, correctly polarized!

Connect Riser with Guide Rail:
After the adhesive has cured.

Glue Magnets into Lid:
Also 6 pieces Ø 4 × 2 mm, observe polarity!

Mount LED Strip:
Attach to the LED profile; access is via the module compartment.

Insert Diffuser:
Ensures even, glare-free light distribution.

Apply Sealant Tape:
Before final assembly, to place the glass lid dust- and vibration-proof.
Route Cables:
Two channels:
1× for LED control signal (e.g., 2× 0.5 mm²)
1× for LED supply + other switching voltage (e.g., Bento Box)

Wire the Relay:
Sample wiring enclosed—adapt to your own components as needed.
Jumper

Wiring

Module Compartment

Notice & Disclaimer
This model was developed as a private enhancement for personal use and is provided to the community without commercial intent. Use and all associated electrical modifications are at your own risk.
No liability is assumed for the connection to the Bambu LED control signal or the integration of third-party components (e.g., relay board, LED strip). Any damage to the printer or its electronics is also outside my responsibility. Always observe the applicable safety guidelines when working with electrical components.
License: Creative Commons BY-NC 4.0
You may download, adapt, and redistribute this model as long as you:- credit the author and
do not use it commercially.
Comment & Rating (3)