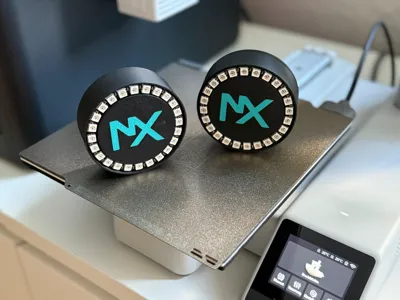
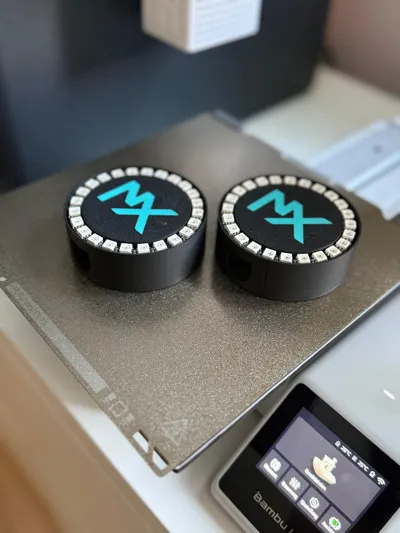
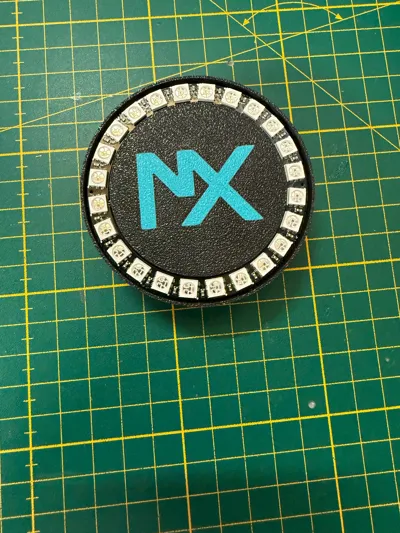
WLED LED Ring 24 LEDs (WEMOS D1 mini, Wi-Fi capable)


Print Profile(1)

Bill of Materials

- Sekundenkleber x 1:
- Lötkolben und Lötzinn x 1:
- Abisolierer x 1:
- Kabellitze am Besten mehrfarbig in 0,2 mm² x 1:
- USB-C-Kabel + USB-Netzteil x 1: Empfohlen: 5V 1A
- doppelseitiges Klebeband x 1:
Description
English:
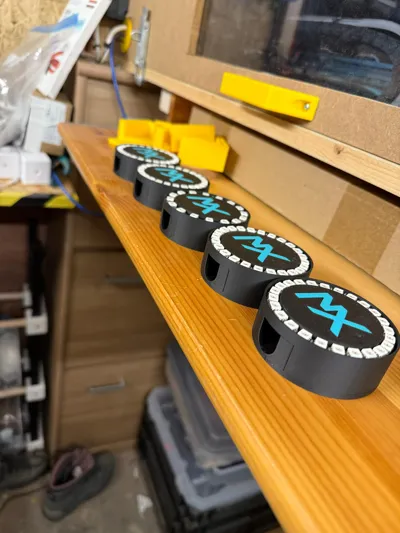
I have designed a compact enclosure for a NeoPixel LED ring that integrates a WEMOS D1 mini module. It provides protection for the electronics while ensuring a stable mounting of the LED ring. Ideal for small DIY projects or decorative lighting applications, such as WLED or ledfx for music visualization.
Required:
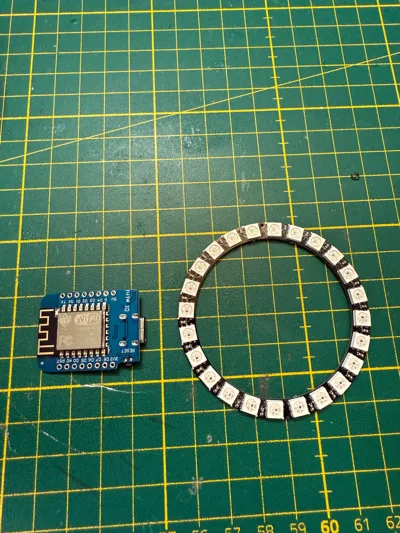
- Neopixel ring 24 pixels (https://amzn.eu/d/3TjPcdc)
- WEMOS D1 mini (https://amzn.eu/d/jdIf63O)
- Wiring ideally multicoloured in 0.2 mm²(https://amzn.eu/d/agqsBXW)
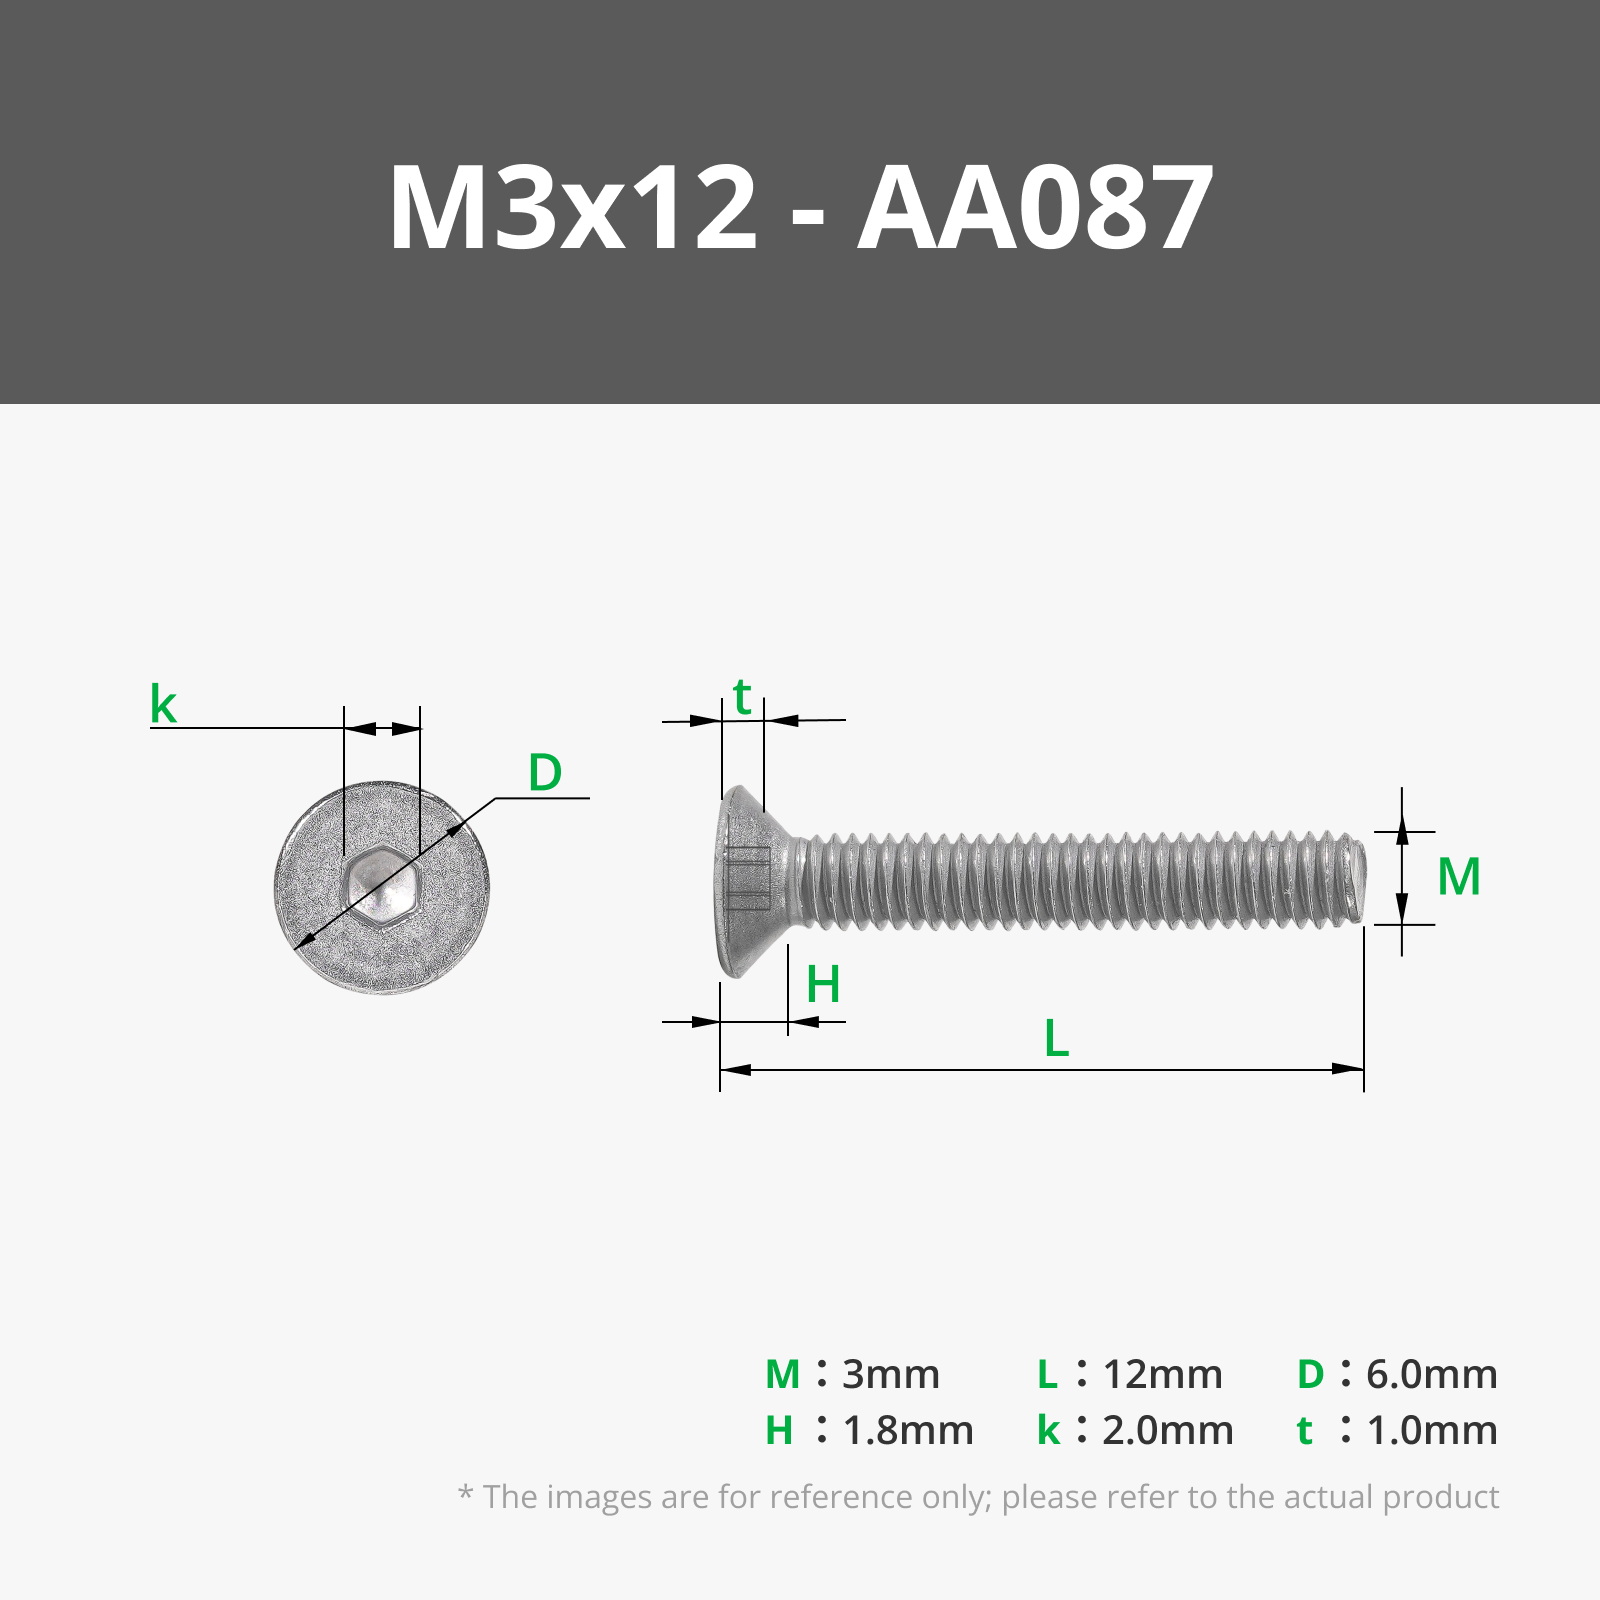
- 2x M3*5*4 embedding nuts + M3*12 countersunk screws (link see below)
- Soldering iron + solder
- Super glue
- Screwdriver / Allen key depending on screws
- Wire stripper
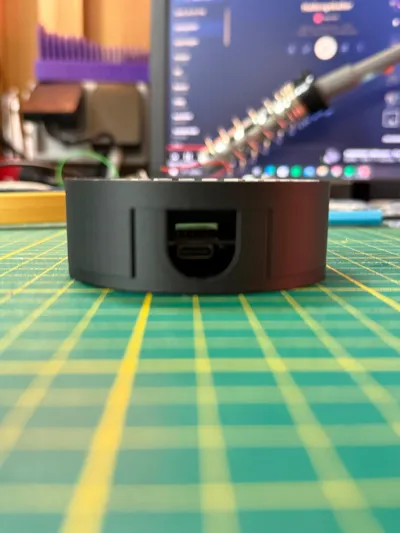
- USB-C cable + power supply
- optional double-sided adhesive tape
Assembly instructions:
Step 1: Melt the embedding sleeves into the 2 holes with the hot soldering iron (see picture) TIP: The optimal temperature for the soldering iron is the printing temperature of the material - 20 degrees Celsius (for PLA 200 degrees Celsius)

Step 2: Solder the stripped wires (red, green and black), shortened to approx. 8cm, to the WEMOS D1 mini
Black → Ground (G)
Red → 5V (5V)
Green → Data pin (D4)

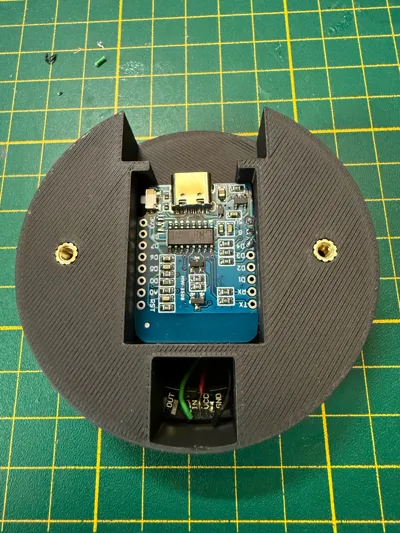
Step 3: Fit the WEMOS D1 mini into the provided base plate and feed the cables through the slot to the other side


Step 4: Tin the solder contacts on the Neopixel ring and solder the 3 wires from the WEMOS D1 mini to the Neopixel ring as follows:
Black → GND
Red → 5V / VCC
Green → DIN


Step 5: Secure the finished soldered LED ring in the provided recess with a little super glue

Step 6: Screw the wall adapter plate to the base plate with the 2 M3 screws.

The ring light can now be used in a variety of ways. Whether individually programmed with Arduino Studio or an installation of WLED to conveniently control all functions and effects via mobile phone. In my case, I use several LED ring light spots with the WLED software and visualize my music playback at parties with LedFx.
For those who don't know how to install WLED, here's a very detailed tutorial:
WLED installation:
License
You shall not share, sub-license, sell, rent, host, transfer, or distribute in any way the digital or 3D printed versions of this object, nor any other derivative work of this object in its digital or physical format (including - but not limited to - remixes of this object, and hosting on other digital platforms). The objects may not be used without permission in any way whatsoever in which you charge money, or collect fees.
Comment & Rating (1)