
Bioshock Pistol Parts
Print Profile(1)

Description
From the Source Models:
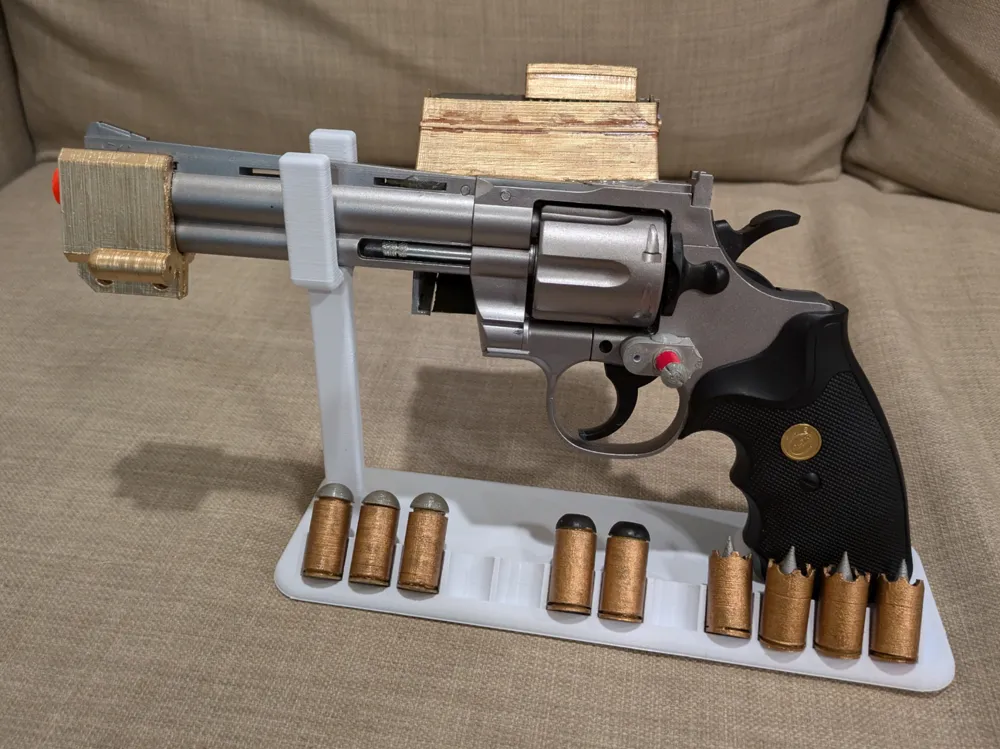
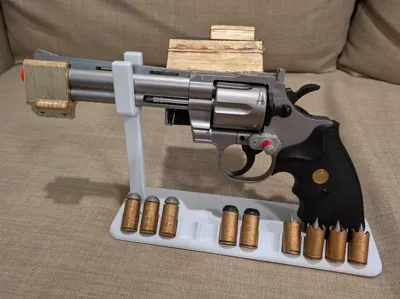
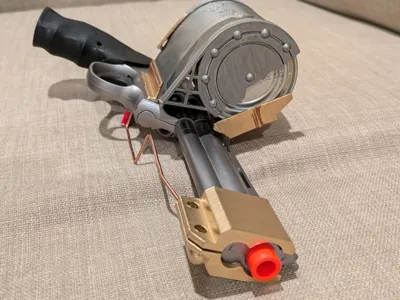
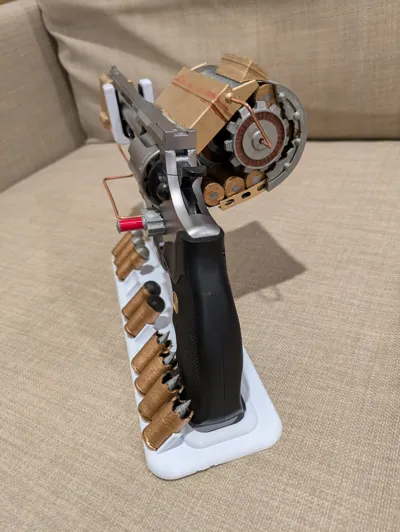
A few parts for making a replica of the revolver from Bioshock 1. These are designed to attach to a toy revolver to give it either or both of the upgrades from the game. The collection includes normal, hollowpoint, and armour piercing bullets, the front part of the damage amplifier, the cog for the expanded ammunition holder, and a mounting part for the cog to go into. There's also a lighthouse logo.
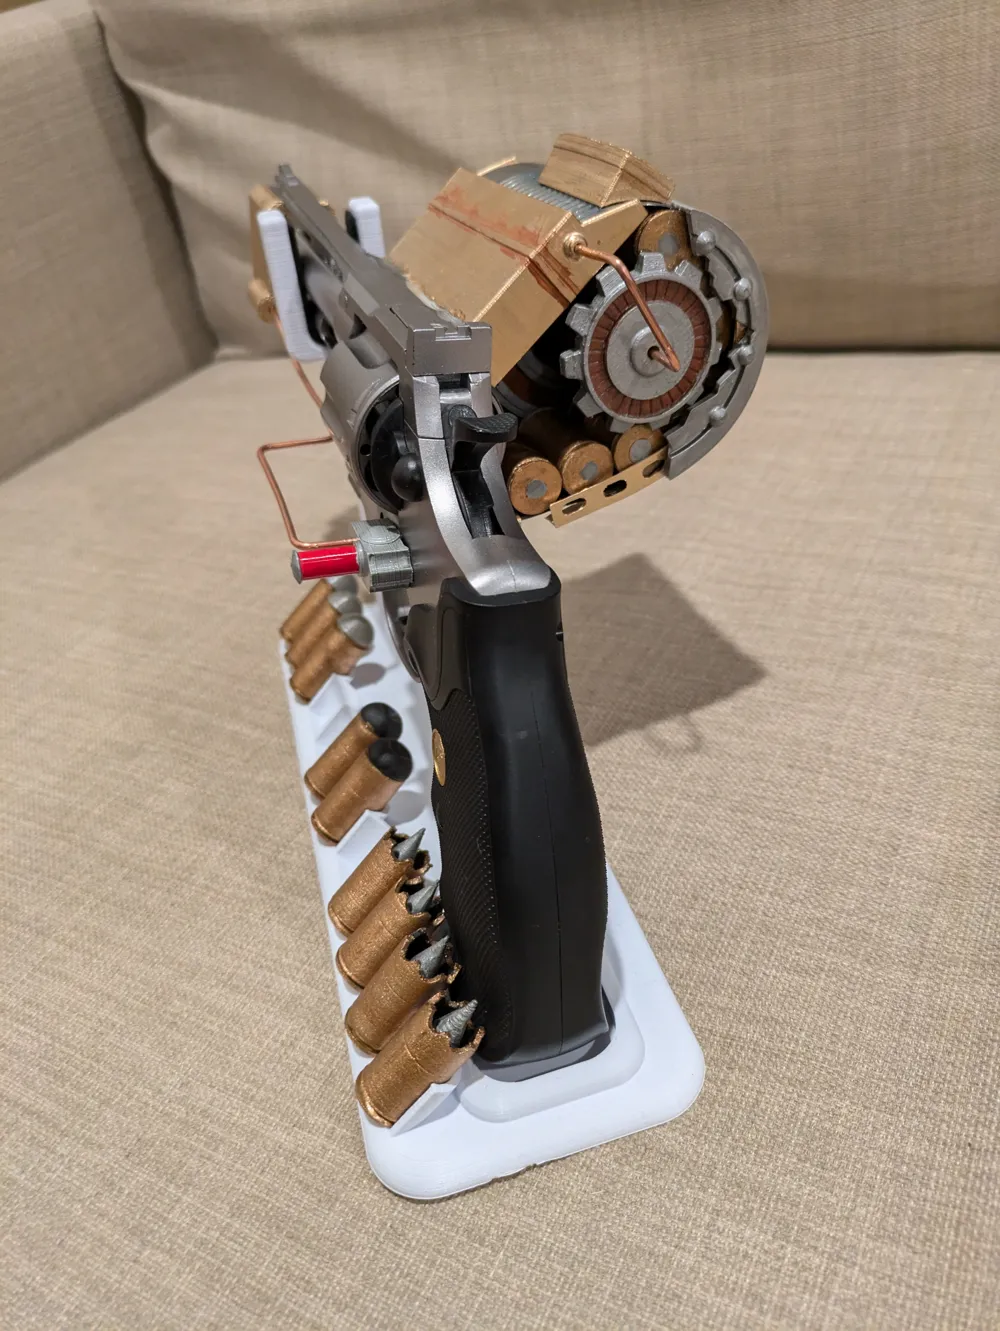
If you build the expanded ammunition holder, you may need to scale up the cog and mount, I made them for a very small can and even then the cog was too small.
For painting, I'd recommend a black primer followed by silver and gold rub-n-buff.
For my Additions
- Pistol Reload Segment
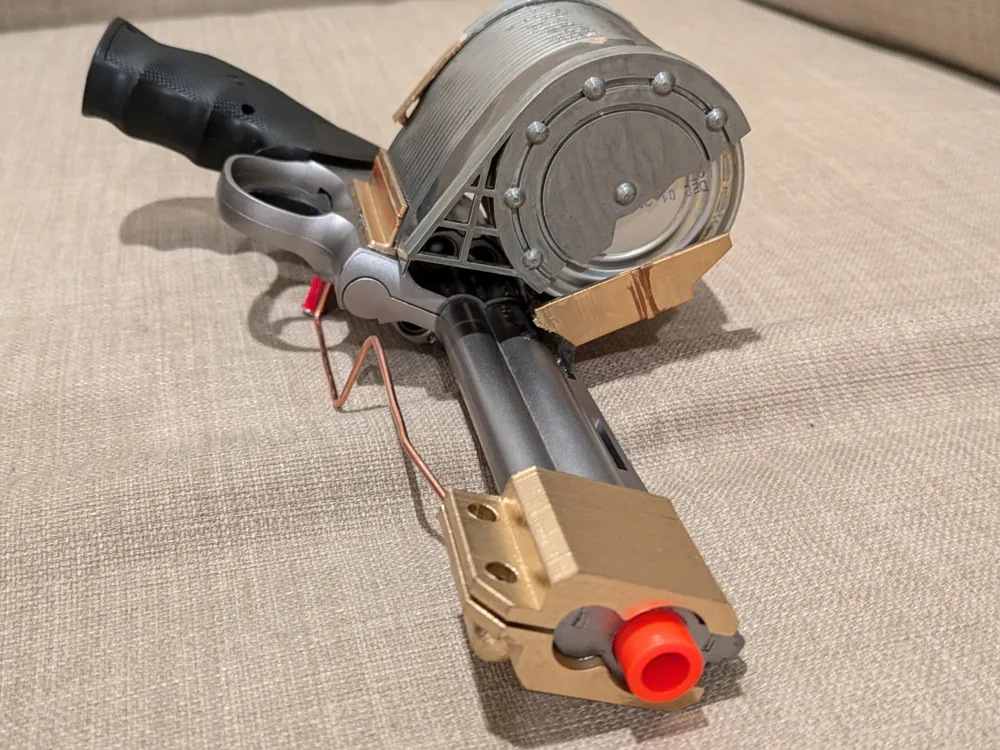
- This attaches onto the drum magazine and is a “hole” into the magazine to insert new rounds.
- Clip Spacer_long
- This goes in the tin can magazine to hold the bullets out towards the back end by the gear (and make that side look better) without needing a itty bitty short can.
- Pistol L & R
- These parts go at the end of the barrel of the pistol as the mount point for the copper wire to attach and provide some of the style of it. Add a pair of nuts/bolts to give it a better feel
- Pistol Clip Mount
- These are used to mount the can clip onto the pistol
- Pistol Light Large & Small
- These are two very different sizes of the damage upgrade light on the side of the pistol. They have a hole diameter matching household copper wiring for using as the wire up to the front of the pistol.
- They also have a hole in the bottom to go over screws in case theres one in the way in your pistol of choice.
- Clip Spacer Long and Short
- These hold rounds off the front of the can for a longer can use to get the bullets in the right position for the looks.
- Clip Mount 2C
- This is a mount for the can magazine on the side of the pistol, both with and without a hole for a screw in the chassis of the pistol.
- Clip mount top
- This is the mount to hold the can at the top of the pistol (combined with clip mount 2c to hold the can at both the top and bottom).
- Stand
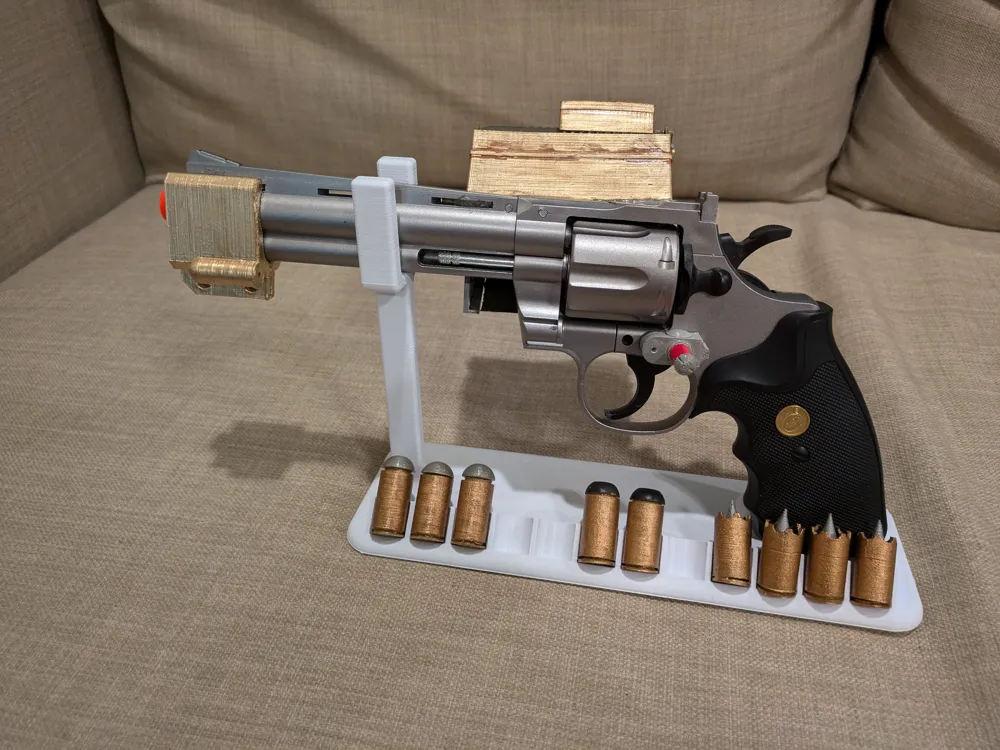
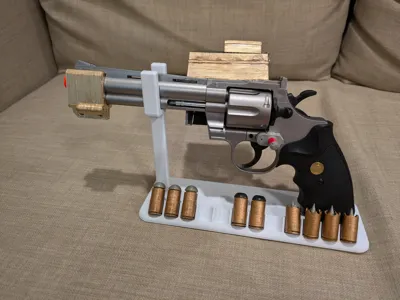
- this is a general stand for the gun that has spaces for rounds to be placed on display (plenty of space for the hollow-point, armor piercing, and standard rounds. You can use a bit of felt in the barrel holder to make it a bit more snug and give it a bit more “polished” feel.
- can-back2
- This mounts on the back of the can and overlaps with the opening for the rounds coming out, this may need to be tweaked depending on how you bend the can outwards
- can-front
- This mounts on the front of the can and overlaps with the opening for the rounds coming out, this may need to be tweaked depending on how you bend the can outwards
Paints I Used
- Testors Metallic Gold
- Testors Metallic Brass
- Testors Flat Rust
- Testors Metallic Copper
Printing
All parts were printed on an ultimaker 2, the stand was sized to just barely fit on the build plate without any brim. All other parts were printed with a brim to ensure good build plate adhesion, and some were printed with supports (the can back/front)




Comment & Rating (0)