


Print Profile(3)


Description
Membership
Want to support me or buy a commercial license? Click Here!
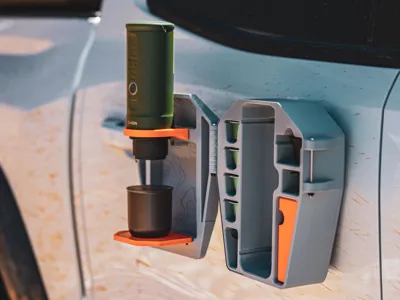
Magnetic Travel Case & Portable Brewing Station for the OutIn Nano Espresso Maker
Take your coffee on the road with this magnetic hard case built specifically for the OutIn Nano espresso machine. Designed for overlanders, campers, and caffeine-loving adventurers, this rugged case not only protects your gear but transforms into a fully functional mobile coffee station.
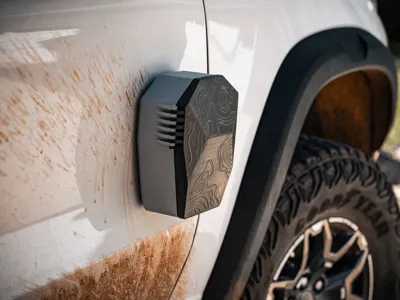
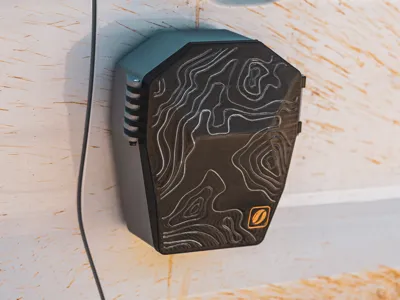
The case utilizes strong magnets (also compatible with my Molle Camp Table and Magnetic Key hider, allowing it to securely attach to any ferrous metal surface—perfect for the side of your vehicle.
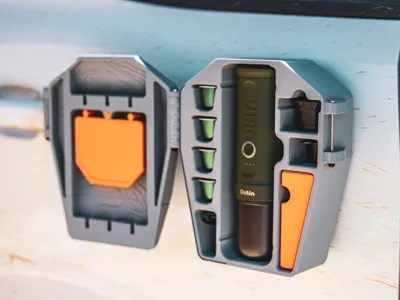
The case has space for:
- The OutIn Nano espresso machine
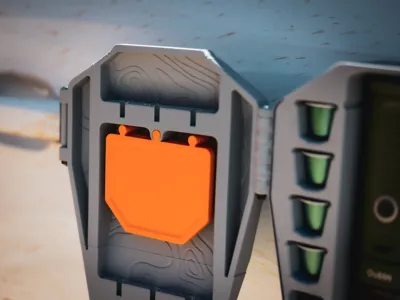
- Up to 8 Nespresso pods
- A sealed container for ground coffee
- A scoop
- Both adapter portafilters (ground coffee and capsule compatible)
- OutIn coffee cup
- The charging cable
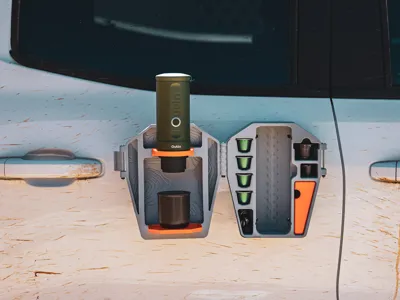
When it’s time to brew, simply open the lid and slide out the two integrated trays, which lock into a horizontal position to serve as the OutIn holder and cup stand. In just seconds, your case transforms into a sturdy, organized brewing station ready for espresso anywhere.
Parts Needed:
Magnet:
4x - M4x18mm
3x - M4x75mm
7x - M4 Nuts
6x - M4 Washers
Assembly:
- Print All Parts
Print all parts as configured. I used ASA filament for long-term outdoor durability. Two profiles are included:- One optimized for AMS usage, with a longer print time
- One for single-material printing without AMS requirements
The lid shown in the photos was painted after printing for a more refined finish.
An optional TPU gasket plate is also included if you'd like to add dust protection to the enclosure.
- Attach the Magnets to the Base
Insert M4 x 18mm screws through the magnets and into the hexagonal cutouts on the front face of the base. Secure each with a nut on the reverse side.
At the latch attachment point on the base plate, insert a M4 x 75mm bolt with a washer through the provided hole and secure it with a nut and washer on the opposite side. This will serve as the catch for the lid latch. - Install the Latch on the Lid
Attach the latch to the latch bracket using another M4 x 75mm bolt. Ensure the latch catch is oriented inward so that it can hook over the bolt installed in the previous step. - Assemble the Hinge
Line up the hinge joints on the lid and base, and secure them with the final M4 x 75mm bolt and nut.
Note: The hinge is designed to be intentionally snug to prevent the lid from swinging freely. You may need to work it back and forth a few times to loosen it slightly for smoother operation. - Prepare Internal Storage & Trays
- Screw the lid onto the integrated coffee grounds container to keep contents sealed.
- Slide the two trays (stored in the lid) into the storage configuration, starting with the OutIn holder tray first, followed by the second tray on top. This ensures proper nesting and secure closure.
- Final Touches
- Install the optional TPU gasket plate now if desired.
- Test the lid opening and latch function.
- Pack your OutIn Nano and accessories into their designated slots and you’re ready to go!
License
You shall not share, sub-license, sell, rent, host, transfer, or distribute in any way the digital or 3D printed versions of this object, nor any other derivative work of this object in its digital or physical format (including - but not limited to - remixes of this object, and hosting on other digital platforms). The objects may not be used without permission in any way whatsoever in which you charge money, or collect fees.
Comment & Rating (149)