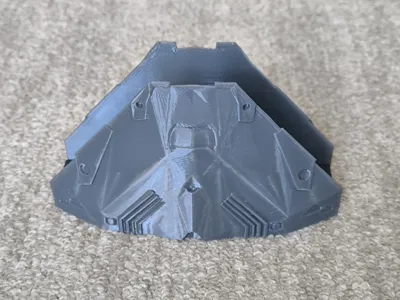
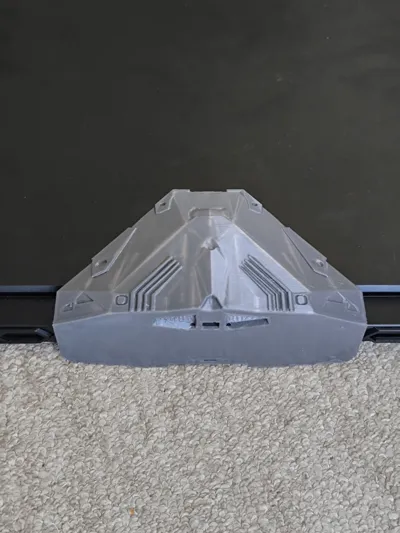
Vertical laptop stand – Cobra Mk3 spaceship style


Print Profile(1)

Description
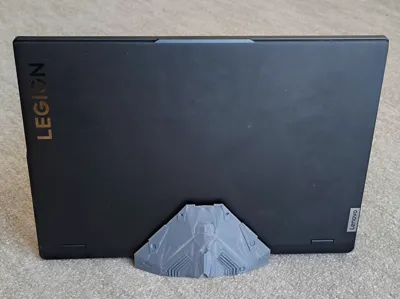
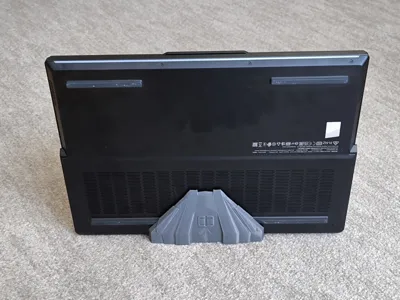
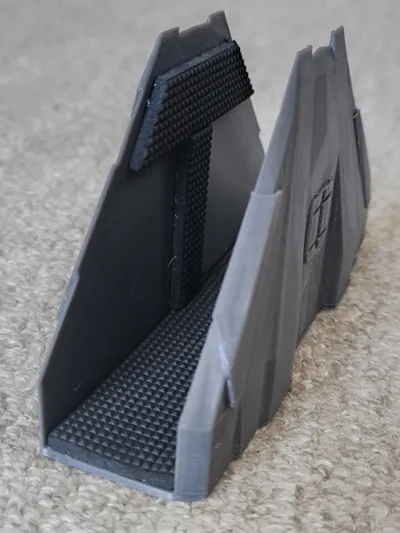
A vertical laptop stand inspired by the iconic Cobra Mk3 spaceship from the Elite Dangerous universe. Designed for fans of sci-fi and practical setups, this stand holds your laptop upright—ideal for closed-lid mode with an external monitor or just stylish vertical storage.
This stand balances form and function—great for space-saving and showing off your gear in a sci-fi flair.
Key points:
- Stable design with low center of gravity and variable infill
- Tested with a heavy 2.6 kg Lenovo Legion Pro 7
- Scratch protection: Use 2.5–3mm felt pads (e.g., IKEA FIXA)
- Customizable: Includes slicer profiles for different laptop models and sizes
- Easily resizable using Y-scale to fit your laptop to fit your laptop
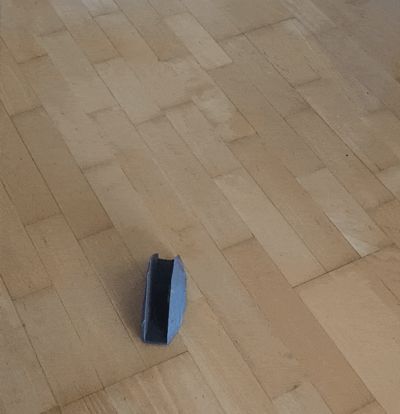
Model stability demonstration:

As an alternative to felt, you may use TPU. You may print 0.2-0.4mm thick inserts and glue them using CA glue or double-sided adhesive tape.
The stand internal compartment (distance between inner walls) is the laptop thickness +2.6mm for padding.
You may choose already pre-designed models tailored to several laptop models:
- 30mm Laptop (Lenovo Legion Pro 7 16IRX9H)
- 22mm Laptop (Lenovo ThinkPad T470s)
- 28.9mm Laptop (Dell Latitude 5421)
- 18.5mm Laptop (ASUS ZENBook14 UX433FN)
- 21.5mm Laptop (ASUS UX31A)
But if you want to tailor the stand model to your laptop, please find below the instructions:
Measure its thickness at the thickest point

Add felt pad thickness (once or twice, depending on padding placement).
In this example, the laptop thickness is 28.9mm + 2.6mm for felt =31.5mm distance between inner walls.
Then take the first model (for 30mm laptops), the distance between walls is 32.6mm.
Then you need to calculate the percentage to scale: 31.5/32/6=96.63% - this value you will need to input as a new Y-scale value.
Adjust the model's using Y-scale in your slicer as it shown on the picture below (don't forget to uncheck the “uniform scale” box):
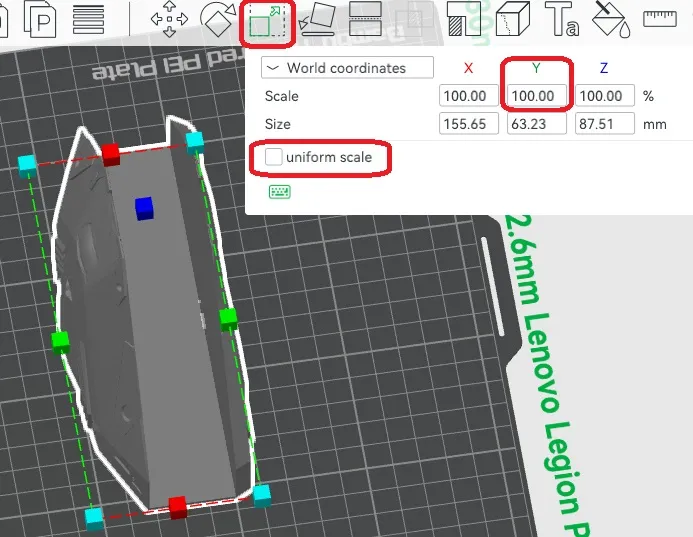
Then it is better to check whether you have done scaling properly using a ruler tool. Do a measurement between inner walls.

You should see your distance value very close to your target 31.5mm, if not, then you return to the original file and repeat the process.
Happy printing, Commanders. o7
P.S. If you are looking for a solution to reduce 3D printer noise, have a look on my soundproof enclosure design crafted from IKEA furniture. This enclosure reduces printer noise and ensures impressive 36.5 dB(A) at just 1 meter away. Detailed instruction how to build it you may find here.
Boost Me (for free)
Like this model? Give it a boost! Your support helps me stay motivated and keep creating more free designs. Thanks for being awesome!
Comment & Rating (0)