Justrite Plunger Can - Anti-Evaporation Lid & Seal


Print Profile(1)

Description

All Compatible Lightbox Frames & Mounts Available Here!
🛠️ Recommended Gear
Check out my Amazon Storefront by clicking here!
Bed Adhesion (Fix First Layer Issues) Magnets (for optional mounts)
Recommended LED Light Strips Battery Powered LED Light Strips Double Sided Tape for Lens: Optional
Custom One-Off Designs Available - CLICK HERE
Printing tips are located at the bottom of this listing
___________________________________________________________________________
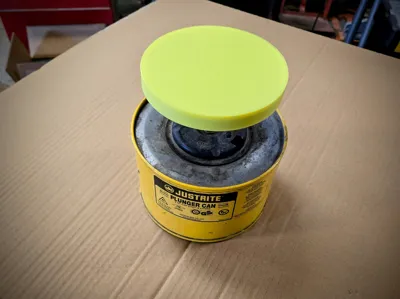
As a knifemaker I use a lot of Acetone for cleaning parts. I have had this old Justrite 2 quart plunger can for years and always hav eused it. One of the issues I faced was the evaporation of the acetone when not in use. Now, normally I would just cover it with something but now that we have a 3D print option, why not make a dedicated lid?
This lid has a TPU insert to act as a seal against the evaporation. I have been using it for a couple of weeks now and it does make a huge difference.
_________________________________________________________________________________________________
Thanks for downloading from Chopper Originals.
If this print earned a spot on your printer and you’re out of Boosts, consider buying me a coffee ☕ to help support future designs and releases.

___________________________________________________________________________________
Affiliate Disclosure
Some links in this listing are affiliate links. As an Amazon Associate, I earn from qualifying purchases at no extra cost to you.
____________________________________________________________________________________
Having issues getting that first layer to flow and stick good? Follow these steps, it helps! ***If using an enclosed printer, be sure to remove the lid and leave door open to avoid heat creep***

If using multiple brands/types of filament, you will need to save each as a Custom Filament setting. Otherwise the settings will change when your colors switch.
License
You shall not share, sub-license, sell, rent, host, transfer, or distribute in any way the digital or 3D printed versions of this object, nor any other derivative work of this object in its digital or physical format (including - but not limited to - remixes of this object, and hosting on other digital platforms). The objects may not be used without permission in any way whatsoever in which you charge money, or collect fees.
Comment & Rating (1)