Modular Spinning Display for keychains & jewelry


Print Profile(5)


Description
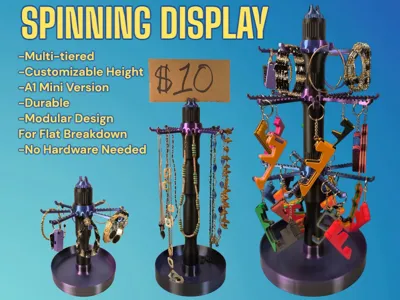
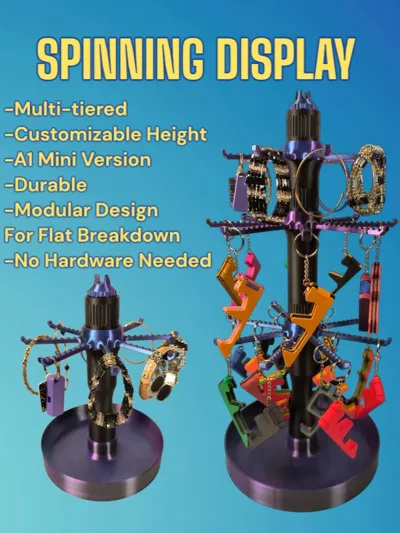
Modular Spinning Display
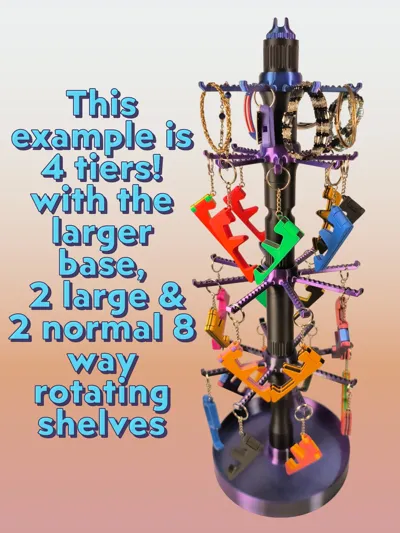
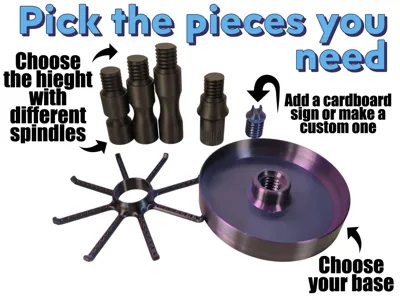
I made this spinning display for anyone trying to organize their belonging, business counter tops, or for those participating in trade/craft shows. I put a lot of time and effort to try and make the "perfect" display. On my first spinning display I and others noticed it would be so much better if the center post would come out; so that led me to a modular design which also allows for variable height. I also made this model A1 Mini friendly, and with the larger printer you can make even larger bases and shelves/hangers. I have tested this loaded up to 4 tiers and it worked great for me. However just be cautious to not go too crazy haha. If you make it 10 tiers high and have 100lbs on it… it will probably break. I added a top cap that you can add a piece of cardboard to with pricing etc (gap is roughly 2.8mm). There are 4 base options (2 for mini), 2 sizes for the 8-way (1 for mini), and 5 different extensions for different height needs.
One important note is that the times and filament used are very off because there are many pieces to choose from.
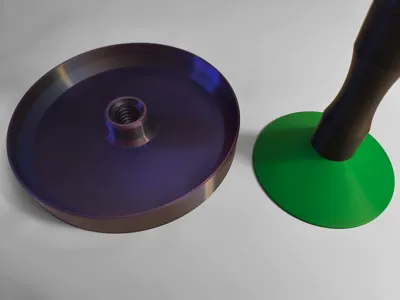
Update: Added smaller base as a standalone part for anyone that wants a more compact option. Thanks @Cammie for your help.
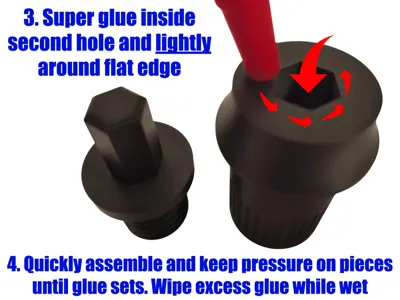
The shelf spindle assembly part only needs super glue to be assembled, other than that there is nothing extra you need. It will still work but it may come apart if lifted up.
Important: Lastly, the threads may start out a tight I recommend putting a drop of Super Lube multi-use synthetic oil (water, bambu's oil, or other plastic friendly oil should work) on the beginning of the threads. Work the threads in until they tighten then back it out a little. Repeat until loosened, then drive in further. Just repeat until the thread goes into the bottom. This usually took me about 5-10 tries. You can scale the x and y axis if you would rather a loose fit (about .40 to 1.0mm should work). If you request it, I will make a profile with this change. It's hard for me to account for different machines and filament though. Supports should only generate for the beginning of the female threads and the top overhang inside it. If they generate on the whole thread, it is not intended. You can lower the threshold angle a bit until they support properly. You can ask me for help if there is an issue too. Pictures below for assembling. I recommend double checking the supports were completely removed and test fit before gluing.


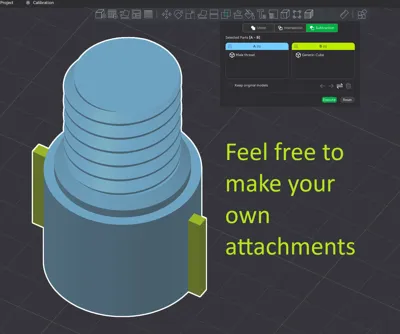
I will try and add more attachment / parts in the future or if you have a request feel free to ask.
Example: If you need a base with legs or other attachment
Boost Me (for free)
I really appreciate your support. A boost, rating, or even a like goes a long way and encourages me to keep creating. Thank you.
The keychain phone stand on the rack is another one of my designs that is handy and popular: Keychain Phone Stand Magnetic Cellphone Holder by OrangeheadMakerWorld: Download Free 3D Models
Here are some of my other models: Orangehead | Published - MakerWorld
General tips for better quality and outcome
Make sure the bed is clean and prepared properly, I recommend using stick glue or bambu's green thin liquid glue, especially on larger or tall prints. I also highly suggest using a smooth plate or supertack (or similar) if you have one as they have better adhesion.
If you have issues with lifting or warping, make sure to use glue and I would recommend a long bed level through the machine interface or in bambu studio under device tab and click on calibration. Auto bed leveling is not the same as these options.
Because the base changes from thick circle to a thinner wall there can be a slight edge from the speed and cooling difference. If you want the base to print better, I recommend turning the fans up to 80 to 100%. You can double check fan speed on the preview page. You can also lower speeds and try outer walls first. I didn't find I needed to make the speed and wall changes, so they aren't in the profile. The fan speed and other filament changes can only be done by you.
I always recommend making sure your filament is calibrated correctly.
License
You shall not share, sub-license, sell, rent, host, transfer, or distribute in any way the digital or 3D printed versions of this object, nor any other derivative work of this object in its digital or physical format (including - but not limited to - remixes of this object, and hosting on other digital platforms). The objects may not be used without permission in any way whatsoever in which you charge money, or collect fees.
Comment & Rating (165)