
Print Profile(2)

Description
Tired of messy hallways or bulky shoe cabinets taking up floor space?
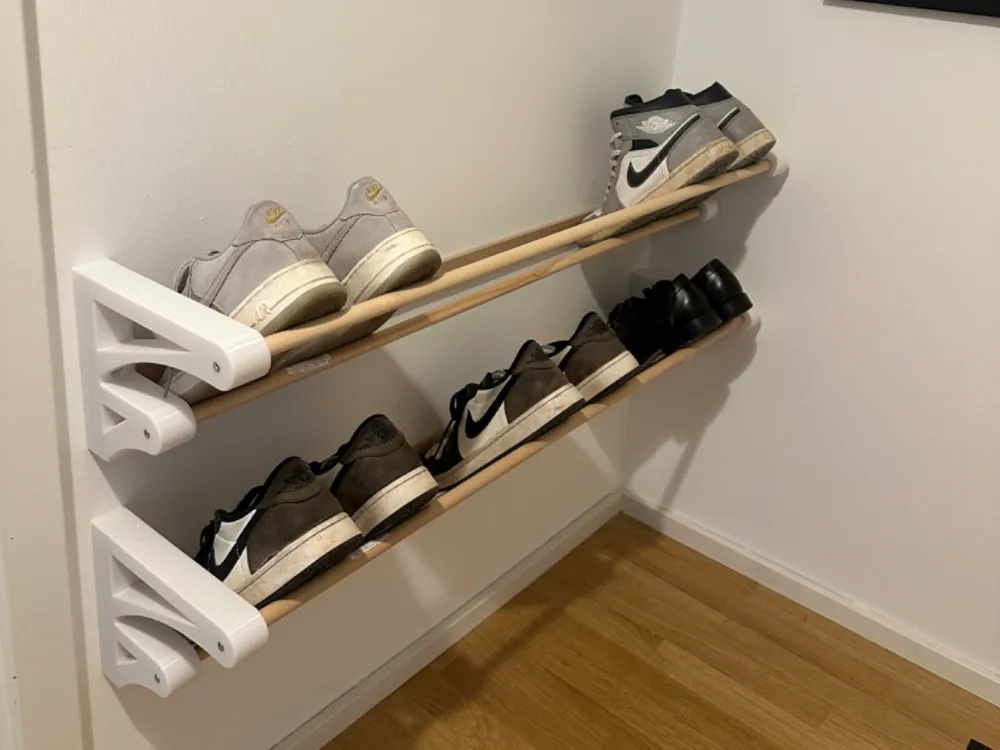
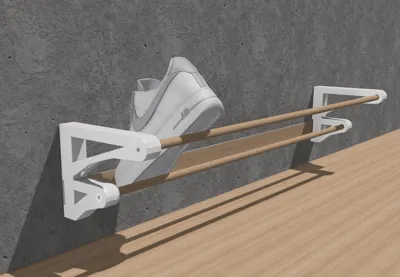
This wall-mounted minimalist shoe rack is the perfect solution for modern living. Designed with a sleek, floating look and a small footprint, it’s ideal for entryways, apartments, or anyone who wants to show off their sneakers in style.
This DIY-friendly project uses two simple 3D-printed holders and a handful of off-the-shelf components to create a beautiful and practical piece of furniture.
✅ Update: Two Versions Included (V1 + V2)
To make the rack work reliably with more shoe shapes, the files now include two bracket versions. V1 (Original) is the standard design and works great for most sneakers and everyday shoes.
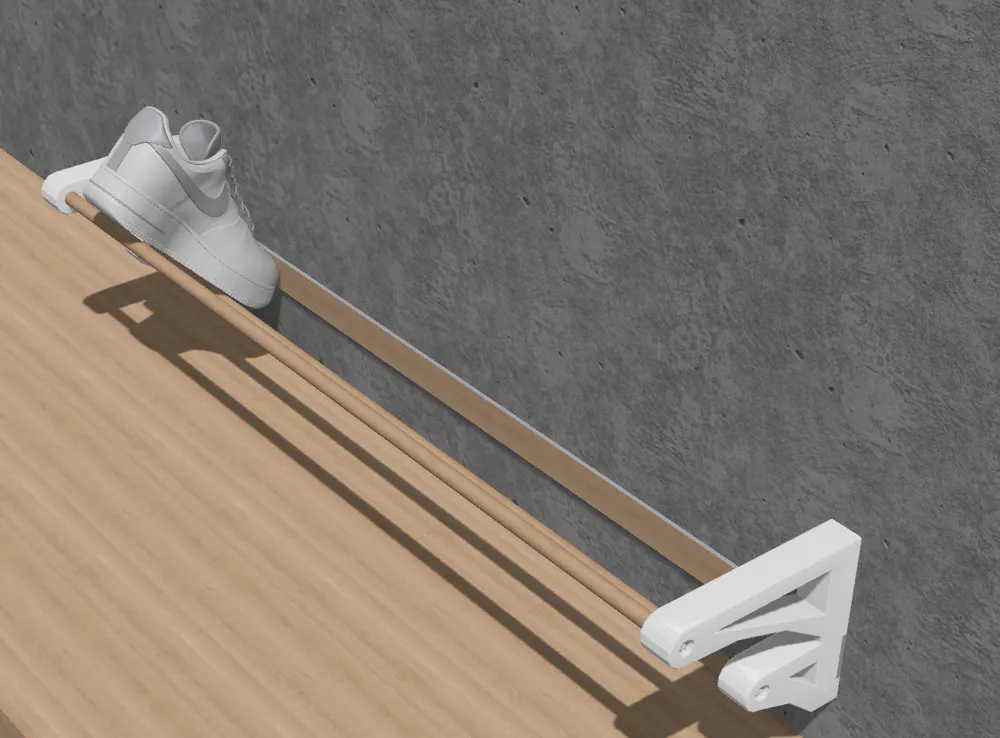
However, with some flatter / thinner shoes (especially pairs with a low-profile toe), it can happen that the shoe tip sits slightly lower and may slide just underneath the front protective strip instead of resting against it. In that case, the shoe can end up touching the wall at the very front.
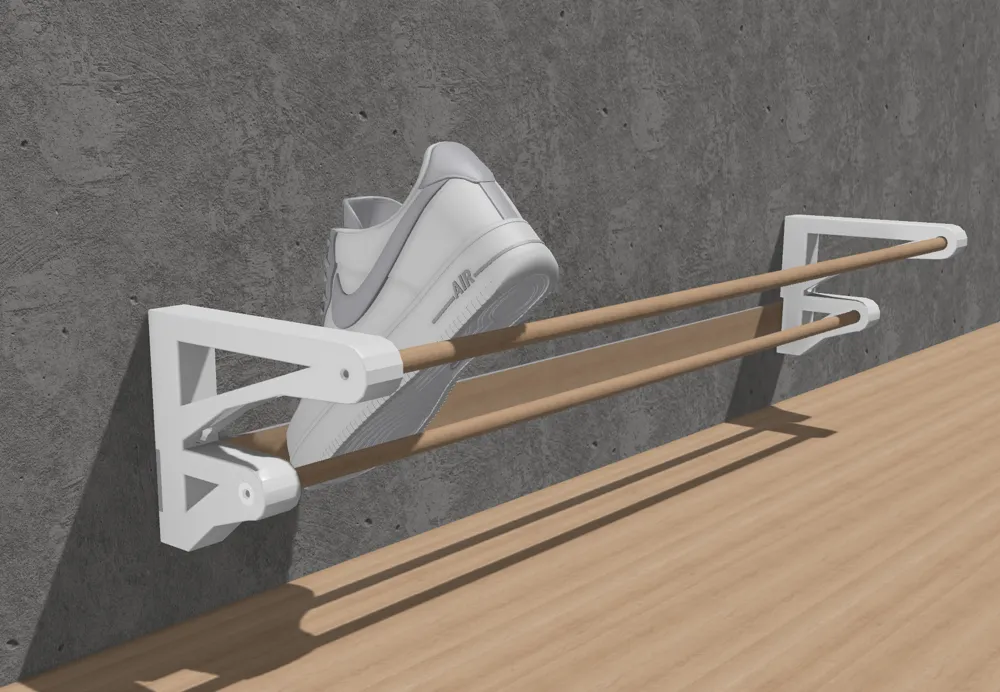
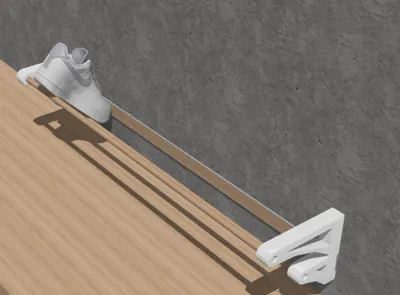
That’s why I designed V2, where the front wooden strip is positioned lower. This keeps the protective strip in the right place even for flatter shoes.
If your shoes are very flat or slim, choose V2 — otherwise V1 is the recommended default.
🧱 Bill of Materials (BOM)
To complete one rack unit (shoe capacity depends on the chosen rod length), you'll need:
- 🖨 2x 3D printed brackets (included STL files)
- 🌳 2x beechwood rods — 16 x 16 mm, length as desired
- 🌳 1x beechwood strip — 5 x 40 mm, length = rod length - 26 mm (press-fit)
- 🔩 4x 4 x 20 mm screws – to fasten the rods to the brackets
- 🔩 2x 4 x 70 mm screws + Ø6 mm wall plugs – for wall mounting
All parts are affordable and easy to find at any hardware store or home improvement center.
🛠 Assembly Instructions
Print both brackets
• Use PLA or PETG – supports not required
• Recommended infill: 10–25%• Wall loops: 3
• Layer height: 0.2 mm
• No supports necessary- Prepare your wood pieces
• Cut the two rods to your desired length (depending on your wall width)
• Cut the flat strip 26 mm shorter than the rods — no screws needed here, just press-fit - Attach the rods to the printed holders
• Use the 4x M4x20 screws to fasten the rods from the inside of the brackets
• The flat wood strip presses into the bottom notch – no glue or screws needed - Mount to wall
• Mark the wall using the bracket holes
• Drill 6 mm holes and insert the plugs
• Use the M4x70 screws to secure the whole unit to the wall
✅ That’s it! You now have a floating, modern, and modular shoe rack!
🔁 Modular & Scalable
Need more capacity?
The design is fully adaptable: choose your preferred rod length and stack multiple racks vertically to fit your space.
💡 Ideas & Tips
- Stain or paint the wood to match your home interior
- Use colored filament for a bold accent or transparent PETG for a “floating” look
📦 Printing Info
- Parts: 2 (Left + )
- Print time: ~6–8 hours total
- Filament used: ~300-400g total
This model is made for makers who love clean design and smart functionality. It’s easy to build, highly satisfying to install, and looks awesome once mounted. Perfect for fans of IKEA-hacks, 3D printing, or just keeping things neat.
License

You shall not share, sub-license, sell, rent, host, transfer, or distribute in any way the digital or 3D printed versions of this object, nor any other derivative work of this object in its digital or physical format (including - but not limited to - remixes of this object, and hosting on other digital platforms). The objects may not be used without permission in any way whatsoever in which you charge money, or collect fees.


Comment & Rating (63)