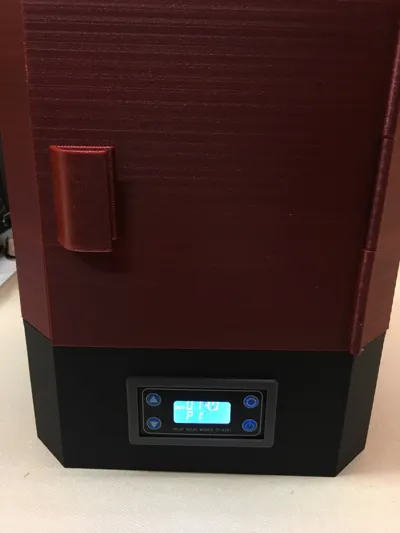
Resin UV Curing Camber


Print Profile(1)

Description
Summary
Features:
- Rotating Table
- LCD Timer
- Closed Box
- 36W UV
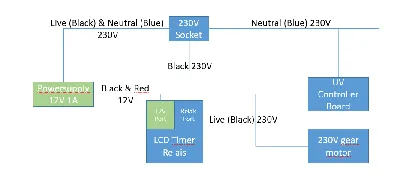
Required electronic parts:
NailStar™ Professionelle UV Nagellampe mit 36 Watt inkl. 4 x 9W UV Lampen (should work with similar prodcuts too)
http://amazon.de/gp/product/B00R4M0TI0/
Akozon 220-240V AC Gear motor 8-10 rpm
https://amazon.de/gp/product/B07FTCP77B
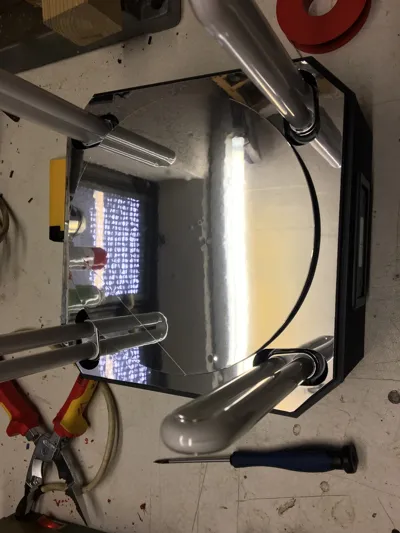
10 x PET Mirror 23 x 15 cm
https://amazon.de/gp/product/B07QPCJJL7
Delay Relay Module XY-WJ01
https://de.aliexpress.com/item/1005007430692708.html
12V 1A Power Supply
https://de.aliexpress.com/item/32665889097.html
Power Inlet with Fuse
https://de.aliexpress.com/item/1005007512745023.html
Video how it look like if its on.
https://www.youtube.com/watch?v=081i0L7JI4s
Post-Printing
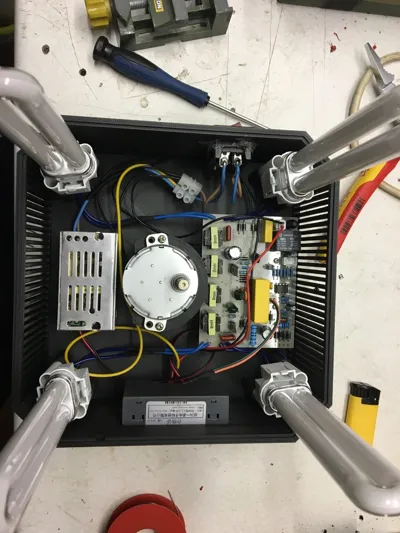
PCB for UV Lamp
Open the Case of the Nailstar and unsolder the blue wires on the PBC to remove the lamp sockets from the plastic.
Disconnect all connectors from the PBC.
The 2 wires that lead to the black switch need be be connected. If this is done, the Board will power the lamps directly after the power is turned on.
- now you need to extend the wires for 2 lamp sockets to around 5-10cm
- solder all blue wires back onto the PBC and screw the PBC and the lamp sockets into the bottom case.
- add the Motor in the center mount and fix it with some of the screws from the Nailstar case.
- Its important, You need 12v for the LCD Timer. All other parts are running with 230v
The wiring is straight forwared. connect 1 wire from the motor and 1 wire from the PBC together and 1 wire from the 12v Power supply with the power inlet. Details can you see on the pictures.
Comment & Rating (0)