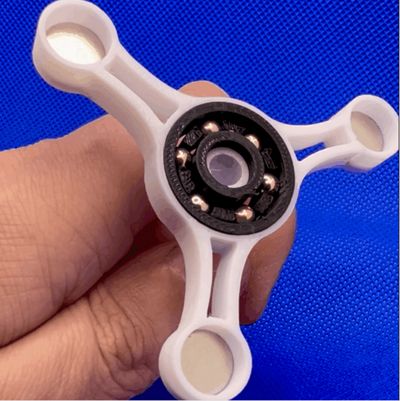
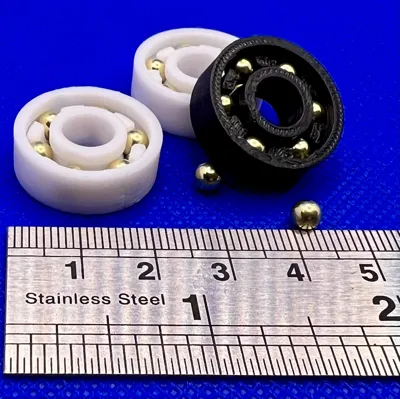
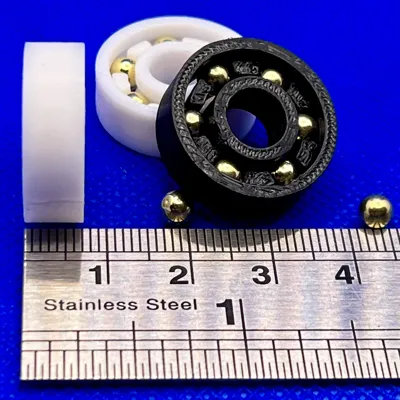
Kamski 608 Bearing 8x22x7mm using 4.5mm steel BB's


Print Profile(0)
Description
Hey fellow makers!
Please note: These are just the 608 bearings, the extra fidget spinner that I used to show the spinning potential will be available here >>> [ https://makerworld.com/en/models/1373791-spinner-for-kamski-608-8x22x7mm-bearing ].
Since diving into the world of 3D printing back in 2019 with my trusty Ender 5 Pro, I've been particularly captivated by the potential of 3D-printed bearings. Like many of you, I often found myself searching for designs that perfectly met specific requirements or offered consistent reliability.
That's why I decided to roll up my sleeves (pun intended! 😉) and embark on a journey of development, meticulous tweaking, and rigorous testing. After countless hours in the workshop, fueled by a desire for a truly functional printed bearing, I'm thrilled to finally share an updated take on the ubiquitous 608 bearing – one that cleverly utilizes readily available 4.5mm steel BBs (specifically 4.40mm). It was quite the engineering challenge to pack these precisely sized spheres into such a compact form factor, offering a different feel compared to the previous 6mm BB version, but the result, I believe, offers a new level of potential!
For those unfamiliar, a standard 608 bearing measures 8mm inner diameter x 22mm outer diameter x 7mm thickness. My design maintains these external dimensions for compatibility while innovating on the internal rolling elements.
I'm launching this updated design with three distinct tolerance options to cater to a variety of applications and preferences, now specifically tuned for the 4.40mm BBs:
+0.05mm (Targeting 4.45mm effective inner diameter): The stability champion! This offers the tightest fit for the 4.40mm BBs, resulting in minimal wobble and a very controlled spin. It's ideal for applications where precision and stability are paramount with these smaller rolling elements.
+0.10mm (Targeting 4.50mm effective inner diameter): The balanced all-rounder. This version strikes a comfortable middle ground for the 4.40mm BBs, offering a noticeable but manageable amount of wobble and a decent free spin. It's a great general-purpose option with this new BB size.
+0.15mm (Targeting 4.55mm effective inner diameter): The fun and fidgety one! This tolerance allows for the most play between the 4.40mm BBs and the raceways, resulting in maximum wobble and the longest free spin. Perfect for low-load applications or creating satisfying fidget toys with a different dynamic feel.
This is just the beginning of my exploration into printed bearings! If these updated designs prove popular within the maker community, I'm eager to explore more sizes and even different bearing types in the future. I've recently been dabbling with the complexities of tapered bearings, so definitely stay tuned for potential future releases!
If you're interested in giving these a spin (again, pun intended!), here are the links to the 4.5mm steel BBs (actual 4.40mm) I've been using throughout my testing.
[Affiliate link to Amazon for 4.5mm Steel BB's - https://amzn.to/3GBNLb6]
Every little bit of support through these affiliate links truly helps fuel future development and innovation in my workshop (and helps me recover from the sheer volume of prototypes that ended up in the waste bin!).
Assembling the bearing is straight forward:
Place the 3D-printed bearing on a flat surface with the two small cut-outs on the inner and outer facing each other.
Using a small tool (like a thin screwdriver or tweezers), gently spin the cage. This will reveal an opening to insert a BB.
Pop one 4.40mm BB into the opening.
Hold both the inner and outer races of the bearing.
Slowly spin the cage again, and you'll see the next opening appear. Insert another BB.
Continue this process until all the ball bearings are in place and the cage is full.
Here are a few extra tips and insights I've gained during this development process with these smaller BBs:
Prioritize a slow and steady print: Given the small and intricate dimensions of these bearings (just 22mm x 7mm!), a slower print speed is crucial. It significantly reduces the chances of print failures and ensures the dimensional accuracy needed for proper function with these smaller rolling elements. In my experience, a single bearing takes approximately 4 minutes to print with my current settings.
Cleanliness is key to smooth operation: I highly recommend using small diamond files to carefully remove any stray bits of filament, burrs, or imperfections from the printed surfaces, especially the raceways. This ensures smooth contact with the 4.40mm BBs.
[Affiliate link to Amazon for small diamond file set https://amzn.to/3YhTf0x ]
(Optional) Fine-tuning the raceways: For ultimate smoothness and optimal performance, I sometimes lightly polish the inner seam lines of the raceways using a mini rotary tool with a rounded diamond bit on a low-speed setting. This helps the 4.40mm BBs glide even more freely. However, this step is entirely optional, and the bearings should function well without it – it's just my inner perfectionist at play!
[Affiliate link to Amazon for mini rotary tool https://amzn.to/4jWjpyn ]
Consider material choice: While Sunlu PLA+ 2.0 still provides excellent results, for applications where higher loads or wear resistance might be a concern with these smaller contact points, you might consider experimenting with more robust filaments like PETG or ABS.
[Affiliate link to Amazon for Sunlu PLA+ 2.0 filament https://amzn.to/4lRlWLW ]
Thank you so much for taking the time to check out my updated 3D-printed 608 bearing design utilizing 4.5mm steel BBs (actual 4.40mm)! I genuinely hope these can be an asset for your own creative projects (I'm currently exploring their use in a smaller, more intricate fidget mechanism!)
Happy making, and I'm always open to feedback and suggestions!
If I have helped you with something, consider showing me your support ❤
Comment & Rating (0)