Search models, users, collections, and posts

Dummy 13 Baryonyx BX65 - V1

Remixed by

Print Profile(1)

All
A1 mini
X1
A2L
H2D
H2C
A1
X2D
H2S
P1P
X1E
P2S
H2D Pro
X1 Carbon
P1S

0.2mm layer, 2 walls, 15% infill
Designer
2.5 h
2 plates
4.8(19)

Open in Bambu Studio
Boost
542
1140
54
28
829
499
Released 

Description

Content has been automatically translated.
Show original

Boost Me (for free)

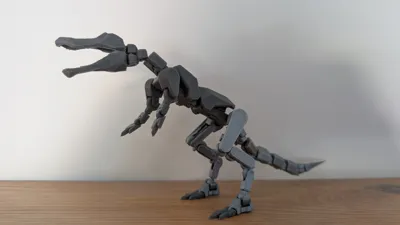
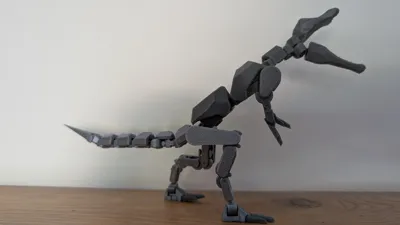
Articulated Baryonyx Dummy13 – The Lord of Forgotten Rivers

🌊 He lurks in the depths. He scans the banks. He awaits his chance. In the wild world of Dummy13, survival is a constant struggle... and this Baryonyx is a master of ambush.

With its stealthy articulations, it can emerge from murky waters, snatch its prey with its formidable claws, and drag them to an aquatic fate. Its sinuous and relentless presence chills the blood of the unwary who venture near its domain, whispering its name with primal fear... before feeling a shadow engulf them.

Display it on your shelf, imagine it watching for the slightest movement, and let a wave of tension wash over you. It's not just a figurine, it's an amphibious hunter ready to reign over hidden currents.

Dare to unleash it, but be warned: once it has tasted the hunt, there will be no refuge... 💧🦖


My models :)


Documentation (1)

Assembly Guide (1)
Dummy_BX65.pdf

Comment & Rating (54)

(0/1000)

Print Profile
0.2mm layer, 2 walls, 15% infill
very articulated, fun to play with and a great model
0
Reply
awesome
The designer has replied
designer
1
Reply
thank you ☺️
0
Reply
Can I ask - what technique/trick did you use to get the tail coverings to connect with the little tail connector pins? We’re pushing very hard and the pins won’t slot into the space provided on the back of the plate…
0
Reply
Replying to @user_392955049 :
Sorry for the late reply. You need to split the objects first and manually rotate some parts. Make sure the tail’s bone connector is facing upwards. For the head part, rotate it until it lies flat on the plate, then add a Z-distance support of 0.075. For example, if the default value is 0.16, change it to 0.235. Lastly, you can rotate the object Dino_Dummy (8).stl_14 to -90 degrees. This step is optional, but if you do it, the printed object will have a stronger bond. However, it will require more filament for supports.
0
Reply
Boosted
Print Profile
0.2mm layer, 2 walls, 15% infill
Printed great! My son loved the model.
The profile uploader has replied
profile
1
Reply
thank you very much. very happy for your son😀
(Edited)
1
Reply
Boosted
Replying to @user_3081978295 :
He was excited and now currently printing one at 300%, lol
(Edited)
profile
1
Reply
Cool model!
The designer has replied
1
Reply
thank you !!
0
Reply
printing now! so excited :D
The designer has replied
designer
1
Reply
thank you 😊
0
Reply
this was great but the shell pieces don’t fit and if you get it on it breaks off the moment you move the tail. the pieces are hard to put in it hurts your fingers and very odd assembly. wish there were more detailed and step by step instructions.
The designer has replied
0
Reply
all my dummy dinosaur models use the same system and are based on the same parts and it works well. furthermore the photos prove that it works well too. you should review your printing settings or the quality of the filament used
Show original
0
Reply
how do I put it together because the instructions are different than the model
The designer has replied
0
Reply
the instructions and photos are usually enough they are very similar you will make it I'm sure 😉
Show original
0
Reply
Print Profile
0.2mm layer, 2 walls, 15% infill
The profile uploader has replied
profile
1
Reply
thank you for your rating
0
Reply
Replying to @user_3081978295 :
your welcome👍
0
Reply
their are no instructions
The designer has replied
0
Reply
there are pdf instructions on the page 😉
0
Reply
Print Profile
0.2mm layer, 2 walls, 15% infill
The profile uploader has replied
profile
1
Reply
Thank you very much for your review
(Edited)
Show original
1
Reply
Can I ask - what technique/trick did you use to get the tail coverings to connect with the little tail connector pins? We’re pushing very hard and the pins won’t slot into the space provided on the back of the plate…
0
Reply