The Tilemat Gen1.1


Print Profile(4)


Description
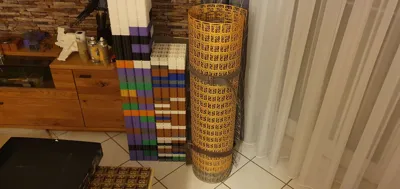
Printing some sheets will help you to follow along with the manual.
I recommend for testing: 2-4 4x4" base sheets, 1-2 4x4" combiner sheets, 1 anchor sheet
What is the Tilemat:
The tilemat is a system agnostic system meant to replace the clips of any Dungeon Tile system, the tiles of which are sized in a multiple of 2". It also includes risers which make it possible to raise vast areas of the map to any height imaginable without losing stability.
Important Preamble:
I highly recommend switching to the Cool Plate Super Tack for printing the tilemat.
You will need a lot of the same model, finnishing prints at a high frequency. This will significantly degrade the textured or smooth pei beds.
I found that the Cool Plate Super Tack copes significantly better with this usage.
Requirements:
- You use Openlock or Dragonlock Dungeon Tiles
- Your printer has a build volume of at least 21cm² or 8"²
Limitations:
- The Tilemat is only compatible with tiles which have a size in multiples of 2. You may use smaller ones, but they can't be held in place properly and they may have an uneven surface
Getting Started
I recommend starting with a small 16x16" patch and working your way up from there.
Print the Following:
4x “base no grid 8in x 8in.stl”
1x “combiner no grid 8in x 8in.stl”
One of the following, depending on your tile size and system:
- “Openlock anchor 2in grid 8in x 8in.stl”
- “Openlock anchor 4in grid 8in x 8in.stl”
- ”Dragonlock anchor 2in grid 8in x 8in.stl“
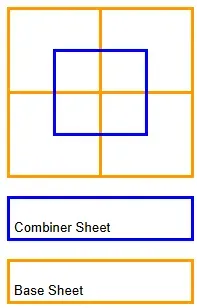
1. place the Base sheets in a 2x2 grid2. press the combiner sheet onto the center, so that it overlaps with each base sheet.
3. place the anchor anywhere on the resulting mat.4. place your tile on the anchor
What comes next?
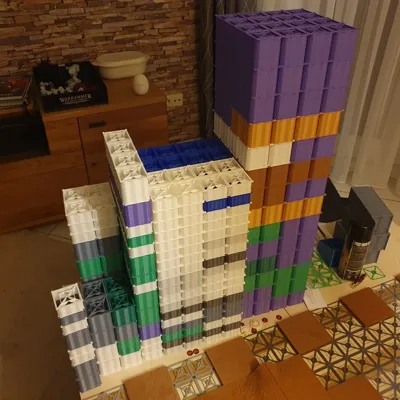
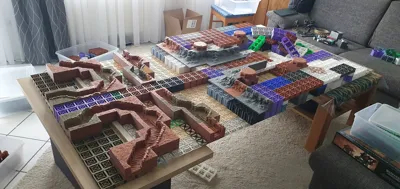
Scaling up your Tilemat
You can stabilize the edges of the mat by using 4x8" combiner or base sheets, depending on which you have to complete.
A completed 16x20" mat may look something like this:

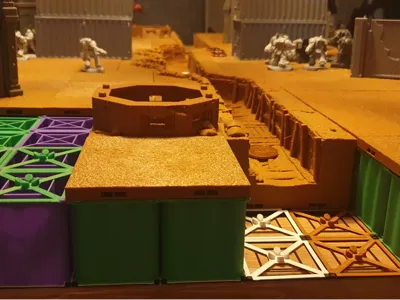
Using Riser
To use the risers, you just place them on top of the combiner sheet and then put the anchor sheet on top.if you are wondering, whether the risers are stable enoguh to hold anything: they most likely are.
In practice, each 2x2" riser may be loaded with at least 220pound/100kg

Cutting your Tilemamt
all files which do not have "no grid" in their name (currently everything but base and anchor sheets) can be cut to size, the value before the grid denoting the size of the grid they can be cut to (a 2in grid file can be cut down to 2x2" small pieces).To do so, you just have to cut the small tabs which hold the segments together.
to cut a riser, you just have to cut the tabs at the bottom and bend the riser 180". The top half will break cleanly, leaving you with 2 smaller risers.
Optimizing your Tilemat
You dont need an anchor beneath each tile
There is no need to place an anchor sheet beneath each and every tile. You can omit them where you see fit, since the tile rests on the base sheet or riser, not anything else.
I recommend to place an anchor beneath the corner tiles so that they don't fall of the mat and sporadically in between to keep them fromm shifting.
The Riser Bridge
The Riser is stable enough to form bridges with it, omitting the riser below its center.

Optimizing print times
The Top 2mm and Bottom 1mm of all files must have a layerheight of 0.2mm or below. higher layerheights will result in compromised functionality.
everything als may be printed as big as you'd like
It is Recommended to stay at a .4mm nozzle, larger nozzles will compromise the riser integrity
(The walls are .8mm thick and require 2 walls to be stable. Larger nozzles will result in holes, which introduces failure points)
Changelog
2025/07/18
Added an alternative Dragonbite anchor sheet
Added an Dwarvenforge anchor sheet
2025/09/13
Added .5" riser variants
Added 1" riser 4in cut grid variants
2025/09/14
Fixed an issue with the .5" 4in cut grid riser variants where they would not print correctly
2026/03/14
Milestone Heroes anchor added

Comment & Rating (9)