Folding Hiking Poles


Print Profile(2)


Description
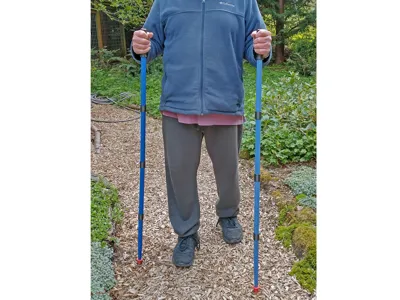
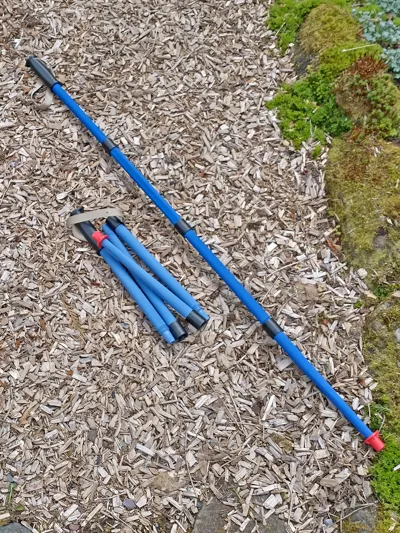
These light-duty hiking poles unscrew and fold up compactly for easy storage in your backpack or glove compartment. They are cheaper than commercial hiking poles plus you get the satisfaction of hiking with your own home made gear.
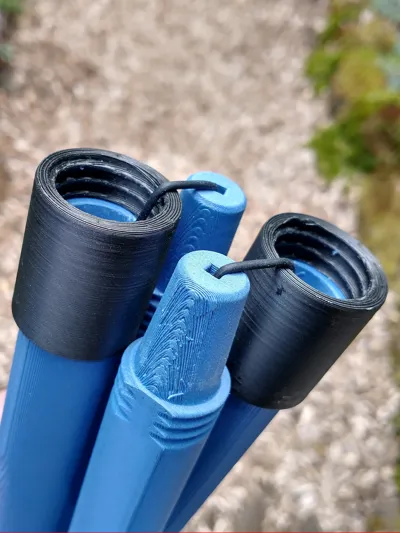
These weigh about the same as aluminum poles: 285g/10oz each or 570g/20oz for a pair. The handles have wrist straps (which dramatically reduces hand fatigue when used properly) and the replaceable TPU tips have a small basket for loose or mucky terrain. Lastly, a length of TPU filament is used as a shock cord to keep the sections together when separated.
I've provided two 3MF file: one for shorter 119mm long poles (works for me at 167cm tall), and one for longer 130mm long poles. From there, you can scale the closest version up or down a bit to get an exact fit for your own height.
Design
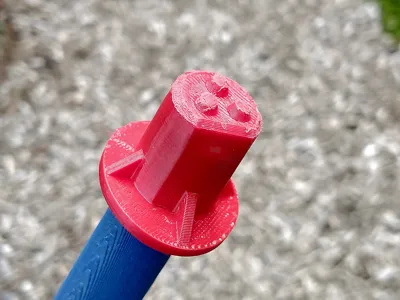
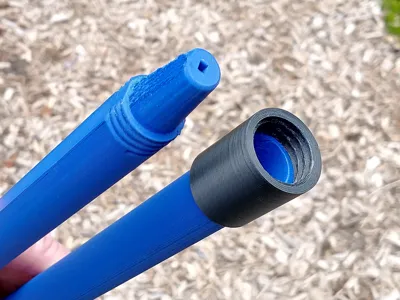
The tricky part of the design is to keep the poles stiff and light and to keep the connections between sections strong enough to take a good bending load. Printing the pole sections flat orients the layers to provide optimal strength and stiffness for each section. The tapered peg and socket connections between sections helps transfer the load evenly from one section to the next, but can also really stress the layer adhesion of the outer cone section. To prevent the outer cone section from blowing out, I've used a separate coupler sleeve that is very strong radially to bind the ends of the sections together. These couplers also provide the threaded connections for holding the sections together.
Straps
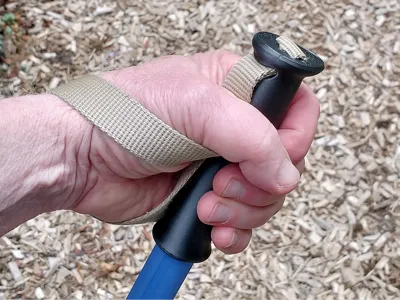
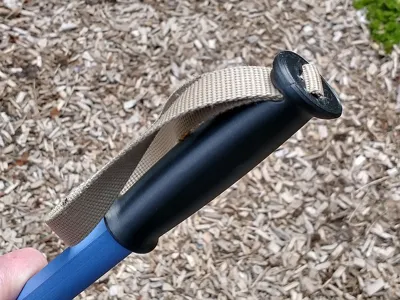
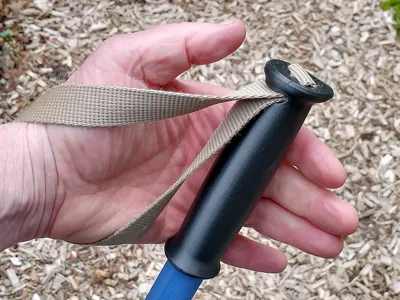
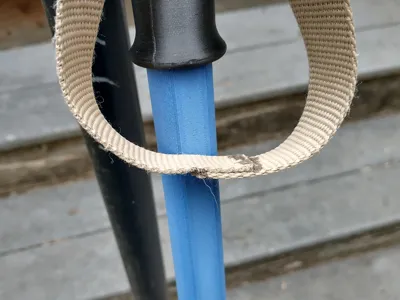
Oddly, the straps are one of the most important aspects of using hiking poles. If worn properly, as shown in the photos above, the thrust load of the pole is transferred directly to the heel of your hand through the strap, requiring only light grip pressure to hold onto the pole. This dramatically reduces hand fatigue.
It is important, though, to get the straps running properly over your hand so that they are flat and smooth against your hand. The straps, rather than just being simple loops, are actually connected as mobius strips, with there being a right handed half-twist for your right hand and a left-handed half twist for your left hand. That's right: the two poles end up being slightly different in how the strap is assembled. That's why I printed my poles in different colors - to distinguish right from left. (Just kidding. I ran out of the dark blue filament after printing the first pole.)
Materials
I printed the pole sections in Bambu PLA-CF filament, which is the stiffest of the inexpensive filament options. But even with 4 perimeter lines, they still aren't quite as stiff as aluminum poles. You could start increasing the the number of perimeter lines, but that will also increase the weight. The filament cost end up being about $15US for PLA-CF, but if you really wanted to go to town you could use PET-CF, which is even stiffer and has excellent heat resistance, but that would more than double the cost.
The handle and the coupler sleeves are printed in regular PLA, and the tips are printed in TPU-95A.
Assembly
Additional materials required:
- 1m length of ¾"/19mm wide strap material (nylon, polypropylene webbing, etc.)
- ¾" strap slider
- 2m length of TPU filament for shock cord (95A or softer)
- superglue
1. After printing, remove the support material from the ends of the pole sections (on the conical peg and inside the conical cavity).
2. Test fit each conical peg in each conical cavity, twisting the two together to grind away any lumps left from the supports.
3. Test fit the coupler sleeves on each thread section, working them bake & forth until the threads operate smoothly.
4. Also test that the couple sleeves slide nicely onto the top of each pole section.
5. On the lower three pole section, you'll now glue on the coupler sleeves. Apply superglue to the outside of the end of the pole (don't put glue inside the sleeve), and then slide the coupler onto the end of the pole until it seats completely. Wipe off any excess glue.
6. Also glue the handle onto the top pole section, again applying the glue to the end of the pole and sliding the handle over that.
7. Test assemble all your pole sections to make sure everything screws together nicely.
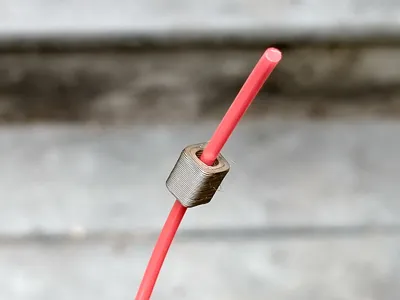
8. As shown in the last photo, slide the little square ferrule piece over one end of your TPU shock cord. Put a drop of superglue on the tail end to fuse the two together. Lets set and wipe off any excess glue before proceeding.
9 Thread the free end of the TPU into the hole at the tip of the bottom pole section. If the TPU gets hung up with sliding it in, twist it as you push it in to help it work past and rough edges inside the channel. Pull the TPU all the way thru and the ferrule will disappear inside the tip. If you push the exposed end of the TPU in and out, you should hear the ferrule sliding freely inside the tip of the pole section.
10. Thread the TPU through the two middle pole sections and then the top pole section. Screw all the pole sections together.
11. Slide the last ferrule over the end of the TPU and slide it down until it is flush with the top of the handle. Apply a drop of superglue to the end of the ferrule to fuse it to the TPU. Let set and then trim off any excess length of TPU. When you unscrew the pole sections, the ferrule will disappear into the handle.
12. Take a 500mm length section of your strap material and thread each end into the slots in the handle as shown in the photos above. If you are using an adjustable slider, sew one end of the strap onto the slider. (I opted not to use a slider as I thought it might be too bulky). Using the photos as a guide thread the strap through the slider. This will require a ½ twist one way for your right hand and a twist the other way for your left.
I opted instead just to glue the strap ends together as shown above. (You could also sew the ends. ) I first grabbed the handle with mu right hand as shown in the photos and the wrapped the two ends over the back of my hand so that everything lays smooth. I then used some tape to temporarily hold the two ends of the strap together at just the right length for my hands.. (You may need to get a friend to help you with this.) Tack one end of the overlapping strap to the other side with superglue. After it sets, take off the tape, cut the free end so you have about ¾" of overlap, and then glue that end down as well.
You should now be ready to try out your poles!
Comment & Rating (3)