CHRONOS-QZ Quartz Clock Mechanism Conversion Kit


Print Profile(4)


Bill of Materials


Description
If you enjoy this design, 👍 Like, 💝 Follow, and 🚀Boost! |
The CHRONOS-QZ Quartz Clock Mechanism Conversion Kit is now available!
The Quartz Clock Mechanism Conversion Kit has been designed to answer requests from two distinct groups of people interested in the CHRONOS Annual Clock:
- Those who would like to enjoy the beauty of the CHRONOS Annual Clock's case but prefer a conventional timekeeping mechanism.
- Persons who would like to build the complete CHRONOS Annual Clock but would like to work on the project in stages.
The Quartz Clock Mechanism Conversion Kit answers these requests by being fully compatible with the cabinet and all decorative base and top options of the CHRONOS Annual Clock. It can also be upgraded to a full CHRONOS Annual Clock as you wish by assembling the required components at a later time.
Bambu Maker's Supply Clock Components Kit-MH011 or a similar mechanism is required to complete this project.
CHRONOS-QZ Conversion Instructions
To Begin:
Visit CHRONOS Annual Clock International
or CHRONOS ANNUAL CLOCK (ZH) China
Download the Print Profile “Main Project File - All Cabinet and Interior Parts”.
- Print these plates.
- Cabinet: plates 1, 4, and 5.
- Lens Gasket: Print plates 10 or 14 as needed.
- You must source a clear acrylic disc (200mm or 8 inches) for the lens.
- Top and Bottom Parts: Your selections from plates 6, 7, 8, and 9 + 13.
Conversion Kit Installation:

Print all Conversion Kit elements from both the main print profile and one of the offered clock face print profiles.
- CHRONOS-QZ Clock Face Frame x1.
- Quartz Clock Mechanism Holder x1.
- Rivets x4
- False Rivets x4
- Clock Hands (2 fits) and Endcap
You will also need:
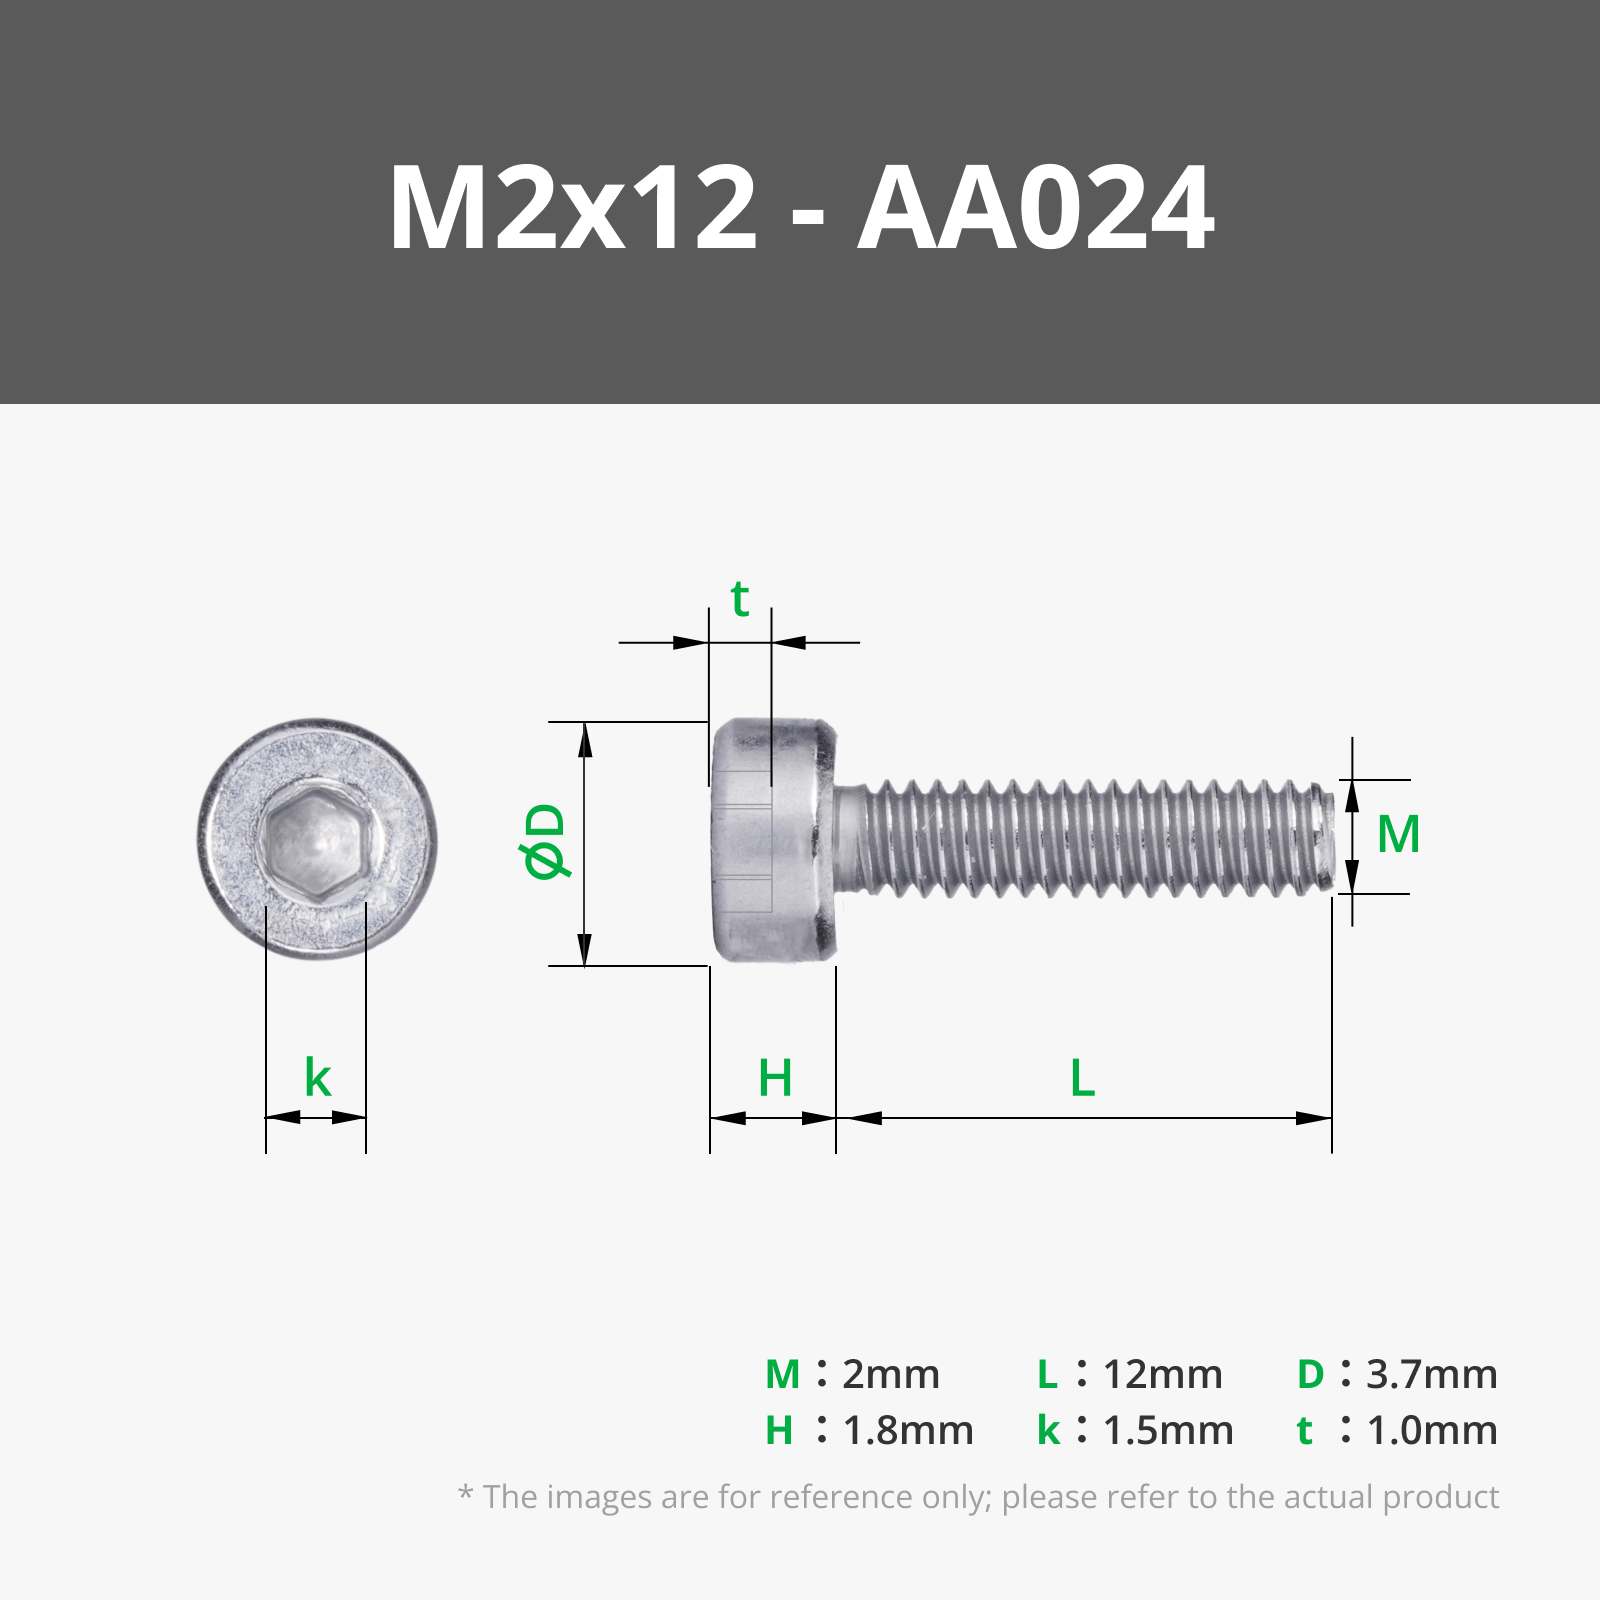
- x2 M2x12mm machine screws.
- x2 M2 nuts.
- x1 AA battery.
Fit the Clock Face onto the Clock Face Frame and secure in place with x2 M2x12 screws. Check the alignment of the marker at 6 o'clock with the diamond-shaped marker in the frame to ensure correct alignment.

Carefully turn the frame over in your hand, holding the screws in place with your fingers. Fit the Quartz Clock Mechanism Holder over the screws. Secure with x2 M2 nuts.

Take the Quartz Clock Mechanism and place the rubber gasket from the Clock Components Kit over the post. The indented side should face the mechanism.
Place the Quartz Clock Mechanism inside the Quartz Clock Mechanism attached to the back of the Clock Face Frame. The post will go through the hole.

Turn the Clock Face Frame over while holding the Quartz Clock Mechanism in place with your fingers. Place the brass washer over the post, followed by the nut. Turn the nut until it is tight, but do not overtighten.

Place the Hour Hand over the post until it rests with a firm fit. Do the same with the Minute Hand. (Hands with slightly different fits are provided to account for variances in tolerance.)

Add the Cap to the end of the post for a finished look.

Install x1 AA battery into the Quartz Clock Mechanism and rotate the dial clockwise to set the clock to the current time.

Completing the project is very much like completing the CHRONOS Annual Clock at this point. Refer to its instructions for complete details. In brief:
Install the Clock Face Frame into the Cabinet using the Rivets by pushing them through Cabinet into the paired holes in the Clock Face Frame.

Install the False Rivets in the unused rivet holes along both sides of the Cabinet. Do not glue the Rivets or False Rivets in place if you plan to upgrade to the CHRONOS Annual Clock in the future!

Complete the Cabinet with your choice of base and top options, and then close up the CHRONOS-QZ Quartz Clock using the Backplane.

Congratulations on completing CHRONOS-QZ!
Boost Me (for free)
🚀 Your boost is appreciated! Boosts contribute to the filament used to bring new models to you. Thank you! 🫶
Membership
Would you like to sell prints of my work? 💵 Enjoy generous rights and no competition from the author with my low-cost license! 😄
License
You shall not share, sub-license, sell, rent, host, transfer, or distribute in any way the digital or 3D printed versions of this object, nor any other derivative work of this object in its digital or physical format (including - but not limited to - remixes of this object, and hosting on other digital platforms). The objects may not be used without permission in any way whatsoever in which you charge money, or collect fees.
Comment & Rating (1)