Search models, users, collections, and posts

Saturn Saturn LED001 Night Light

Print Profile(4)

All
A1
X1 Carbon
P1S
H2D
P1P
X1
X1E
H2D Pro
H2S
P2S
H2C
X2D
A2L
A1 mini

75mm Saturn Rings
75mm Saturn Rings
Designer
2.4 h
1 plate
4.9(15)

Lamp Base
Lamp Base
Designer
37 min
1 plate
4.9(9)

Saturn body
Saturn body
Designer
4.6 h
1 plate
4.6(23)

150mm Saturn ring
150mm Saturn ring
Designer
2.7 h
1 plate
5.0(6)

Open in Bambu Studio
Boost
1273
3284
91
53
1.7 k
490
Released 

Description

Content has been automatically translated.
Show original

Modeling tool: Blender

Texture source: Solar Textures | Solar System Scope


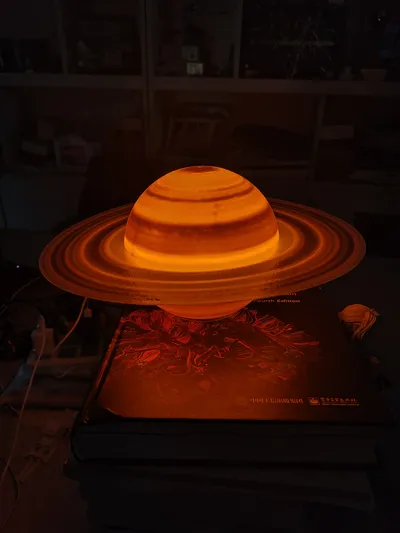
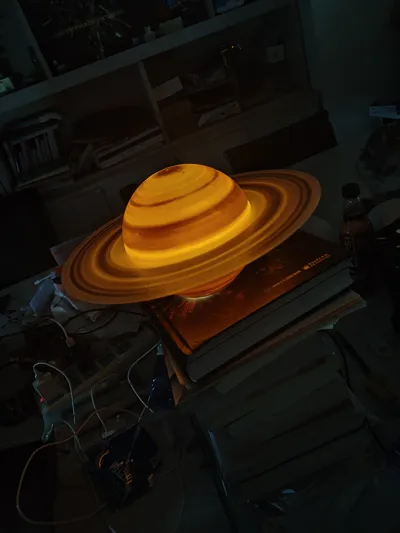
Saturn, lacking the exquisite hues of Venus, the intricate surface coloration of Jupiter, or the rugged lunar terrain, presented a unique challenge.

How could I faithfully replicate Saturn's distinctive appearance? This proved to be the most significant hurdle in the modeling process.

The answer was, of course, the rings.

But how to translate this into the model? I considered three approaches: extruding a ring directly from the planet's model, using line art to connect the rings to the main body, or employing an external support structure to suspend the rings.

However, these options presented difficulties in printing and material consumption.

Therefore, I opted for a more pragmatic, even somewhat brute-force, solution—simply clipping the rings onto the planet.


To achieve this, you will need at least one transparent filament (colorless is ideal, although a tinted filament might offer an interesting aesthetic), and additional filaments of your choosing.

Incidentally, I used desert yellow for my print.

For a more accurate Saturnian color reproduction, I recommend a deeper yellow and cool-toned LED lighting.


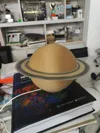
I've provided two versions of Saturn's rings: one sized for larger printers—the 150mm version printed on my H2D, matching the planet's radius—and another, 75mm version, suitable for standard printers like the A1.

As for the A1 mini, I might experiment with a segmented ring design later. Alternatively, you could divide the original model into sections, such as quadrants, to obtain a complete 150mm ring.


Personally, I find standard PEI build plates perfectly suitable for the rings; the frosted glass effect under illumination is quite pleasing.

However, for enhanced clarity, consider using a glass plate, reducing print speed, and configuring the infill as unidirectional lines to maximize transparency.


Those interested in this model might also appreciate my other projects:

Venus Lamp:

Venus LED001 Night Light from Zarathustra MakerWorld: Free 3D Model Download

Jupiter Lamp:

Jupiter LED001 Night Light from Zarathustra MakerWorld: Free 3D Model Download


Three of the five classical planets are now complete.

Next, perhaps Mars? Or possibly a magnetic levitation-based Sun.


Mercury… I'm currently at a loss. In my mind's eye, it's simply a larger version of the Moon, lacking readily identifiable features.

Those with insightful suggestions are welcome to share them in the comments section.


If this model has been helpful, please like, save, and boost it—thank you.

Boost Me (for free)

New to this, creating this was challenging.
Any support is greatly appreciated.

Comment & Rating (91)

(0/1000)

This model actually broke the camel's back and got me to hit the purchase button and buy P2S, my first 3d printer. As rings are the thing that makes Saturn the beauty of the solar system, I wanted the big rings. So I scaled down size by 33% to be able to print this on p2s. Also I do not have petg, so I just used bambu pla translucent orange filament; features of the planet itself unfortunately don't really show much, but nothing brush and some transparent acrylic paint couldn't fix. As wall became quite thin, on the top of the ball I got a small printing fault with roughly thickness of a nail slice was not filled. Wife just thought it to be nice safety feature if light inside would heat up too much 😂 Given this was my maybe tenth print ever, very satisfied to the end result given filaments I had on hand. Big thanks to the author, awesome work!
4
Reply
i have a question i made the same thing but i got 2 lines on the side and was wondering did you have any line or did i do something wrong i new to 3d print thanks for your time
0
Reply
Replying to @user_4013715828 :
Yes i did get the same. Apparently setting seam to random (in bambu studio) would help as then each layer would be started from a random location i stead of fixed point. i have not reprinted this yet to confirm, only added more rings (outer diam 250mm) and colored with acrylic colors
0
Reply
I'm satisfied, though it didn't turn out quite as beautiful as in the picture
Show original
4
Reply
Only the moon can be printed white Jupiter and Saturn must be printed in brown-based colors
(Edited)
Show original
1
Reply
add a colour diffuser to the led in red/orange/brown will make a huge difference
0
Reply
Print Profile
75mm Saturn Rings
used the rings on a different Saturn model fits nice and tight look cool,
2
Reply
Hello, from which other Saturn model did you take the rings?
0
Reply
Replying to @user_3531726053 :
hi, I used these rings on this Saturn model, https://makerworld.com/models/1291285?appSharePlatform=copy
0
Reply
I'm getting these missing spots on the top, what value can I modify to improve the finish:(
The designer has replied
Show original
0
Reply
This is usually due to insufficient filament extrusion or insufficient cooling, causing the filament strands that should adhere to the wall to fall off Please dry the filament and recalibrate, and try slowing down the printing speed when the model is high Or use filament with stronger layer adhesion
Show original
2
Reply
Print the last 10% of layers on the top with the height of 0,08mm instead of 0,2mm
1
Reply
Replying to @user_4228792711 :
yep- variable height toward the top. i do this with all dome-like shapes
0
Reply
Print Profile
75mm Saturn Rings
Looks great, it's a pity there's only one side, maybe it would look better if I printed it again and attached both sides
The profile uploader has replied
Show original
1
Reply
So it is recommended to use translucent materials for the main color of the star ring
(Edited)
Show original
1
Reply
Print Profile
Saturn body
Turned out amazing - thank you! Used ZIRO Fast Color Changing Twinkling PLA.
(Edited)
2
Reply
Print Profile
Saturn body
Prints well, looks great when lit.
(Edited)
0
Reply
Print Profile
Saturn body
(Edited)
Other Issues:Hey bro, the model is beautiful, but I don't understand why I can't print it when it says it's compatible with the P1S and X1C
Show original
0
Reply
awesome! Thank you for this model. Do you have a stand compatible for a bambu LED lamp?
The designer has replied
0
Reply
Is this the base used to secure the lamp? I have just uploaded this model, please see if it meets your requirements
Show original
0
Reply
yes, exactly! Thank you, the stand works great! It could be a little bit tighter, but I can glue it to the planet
0
Reply
it looks impressive so far. I'm printing the rings now and wondering how they attach.
0
Reply
To answer my own question, it's just a friction fit.
0
Reply

License

This user content is licensed under a Standard Digital File License.

You shall not share, sub-license, sell, rent, host, transfer, or distribute in any way the digital or 3D printed versions of this object, nor any other derivative work of this object in its digital or physical format (including - but not limited to - remixes of this object, and hosting on other digital platforms). The objects may not be used without permission in any way whatsoever in which you charge money, or collect fees.