Benchy around the moon


Print Profile(1)

Bill of Materials

- Screw-CHC-M3x20 x 1: Screw
- Insert-laiton-M3 x 1: Insert
Description
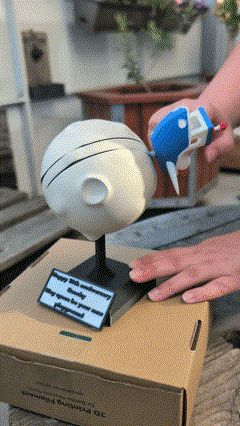
For our favorite boat's anniversary, I decided to take it for a spin around the moon.
This mobile sculpture allows our friend to take lunar excursions at will. In a final message before its departure, I offered these words: “Happy 10th anniversary Benchy, may space be your new playground”
Original Benchy model: https://makerworld.com/en/models/1272656-original-3dbenchy-public-domain-cad-step-file#profileId-1336828
Assembly:
I should clarify that, lacking filament to reproduce the moon, I employed my painting skills to achieve this appearance. Besides lacking the correct color, this allowed me to economize on Benchy's purge. However, the print profile includes both a neutral and a painted version should you prefer not to paint.
Assembling the sculpture is quite simple and intuitive. It features numerous small interlocking components; if the fit is too loose, feel free to add a dab of glue
- First, assemble Benchy: Simply interlock the antenna, wings, and flame.
- Next, assemble the half-moon and the base (again, using interlocking parts)
Assembling the central component is slightly more delicate; you will need both strength and finesse; the bearing must be seated firmly.

Next, mount the Benchy support rod and the spring-retaining rod onto the central component.

- Using a soldering iron, insert the insert into the hole at the center of the top half-moon
Position the spring

Position the “Axis” piece within the bearing of the “mid” piece; thread the screw and tighten it into the top half-moon:
Note: ensure your assembly matches the orientation in the image below

- Before fully tightening the screw, adjust the “Axis” piece to form an angle of approximately 120° with the spring stop
- Finally, simply clip the two half-moons together, position the plate on the base, and secure Benchy!

License
You shall not share, sub-license, sell, rent, host, transfer, or distribute in any way the digital or 3D printed versions of this object, nor any other derivative work of this object in its digital or physical format (including - but not limited to - remixes of this object, and hosting on other digital platforms). The objects may not be used without permission in any way whatsoever in which you charge money, or collect fees.
Comment & Rating (2)