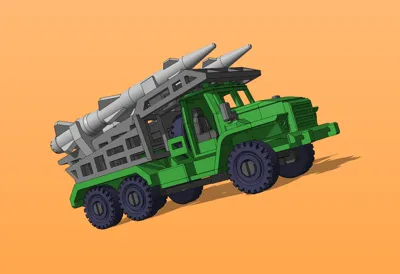
S-125 Missile Launcher—Super Cool Assembly Version


Print Profile(1)

Description
<Board Game Miniature Collection>--<Warship Collection>--<Aircraft Collection>--<Vehicle-Tank Collection>--<Aerospace Collection>
Membership
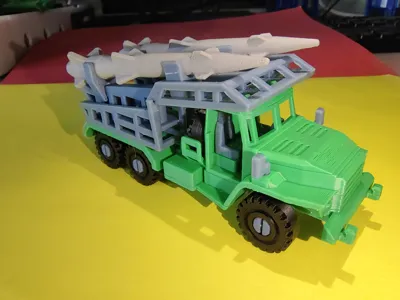
S-125 Missile Launcher—Super Cool Snap-Together Version
(Model assembly requires some practical skills, familiarity with slicing software, and the ability to adjust slicing parameters as needed)
Assembly is required for the steering wheel, seats, rearview mirrors, chassis, tires, and missile launchers.
Before printing, remember to thoroughly clean the build plate to ensure optimal adhesion and that the filament is dry
The model tolerance is 0.2mm; if any components are too tight after printing, please adjust your machine settings, filament, or sand them down. Bambu machines and filaments generally have no problems assembling parts with 0.15mm to 0.2mm tolerances. Some areas may require 502 or B-7000 adhesive
The total model length is approximately 112mm, using 48g of filament for multi-color printing, with a print time of 7 hours and 30 minutes.
Printer: A1 mini (low-temperature stabilized build plate), Bambu PLA, 0.12mm layer height, 2 walls, acceleration set to 1000 mm/s or lower.
For more exquisite 3D printed models of aircraft, warships, and more, please visit my homepage—Project Tianmen
International: https://makerworld.com/zh/@tianmen
China: https://makerworld.com.cn/zh/@TianMen
Many thanks to all those who have followed, liked, downloaded, and boosted this project
Assembly Instructions
1. Parts Diagram

2. Install the tires (refer to the image)

2. Install the steering wheel, seats, rearview mirrors, bottom footrests, and top cover.Sanding and adhesive may be required here. Small pliers will be useful for installing small parts


3. Attach the chassis to the body.


4. Assemble the missile launchers (refer to the assembled images below)
Note the orientation of the two lower clips shown in the image below—the angled ones face the front of the vehicle

This is the correct placement; the launcher clips have a specific bevel.

When pressing down on the clips, as shown, gently press the top two sides inward; this will slightly widen the bottom, making it easier to press down.

Clips installed

Attach the launcher assemblies; no adhesive is needed as they fit snugly.

Attach the assembled missile launchers to the vehicle.

Attach the missiles to the launchers.


License
You shall not share, sub-license, sell, rent, host, transfer, or distribute in any way the digital or 3D printed versions of this object, nor any other derivative work of this object in its digital or physical format (including - but not limited to - remixes of this object, and hosting on other digital platforms). The objects may not be used without permission in any way whatsoever in which you charge money, or collect fees.
Comment & Rating (3)