BENELLI M4 Charging Handle Extension


Print Profile(3)


Description
BENELLI M4 is an excellent shotgun. Its only two flaws are the bolt release button being too small and the charging handle being too short. I tried to improve them through my own designed project. After several months of continuous improvement and iteration, the charging handle extension project has been perfected and released.
Important Disclaimer: Maintaining safe firearm operation is your responsibility as the user. Please evaluate the safety of this project yourself. This project and its designer are not responsible for any risks or consequences arising therefrom.
Currently, this project has undergone extensive live fire tests and works well. (The 20mm extended version has fired approximately 75 rounds of birdshot as of 21-04-2025) If you encounter any issues during printing or use, please contact me, and I will continue to improve it.
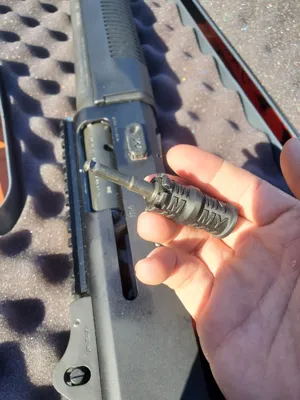
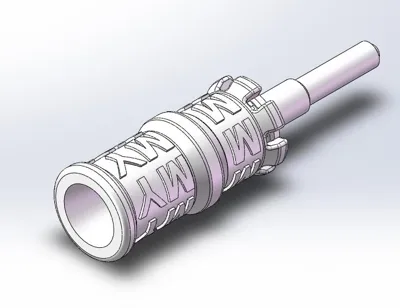
This project is based on the original charging handle, extending and thickening it. No additional parts are needed other than the original charging handle. Combined with my released bolt release button project (BENELLI M4 Bolt Release Button from Meaommy - MakerWorld) it allows your BENELLI M4 to evolve into a perfect shotgun. This project has two basic configurations, extending the original charging handle by 15mm and 20mm respectively. There is also a configuration for a disassembly assistance tool.
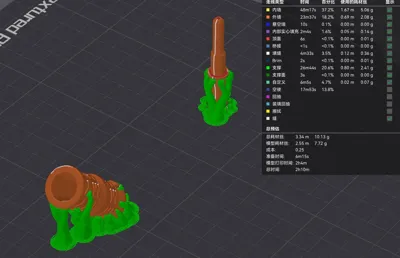
Please do not change the part placement in the original file. Especially do not change the bottom surface of the part. If the bottom surface is modified, the strength may be affected due to a change in layer orientation. Unfortunately, my practice has shown that printing in an upright posture does not provide sufficient strength. The charging handle extension is likely to break at the end of the original charging handle. For this reason, I specifically designed an inclined placement angle (as shown below). Printing at this angle can greatly increase the strength of the charging handle extension, enough to withstand considerable rough handling.


Corresponding to my hand size, the 20mm extension is suitable for "two-finger" use, and the 15mm extension is suitable for "one-and-a-half-finger" use.

I personally prefer the 20mm extension, as it is easy to operate. However, the 15mm extension is more portable. I performed operations on the extension in various postures, and all were completed successfully. I also conducted barehanded striking and rough handling tests from various angles, and the extension withstood the test, with no issues regarding strength.


Installation Instructions:
Among the printed parts, a replica of the charging handle is included. Before actual installation, please use this replica to practice assembly to avoid problems during actual assembly. Note that this replica is only for testing the installation of the extension; it is forbidden to install this replica on a real firearm to avoid unnecessary risks.
Initial Assembly
After printing, please carefully clean the supports, BRIM, and burrs, ensuring all parts are smooth.
Firmly press the original charging handle into the receiving hole at the bottom of the extension. After feeling a 'click' sound as it passes the limiting protrusion, the charging handle is fully embedded in the extension.


Insert Locking Tabs
With the disassembly hole of the locking tab facing upwards, insert it into the gap between the extension and the charging handle. As shown in the figure, ensure the disassembly hole of the locking tab aligns with the disassembly notch on the extension.

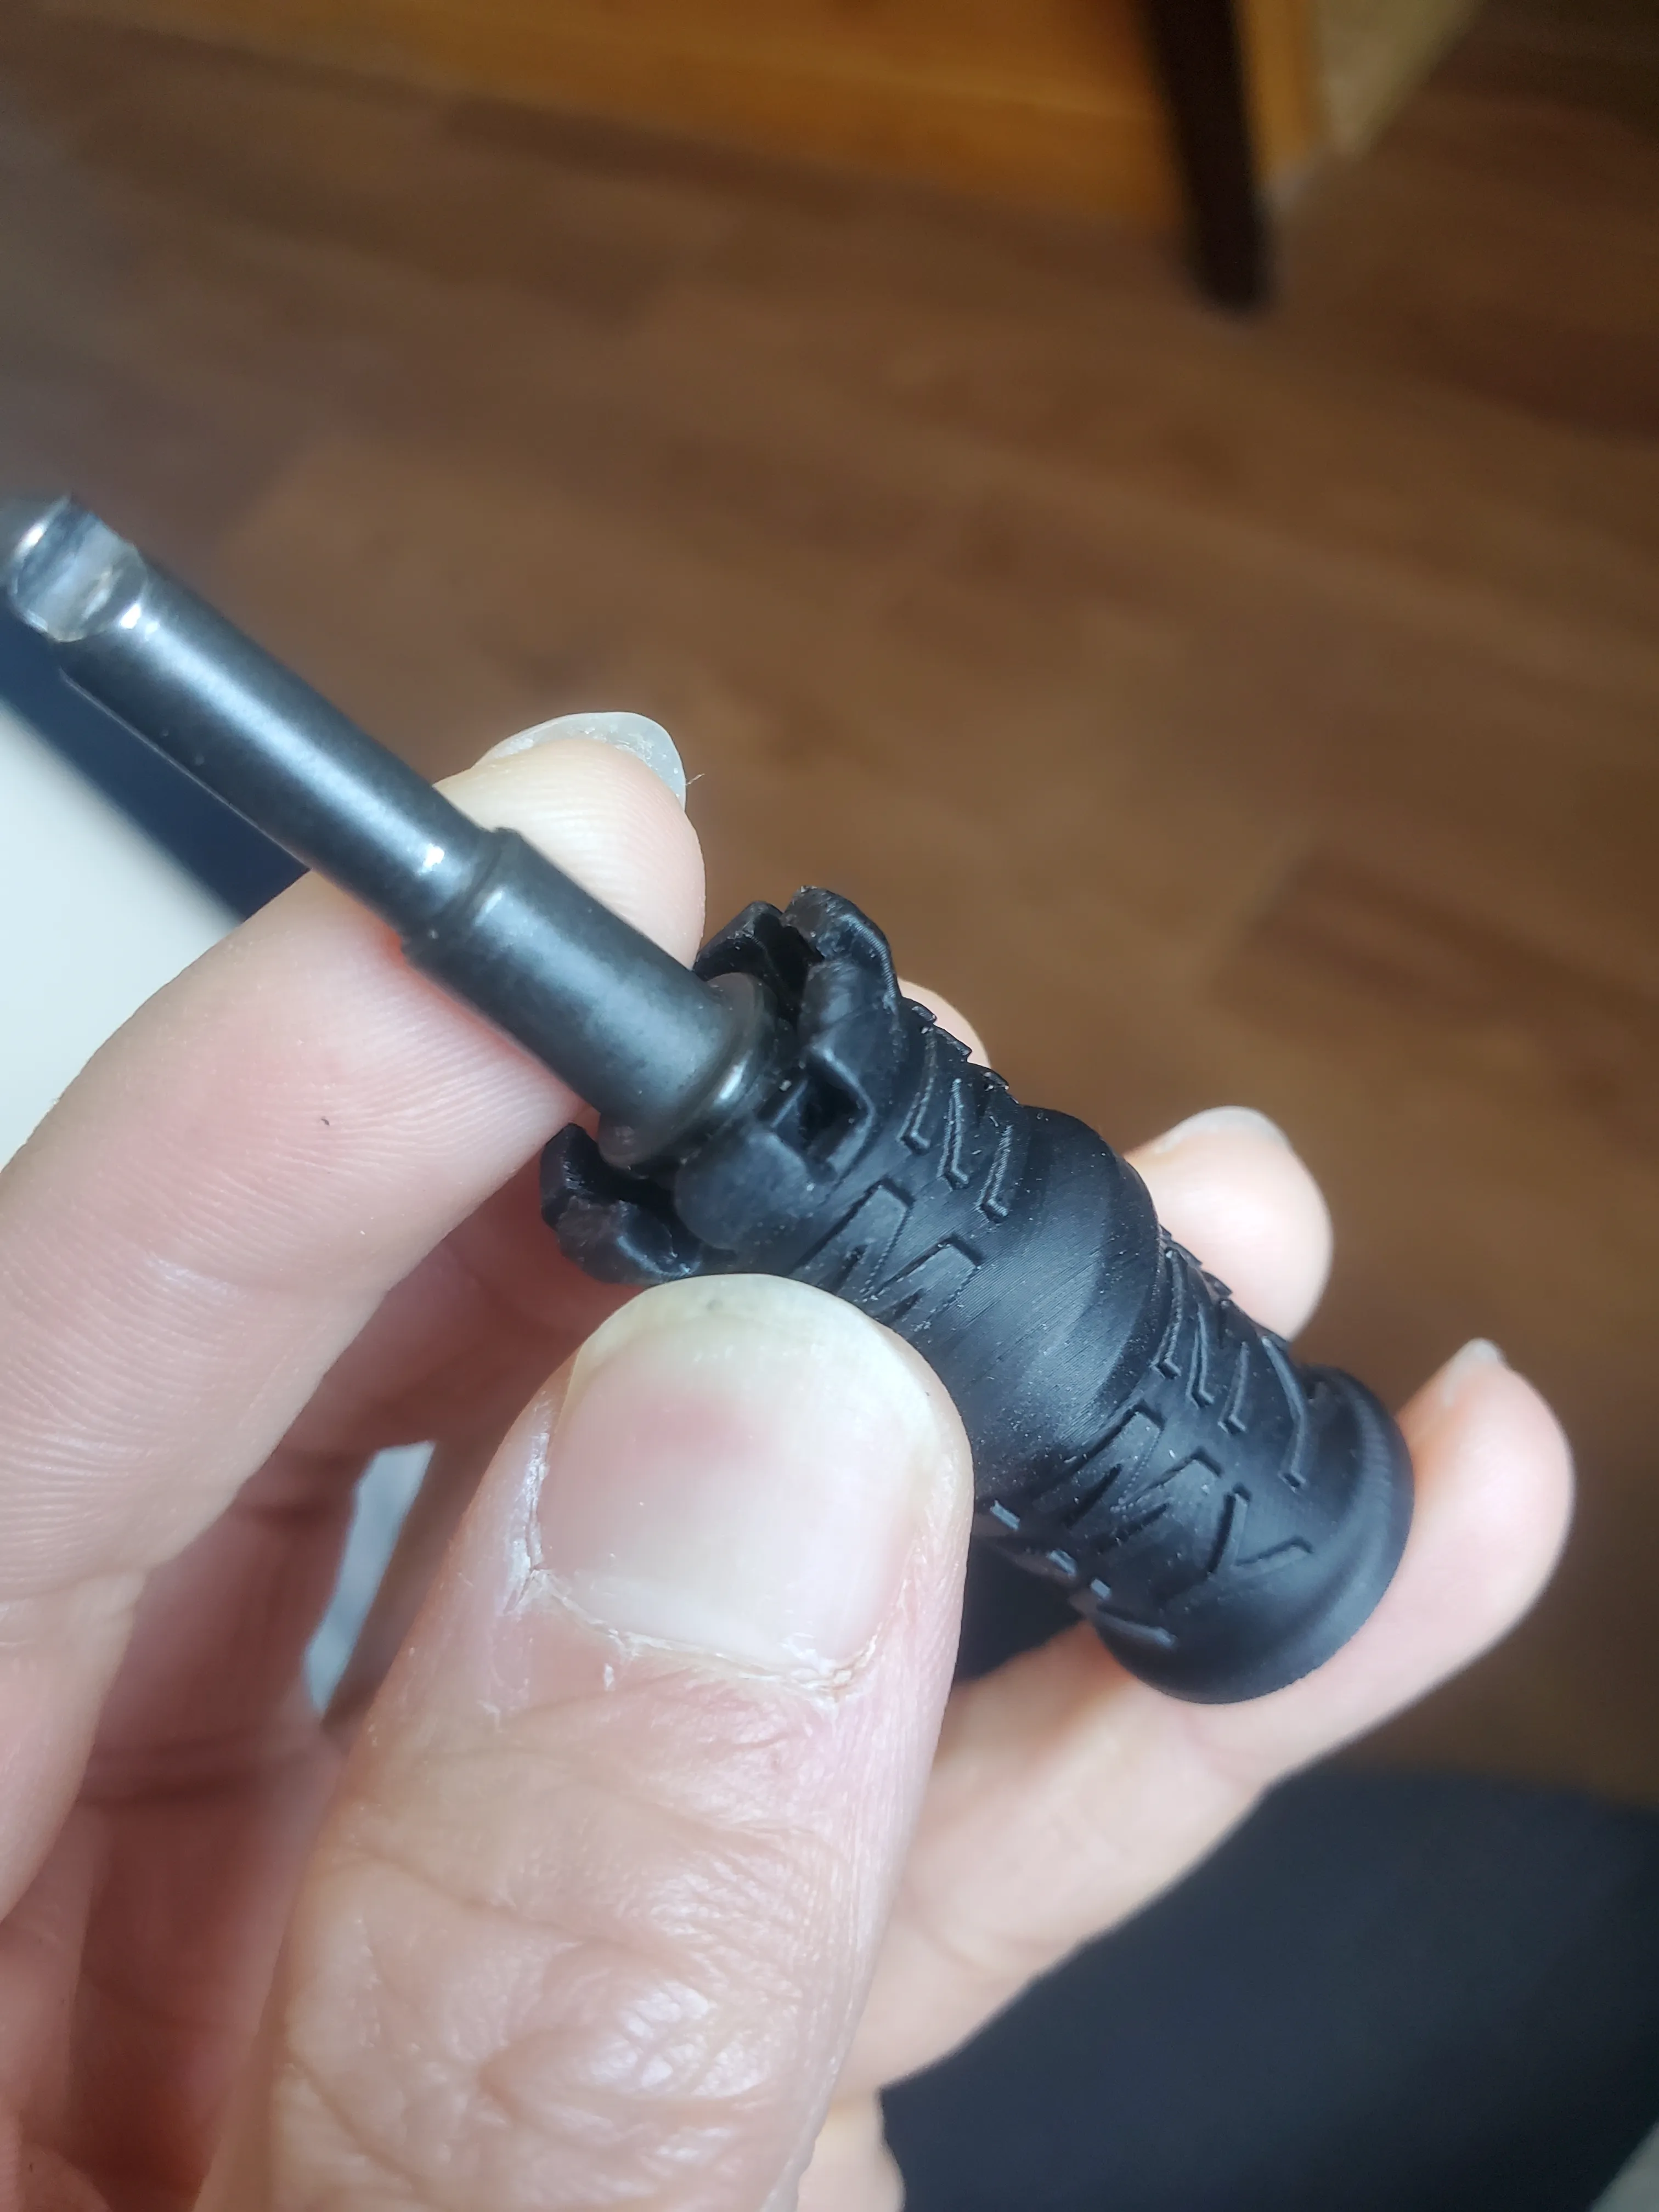
There are 7 locking tabs in total; please ensure all locking tabs are properly seated and their top surfaces are flush.

Install Retaining Ring
With the end of the retaining ring that has internal protrusions facing downwards, first snap one end in, then use a flathead screwdriver to press it in sections so that the retaining ring is fully seated in the annular groove of the charging handle.

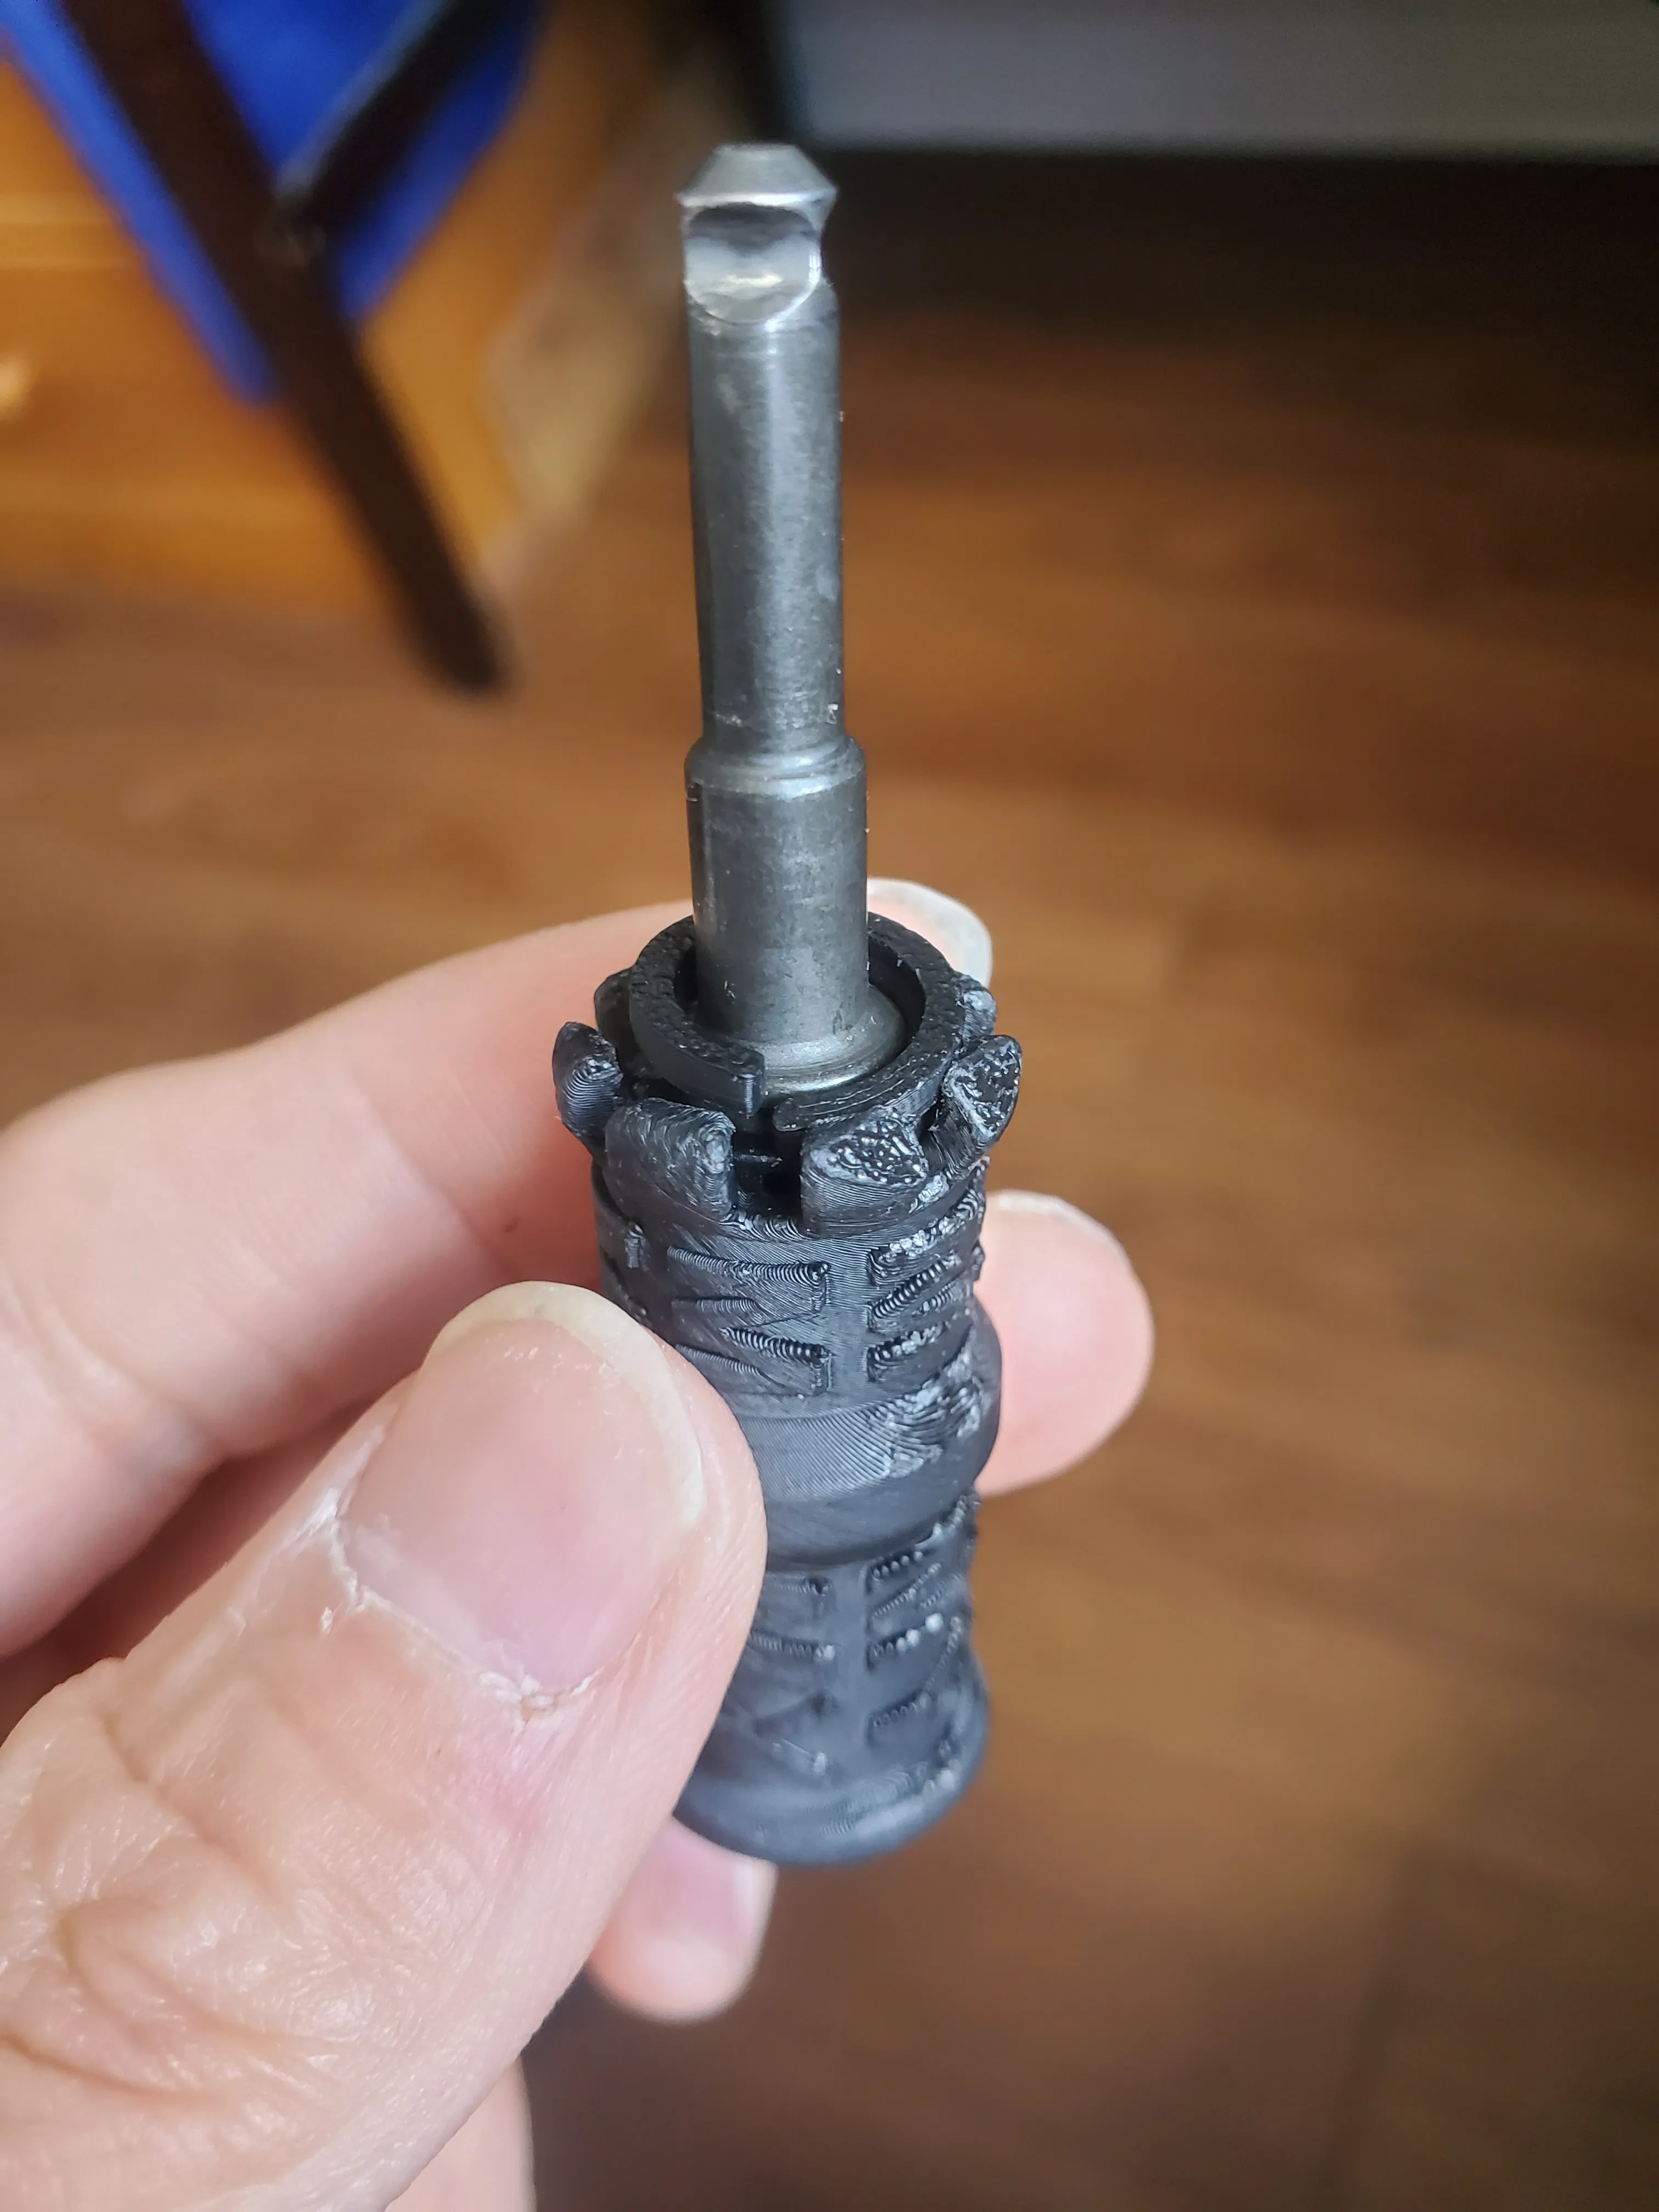


After assembly, the end face of the retaining ring should be flush with the end faces of the charging handle and the extension.

Method for Disassembling the Charging Handle Extension
When disassembling the charging handle, first use a small flathead screwdriver (a 2.5mm wide model is recommended) to pry the retaining ring out of the disassembly notch.


Then use a pointed object (such as a crochet hook, pointed tweezers, etc.) to insert it into the disassembly hole on the locking tab and pry the locking tab out.

If for some reason the disassembly hole is not aligned with the disassembly notch, then use a pointed object to gently lift the protrusion on the side of the locking tab and carefully remove the locking tab.

After all locking tabs have been removed, pull out the charging handle. If the charging handle is stuck too tightly and is difficult to remove, you can also use the printed disassembly assistance tool to push it out (details on how to use the disassembly assistance tool are provided in the next section).
Charging Handle Installation, Disassembly, and Assistance Tool
Once the charging handle extension is installed, the charging handle can be inserted into the bolt for normal use.


The method for disassembling the charging handle is essentially the same as for the original charging handle. Generally, the charging handle can be pulled out using a 'pull-and-twist' method. Since the extension can rotate relative to the original charging handle, a strong pulling force is required to pull the charging handle outwards while simultaneously rotating it while maintaining the pulling force. Under normal circumstances, the charging handle can be smoothly removed with the aforementioned operation. If, due to excessive wear or unforeseen circumstances such as lubricant seeping into the extension, the extension slips, making charging handle disassembly difficult, then the disassembly assistance tool can be used.
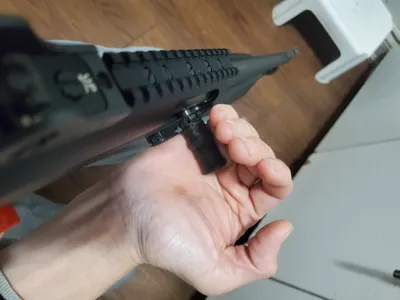
The assistance tool is in a separate profile and consists of a nut and a threaded rod.

To use, slide the nut's slot onto the head of the extension and then screw in the threaded rod. Once the threaded rod is tightened (please be careful not to overtighten, to avoid damaging the rod), the charging handle and extension will be locked together and will no longer slip. Then, using the original charging handle disassembly method (pull-and-twist), the charging handle can be removed from the bolt.


Finally, I hope everyone enjoys their perfectly customized BENELLI M4!
License
You shall not share, sub-license, sell, rent, host, transfer, or distribute in any way the digital or 3D printed versions of this object, nor any other derivative work of this object in its digital or physical format (including - but not limited to - remixes of this object, and hosting on other digital platforms). The objects may not be used without permission in any way whatsoever in which you charge money, or collect fees.
Comment & Rating (26)