Magnetic Knife Bar and Kitchen Organizers


Print Profile(2)


Description
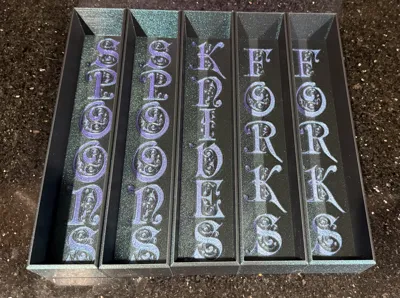
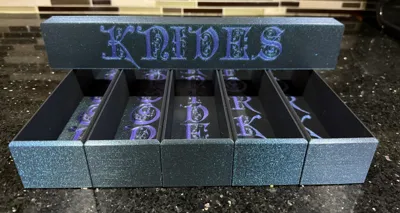
Modular Kitchen Organizers
I was tired of boring kitchen organizers so I designed my own.
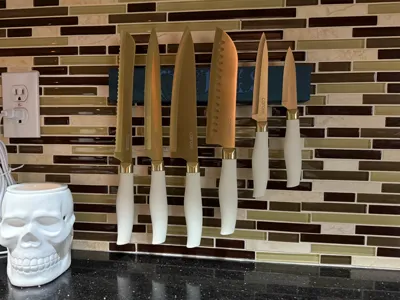
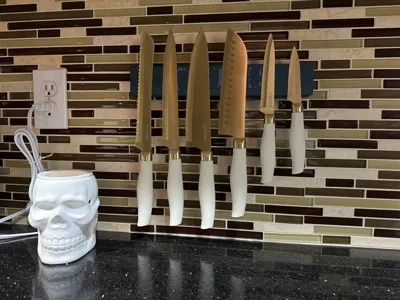
I also designed a knife bar to be printed with magnets inside for wall mounting. The interior is designed to hold 12 magnets sized: 30mm x 10mm x 3mm. I purchased "FINDMAG Neodymium Magnets Heavy Duty" on amazon for this and it holds my large knives quite well. I mounted it with "Scotch-Mount Double Sided Mounting Tape Heavy Duty, Black Extreme Mounting Tape". It claims to hold 1 pound per 2 inches of tape. With the knife bar being 12 inches, it may hold up to 6 pounds, but how much it will hold depends on your mounting surface and knife weight. *Make sure you clean the mounting surface well as kitchen surfaces tend to get greasy and the tape will not stick. I cleaned with dish soap and vinegar and let it dry. I put the tape on with a lot of pressure to ensure a good bond between tile/grout and let it adhere for a day before attaching the knife bar, also pushing it on with a lot of pressure for a few minutes and allowing it to adhere over night before putting knives on.
Printed at .16mm Optimal with a .4 nozzle gave me the best quality details without taking days to print. I did try printing them with a .2 nozzle, but they took a lot longer and I would say with the filament I was using, they didn't look significantly better. On the utensil organizers, I had to print with a .36 outer wall line width to get all of the small letter details to print correctly. I slowed the outer wall, top surface, and initial layer infill speed to 50mm/s for a better quality finish with my glittery filament.
I designed a set with a honeycomb pattern in the walls, but my glittery filament looked better with solid walls. I have added the honeycomb to the file if you prefer a little more detail over solid walls.
** If you change the quality settings or line widths, the letters may not print correctly. I tried many different quality settings to get all of the little details in the letters to print properly.
**The knife bar has a pause at layer 30 on the .16mm Optimal setting in Bambu studio to add the magnets. If you change the printing quality or decide to print it face up you will need to change the pause layer to add the magnets before it prints the bridge over the openings.
Filament: Flashforge PLA in Burnt Titanium and Nebula Purple
Comment & Rating (0)