Search models, users, collections, and posts


GIF


Print Profile(1)

0.1mm layer, 3 walls, 100% infill
Designer
1.2 h
1 plate
Open in Bambu Studio
Boost
53
97
11
7
120
74
Released
Description
V2 is out now! (It has fixes for a better fit)
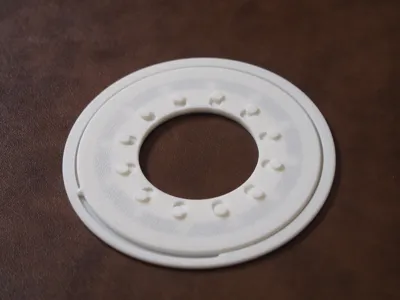
It's an adjustable compass for drawing that uses an iris mechanism. The design is my own, but I took inspiration from the following iris compass linked below. My design is quite a bit thinner, although it may not produce the most precise circles.
Important:
- The compass may initially have a lot of friction (especially for matte filaments). With more use, friction decreases a tad. Ironing can be enabled for top surfaces which helps to eliminate friction. I added a little bit of lubrication fluid I had laying around from Hub Hobby to the flange of the top before assembly, which helped a great deal.
Assembly:
- Carefully use a scraper to remove the thin parts from the build plate.
- Place the Base on a flat surface.
- Hook one Shutter at a time over an outer peg of the Base. Work in a clockwise manner. When installing the last 4-5 Shutters, you will need to slide them under the first few initial Shutters while holding them in place and hook them over the pegs. A photo of all of the Shutters installed on the Base is provided.
- Run your finger or something around the inner edge of the Base to align all of the Shutters.
- Rotate the Base assembly so that the slot on the edge faces you.
- Take the Top and lay it on top of the Base assembly so that the protruding nub is in the left edge of the Base slot.
- Shift the Top so that all of the Shutter pins are aligned with the Top slots.
- Push down on one edge of the Top with one finger and slide another finger around the edge of the top until it is attached to the Base.
License
This user content is licensed under a
Creative Commons Attribution-Noncommercial-Share Alike
Comment & Rating (11)