Reversible Boxy Bluey Toy


Print Profile(1)


Description
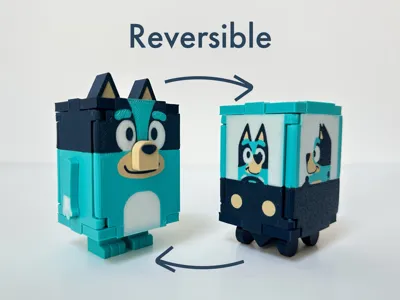
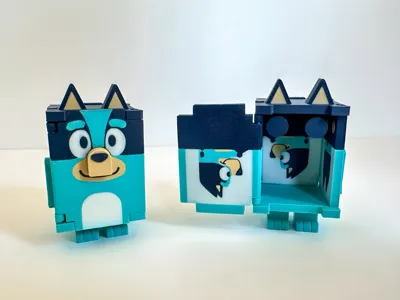
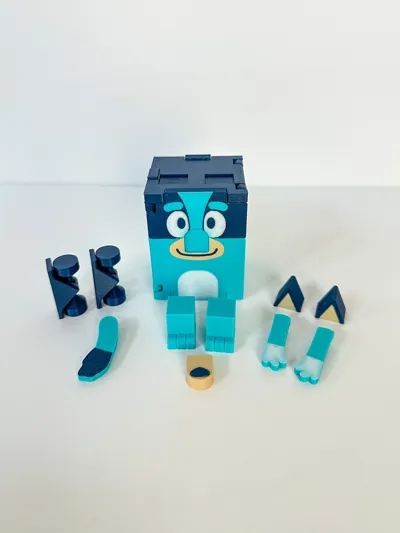
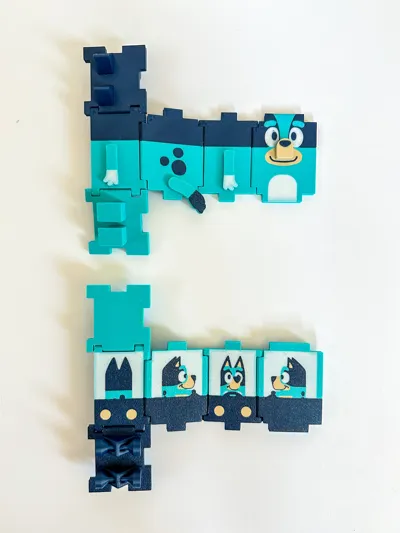
This Reversible Boxy Bluey toy transforms from Bluey into Bluey driving a car 🚙 The main body of Bluey prints flat and the nose, ears, feet, arms, tail and wheels print separately and are attached after printing.
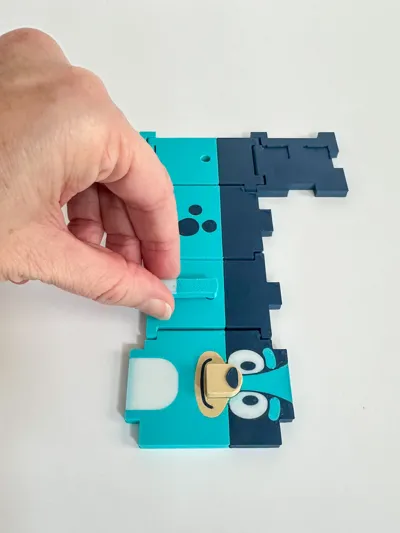
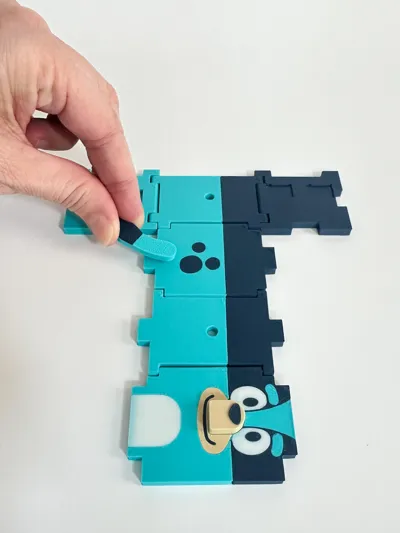
Note: The axle of the hinges in this box are unprinted 1.75mm filament that has been straightened. This filament needs to be inserted during the print (more detail and image below).
PLA works great
Layer Height 0.2mm
Infill 15%
No supports needed
Two rubber bands to secure the two halves of the filament straightening block together (if you chose to use the block)
Pieces of unprinted 1.75mm filament that has been straightened (these pieces are 35-40mm in length)

I have included a 3mf file with the following print profiles:
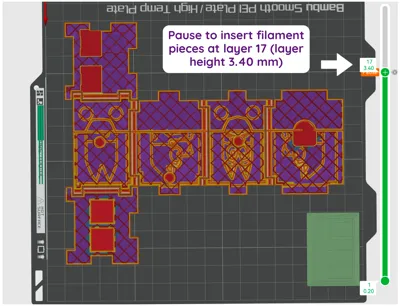
Print Plate #1 (Bluey body): 4 colors (light blue, dark blue, white and tan), print pause at layer 17 (layer height 3.40 mm)
Print Plate #2 (arms, feet and tail): 3 colors (light blue, dark blue and white)
Print Plate #3 (ears and wheels): 2 colors (dark blue and tan) wheels print in place upright with no supports
Print Plate #4 (nose): 2 colors (dark blue and tan)
Print Plate #5: Filament Straightening Blocks (two halves), PETG filament selected
Note: I have set the flushing volumes (for changing out the filament colors) to a multiplier of 0.9 (you can adjust this if you'd like)
How to Print Filament Straightening Block:
PETG preferred because of it's high heat tolerance (but PLA will work too:)
0.2mm Layer Height
20% Infill
No supports needed
How to Use Filament Straightening Block to Straighten Unprinted Filament:
To use this block, secure the two halves together with a couple rubber bands. Next heat a pot of water over the stove (or microwave) to around 160F (~70C) and carefully insert sections of filament into the hot water (please be careful not to burn yourself). Swirl the filament around until it gets soft (like a cooked noodle) and then insert it into one of the holes in the block, threading it all the way through. Repeat (there are five holes) until filled.
Let the filament sit and set for several minutes and then when you open it the sections will be straight:)

*You can use any method of straightening filament you would like, but it is important to try to straighten the filament so it lays down flat when printing.
How to Assemble Boxy Bluey:
Snap the arms and the tail into their corresponding holes. They will be able to rotate after they are snapped in. Use super glue to attach the feet, ears, nose and wheels to their corresponding positions. And that’s it:) He’s ready to roll 🚙
My designs are free for personal and non-commercial use. If you would like to sell them for commercial use, I offer a commercial license on Thangs: https://thangs.com/designer/3DPmom
If you like my work and want to help support it, you can buy me a Diet Coke at https://www.buymeacoffee.com/3dpmom Thanks so much!
Boost Me (for free)
If you like this print please give me a boost 🚀 Thanks so much!
Have fun printing!
License
You shall not share, sub-license, sell, rent, host, transfer, or distribute in any way the digital or 3D printed versions of this object, nor any other derivative work of this object in its digital or physical format (including - but not limited to - remixes of this object, and hosting on other digital platforms). The objects may not be used without permission in any way whatsoever in which you charge money, or collect fees.
Comment & Rating (9)