EV spider cable - Suspended cable roller


Print Profile(1)

Description
🚗 Presenting the EV Spider Cable 🕷⚡
Here’s a little print I made to clean up the charging situation in our garage. It lets you mount a Type 2 cable to the ceiling so the plug can hang down when you need it, and be out of the way when you don’t.
Boost Me (for free)
Want to support me ? If you love my designs and appreciate the effort behind them, please share and boost to help me keep creating ! 🔥
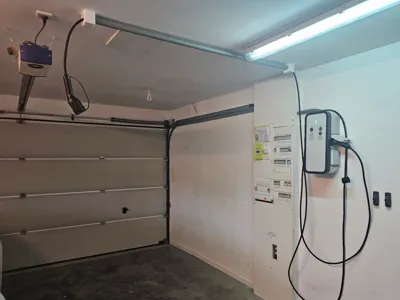
Here's some context, as the shown in the image below, we have 2 EV and a charging station installed up to the wall on the right.
The space in the garage is limited and we have 2 EV have the charging ports in the middle of the garage (no other way of doing it due to the door position and the car length). I figured that it would be a pain to grab the cable, connect it to the station, go around the other car, plug, go back to the station, etc …

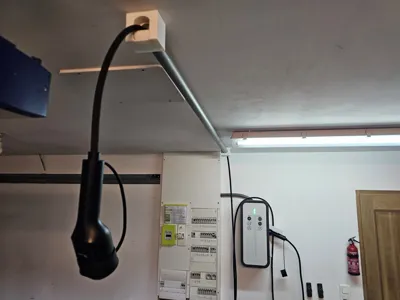
I designed a simple system with rollers mounted on a 40mm PVC pipe. The rollers reduce friction so the cable moves smoothly. The result is awesome as the cable glide without much effort aand work as intended.
I originally tried doing a full 3D-printed version, but it wasn’t stiff enough and ended up costing more than just using PVC, big fail as I wasted quite some filament …

I was aiming for automatic retraction at first — tried a counterweight system — but it didn’t really work with the way I had things set up. So for now, I just pull the cable back across manually when I’m done charging, and honestly, it’s been totally fine. Might revisit that idea later though. Also the PVC pipe will be painted in white to make it less catchy to the eye.
Bill of material :
- 1 EV charging cable, in my case a 10m length was needed, I got mine at 110 euros approx.
- 1 PVC tube, Ø40mm, length 2m (175cm in my case)
- 4 screws and anchors to mount the top brackets to the ceiling
- 4 bearings 608Z
- 8 screws M4x18 (length can vary)
- 8 threaded inserts M4
The PVC pipe must be cut lengthwise to insert the cable and also index it to the rollers. Please exercise extreme caution during this operation, as improper handling may result in injury. I shall not be held responsible for any harm or injury incurred during this process.
Assembly instructions are included, but feel free to reach out if anything’s unclear or if you want to tweak it for your setup.
Thanks for checking it out, hope it helps someone else with a similar garage setup !
Documentation (1)
License
You shall not share, sub-license, sell, rent, host, transfer, or distribute in any way the digital or 3D printed versions of this object, nor any other derivative work of this object in its digital or physical format (including - but not limited to - remixes of this object, and hosting on other digital platforms). The objects may not be used without permission in any way whatsoever in which you charge money, or collect fees.
Comment & Rating (4)