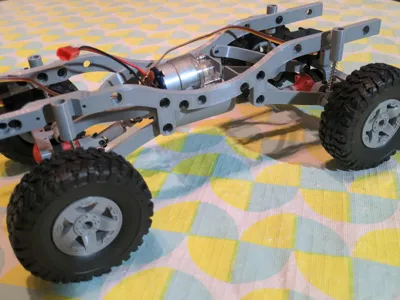
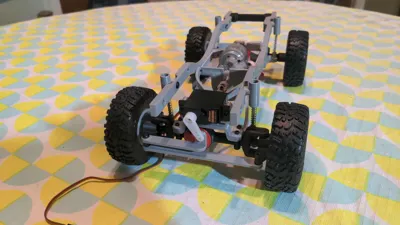
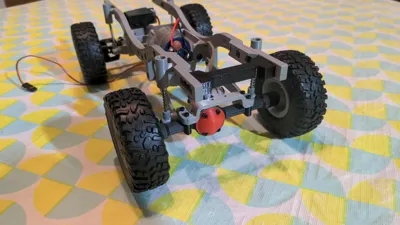
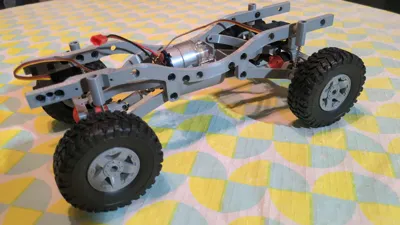
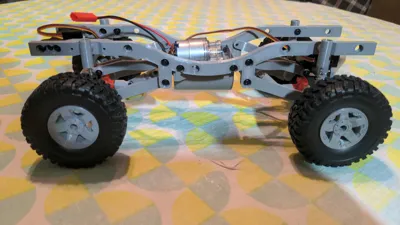
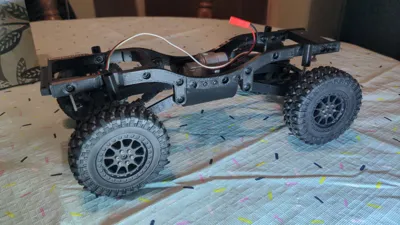
1:16 Truck/Crawler 4x4 RC Chassis


Print Profile(2)


Description
This 3D-printable model draws heavy inspiration from other 1:12 and 1:16 scale models. Every component was designed from the ground up specifically for 3D printing.
Features:
- 190mm wheelbase
- full time 4x4
- no printed gears
- multiple motor options
- highly customizable; easy to turn into 4 wheel steering for example
- compatibility with some WPL parts and some MN accessories
- no soldering required (depending on your motor selection)
Compatible RC Bodies
Required Hardware
- 47x M2.3x6mm coarse-thread washer-head screws. 4 extra screws needed if using the print profile for smaller printers.
- 20x M2x4mm countersunk screws or ideally flat-head screws.
- 16x M2x16mm screws.
- 4x ~26mm long, 4mm OD, 0.4mm comp springs. (0.5mm is too stiff. 0.3mm is very soft). I buy these longer than needed and cut them to length.
- 4x M3x30mm shoulder screw, 4~8mm of thread recommended.
Required RC products
- WPL Metal Axle: both WPL front and WPL rear kits.
- Digital Servo: 17g or 21g servos in size, choose "JR" plug
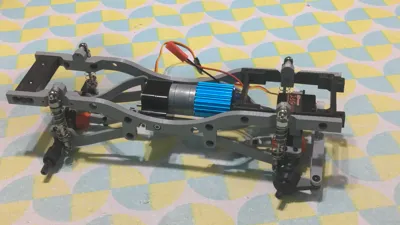
- Motor + Electronic Speed Controller:
- WPL 180 Brushed Motor + Brushed ESC (requires soldering a JST plug)
- MN 260 Brushed Motor + Brushed ESC (requires soldering a JST plug)
- WPL 370 Brushed Motor + Brushed ESC + 4x M3x6mm Socket Head Cap Screws (does not require soldering)
- WPL 2-SPD Gearbox + Brushed ESC (requires soldering the JST plug)
- RC Receiver or any other receiver compatible with your transmitter
- 2S Battery: JST plug
- WPL Tires + 3D printed wheels or MN/WPL wheels & tires.
Optional/Alternative Compatible RC products
Note: These products are not required, but are compatible with this model.
- WPL Metal Shocks: replaces 0.4mm compression springs and M3x30mm shoulder screw
- WPL Metal Beams
- WPL Metal Axles + Housing
Print Settings
The easiest way to print this project is by using the provided print profiles. They have the proper print settings applied to each individual objects. You might need to change your printer, if so make sure to transfer the settings over when you do so. Optionally split the larger plates into smaller ones.
General Print Settings for all the .stl files
- 0.15mm layer height
- 4 perimeters, 30% infill
- PLA or PETG (tested both)
- All files should be printed in the orientation they come with
Note:
- Make sure you have excellent bed adhesion and that your printer is tuned correctly.
- If you're having trouble with female driveshafts, try printing them one at a time.
What to print?
- Print the frame, parts_1, parts_2 plate.
- Print the plate corresponding to your motor (drivetrain)
- Optionally print the optional plate if you don't have a body yet.
Assembly
This video covers assembling the chassis.
History
May 30 2025: Published Extra tolerance parts
Jun 20 2025: Added design reference files: asm_compressed.stl, asm_extended.stl and mounts.step
Jul 14 2025: Added Metal Shock option. Added more motor options. Reformatted text for better clarity.
Jan 10 2026: Added print profile for A1 mini / smaller printers
Apr 19 2026: Updated the following parts to be stronger: axle-truss_x2.stl, axle-truss-link_x4.stl, axle-truss-servo-mount.stl, suspension-link_x4.stl, driveshaft-cross-shaft_x4.stl
Comment & Rating (90)