1/4" Strut / Unistrut Channel Nut (v1)


Print Profile(1)

Description
EDIT: There is a newer version of this model here
https://makerworld.com/en/models/2174555-1-4-struct-channel-nut-v2
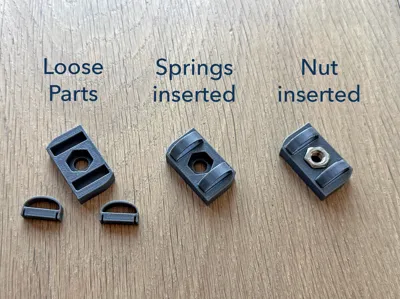
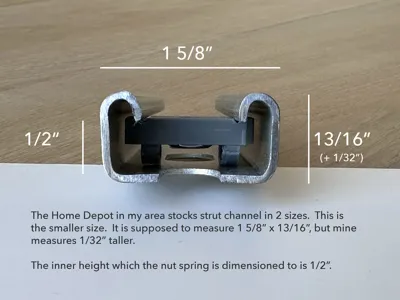
These are DIY strut channel nuts for half-height strut channel. That is, struct channel measuring 1-5/8" wide x 13/16" tall. This includes a spring to hold them in place. These are made for 1/4"-20 hex nuts.
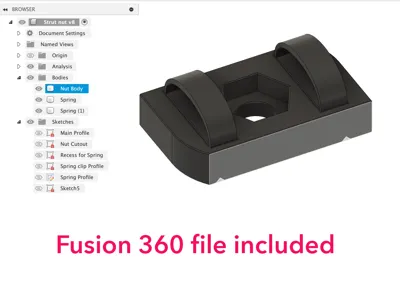
Note: These will work with full-height channels but you won't get the benefit of the spring. I include STEP and Fusion 360 files if you need to change the dimensions.
The model comes as 2 parts, which press fit together. I broke the model into parts to get the best print orientation.
Printing tips:
- avoid PLA, it creeps.
- For the springs, PETG.
- For the Body - PETG works too. ASA/ABS may be better. CF filament is the best I tested. I tested Bambu PLA-CF and stripped the threads of ¼" bolts as they were breaking.
- Use my print file. I did a fair amount of testing and optimized this for strength. If you cannot:
- print the body face down, print springs on the side
- 1 wall loop ← yes, you read that correctly.
- 100% infill. This is a must.
- Infill: Aligned Rectilinear at 90 degree angle (lengthwise of the body)
- Slow Inner + Outer wall speed down (on Bambu printer at least)
- Wall generator: Arachne
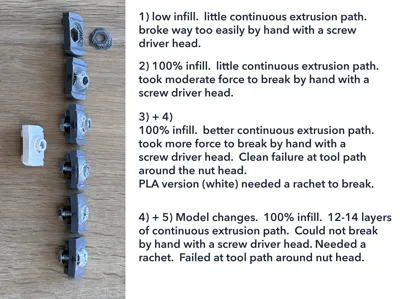
My first model was pathetically weak. Each iteration of print parameters and model changes got better:

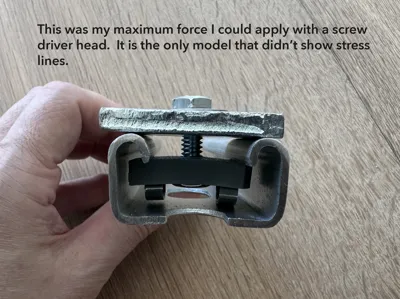
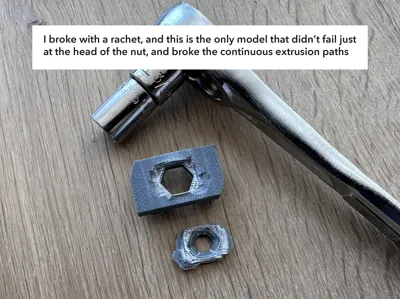
This is the model I posted .. number 6 … (not included above). It is quite strong.

It required the most force to break and snapped the extrusion paths where the model is strongest, as opposed to delamination of intra layer bonds like the other parts:

This is a view of a weaker part. The model and slicing parameters change the strength significantly, and can be counter intuitive as well. For example, more wall loops are weaker:

This is what you should see from my print file. You want the slices under the nut to look like this:

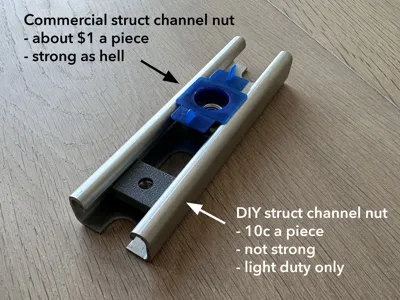
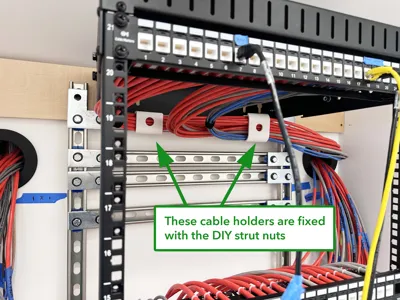
My use case: I'm building a home server rack and I added strut channels to the back of a 2 post wall mounted rack to help manage cabling. A 4 post rack would have been an option, but I was already committed to a 2 post. Strut is a complete overkill, but you can buy 10' lengths for $25 and the modularity of it is amazing. The cost of bits to bolt everything together adds up quick though. I used commercial nuts for the structure, and use these DIY nuts to mount cable holders, which are also 3d printed.

Comment & Rating (8)