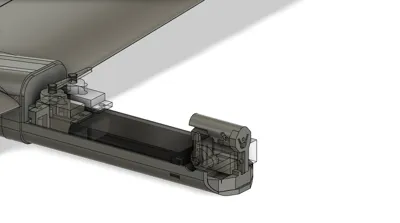
RC Glider Tow Release Mechanism for MG90S Servo


Print Profile(1)

Bill of Materials
- Steelwire x 1: Diameter:1mm
- MG90s x 1: MG90S
Description
Take your RC glider adventures to the next level with this precision-designed tow release mechanism, engineered specifically for the popular MG90S servo. Whether you're launching your glider with a tug plane or setting up a winch-based system, this tow hook assembly ensures secure towing and reliable release—every time.
Key Features:
- Servo-Compatible Design: Tailored to fit the MG90S servo, this model provides a snug and secure mounting solution, eliminating any guesswork.
- Compact & Lightweight: Ideal for smaller RC gliders and DLG models where weight and space are critical.
- Easy Integration: Mounts directly to the fuselage or servo bay with minimal hardware.
- Smooth Release Action: Engineered linkage ensures consistent and jitter-free line release when activated by the servo.
Recommended Hardware:
- MG90S metal gear micro servo
- M2 screws or similar for mounting
- Thin pull wire (Steel, 1mm recommended)
- Superglue to glue it into the fuselage
Wire Shaping Guidance:
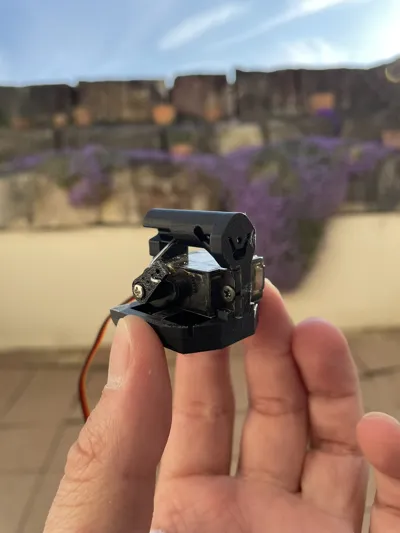
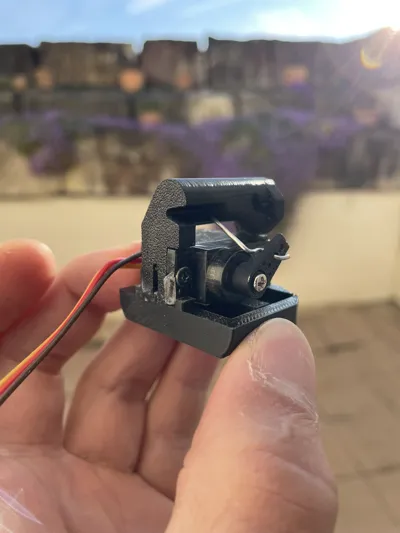
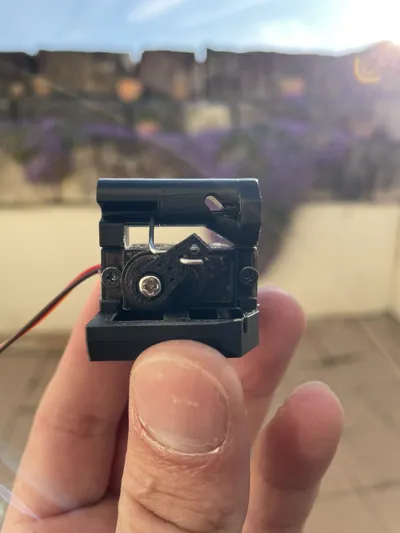
This design uses a bent metal wire as part of the release mechanism which needs further assembly. Example how to bend it is shown on the pictures. The wire hooks into the release arm and loops through the towline, releasing it when rotated by the servo.
Assambly:
To assemble the tow release mechanism, begin by securely screwing the MG90S servo into the main mounting bracket using M2 screws. Once the servo is fixed in place, take a piece of approximately 1 mm thick steel wire and slide it into the cylindrical hole in the release arm. Push the wire in until it just starts to come out the front of the cylinder. At this point, bend the wire 90 degrees outward. Continue shaping the wire with additional bends so that it can be properly fixed into one of the holes of the servo horn. It's important to ensure that the servo is already set to its fully extended (forward) position before doing this, so that the release mechanism will operate with the correct range of motion. Now, attach the servo horn to the bent wire at the designated spot and screw the horn onto the servo shaft. Once this is done, glue the entire assembly into the printed base, and finally, glue the base into the fuselage of your glider. Alternatively, the base can be omitted and the assembly glued directly into the fuselage; however, this may reduce the available bonding surface and affect strength.
Comment & Rating (3)