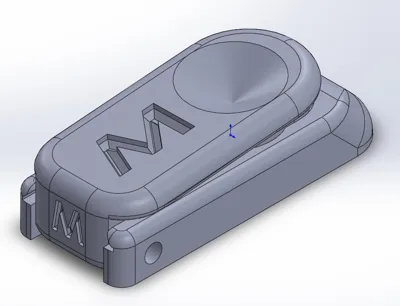
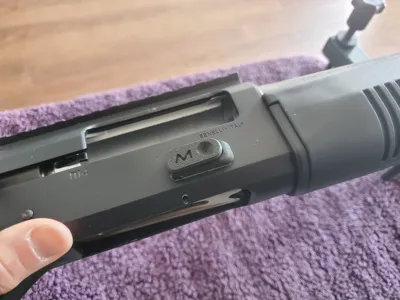
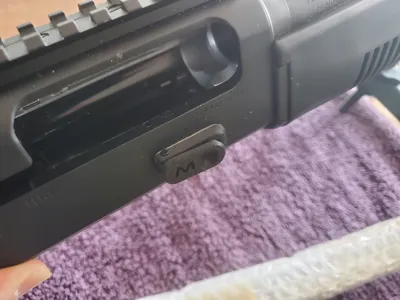
BENELLI M4 Bolt Release Button


Print Profile(3)


Description
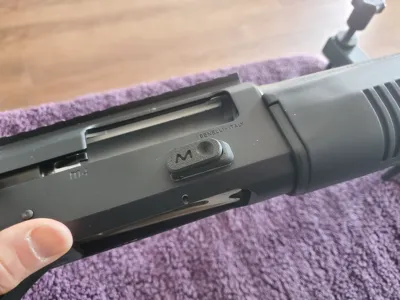
The Benelli M4 is a truly remarkable shotgun. Its only shortcomings are the diminutive bolt release and charging handle. I've endeavored to rectify these with this custom design.
Months ago, I released a bolt release button cap, but unfortunately, it was imperfect and subsequently removed. After months of refinement and iteration, this redesigned bolt release button cap is now complete.
Furthermore, the extended charging handle extension is now field-tested and ready for those seeking an upgrade: BENELLI M4 Charging Handle Extension by Meaommy - MakerWorld
Important Disclaimer: Safe firearm handling is your sole responsibility. Assess the safety of this project yourself; neither this project nor its creator bears liability for any risk or consequence.
This project has undergone extensive live-fire testing with excellent results (approximately 275 rounds of birdshot fired as of 21-04-2025).
Assembly requires the following components:
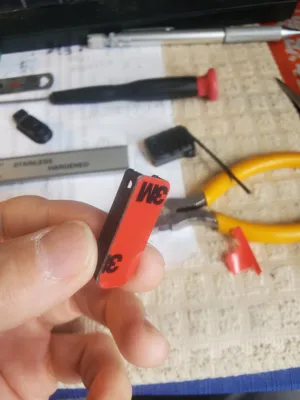
A short length of filament to serve as a pivot, a small piece of 3M Scotch Brand Tape, and Core Series JS double-sided foam tape. The latter secures the base to the receiver. This type of tape is commonly used for adhering plastic trim pieces in automotive interiors.

Assembly instructions:
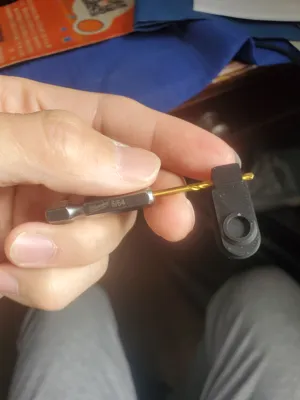
1. First, use a 5/64 drill bit to clear the pivot hole.

2. Ensure the filament passes freely through the hole.

3. Apply double-sided tape to the back of the base.

4. Cover the unadhered areas with protective film.

5. Use a sharp blade to trim the central hole. Ensure the hole remains clean and free of adhesive residue.


6. Soften one end of the filament with a lighter and flatten it to create a mushroom-shaped head.

7. Slide the button cap into the base through the side opening.

8. Insert the filament pin, trim to length, and create a mushroom head on the opposite end to secure it in place.

9. Leave the protective film on the adhesive. Attach the cap to the original bolt release. While ensuring safety, test the bolt release mechanism. Try loading rounds into the magazine tube. Verify all operations function correctly. For safety, absolutely refrain from using live ammunition during this phase. Only utilize inert snap caps or spent casings.

10. Once functionality is verified, remove the protective film and adhere the cap base to the receiver. Clean the receiver surface thoroughly with alcohol or a similar solvent to ensure a secure bond.


11. After adhering the base, avoid immediate firm pressure. Retest all operations to ensure no binding or interference with loading. Once satisfactory, firmly press the base for a secure bond.


12. As of now, I’ve conducted approximately 200 rounds of live-fire testing. The button cap performs flawlessly!


13. A quick advertisement. The charging handle extension, after several iterations and refinements, has passed live-fire testing and is officially released. Give it a try.
BENELLI M4 Charging Handle Extension by Meaommy - MakerWorld


Finally, I wish you all the satisfaction of crafting your own perfect Benelli M4
License
You shall not share, sub-license, sell, rent, host, transfer, or distribute in any way the digital or 3D printed versions of this object, nor any other derivative work of this object in its digital or physical format (including - but not limited to - remixes of this object, and hosting on other digital platforms). The objects may not be used without permission in any way whatsoever in which you charge money, or collect fees.
Comment & Rating (26)