
Ryn25 2.5" DJI O4 Pro FPV Drone Frame 3D Prints
Print Profile(1)

Description
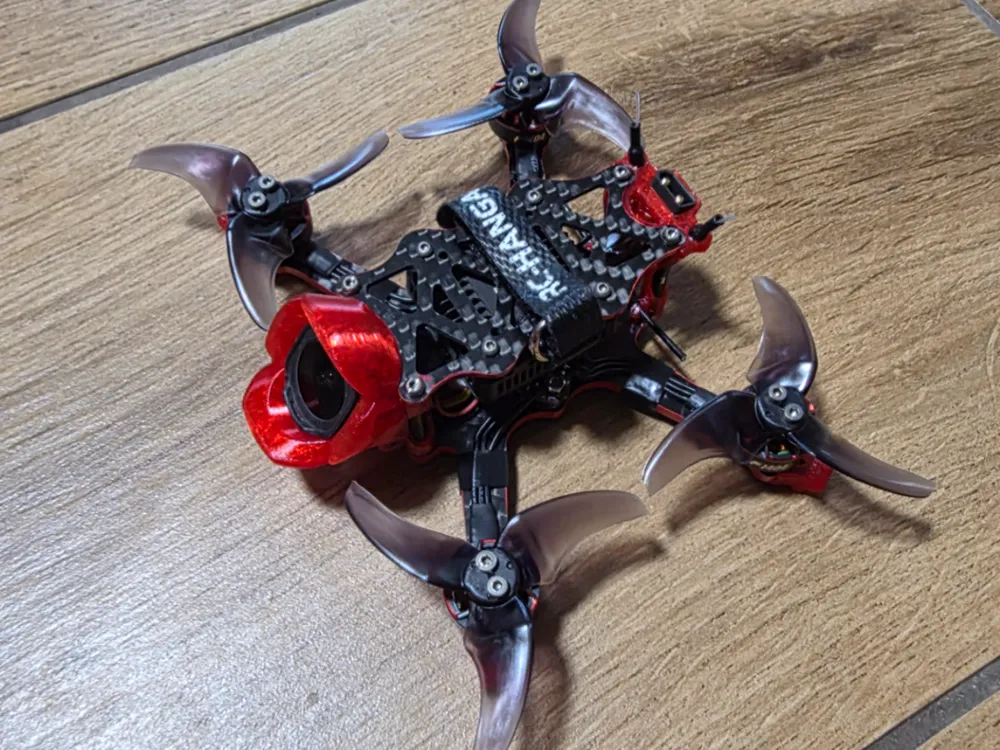
Disclaimer: You can only download the 3D-Print Files for this Frame here. The Frame itself is made out of Carbon Plates like most regular FPV Frames.
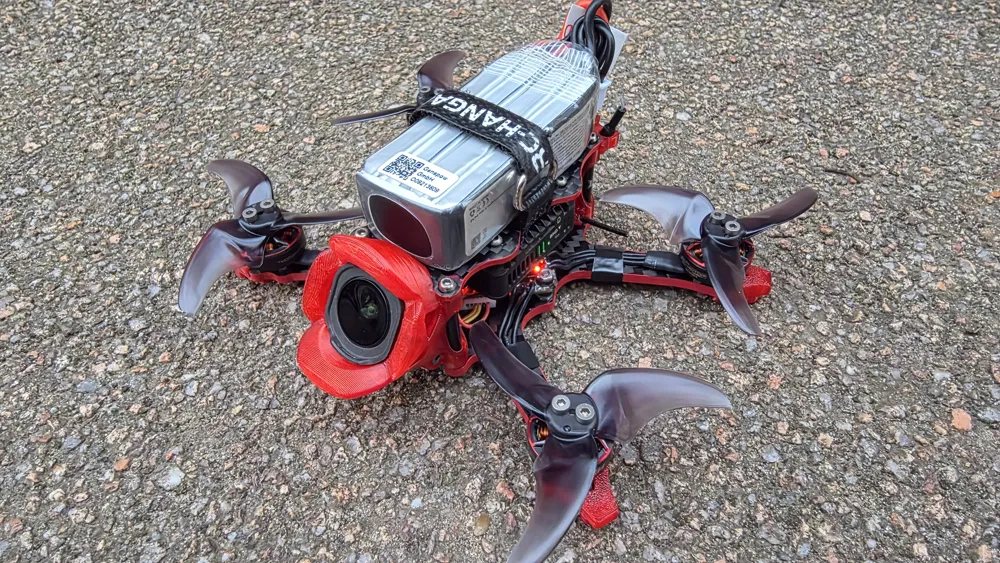
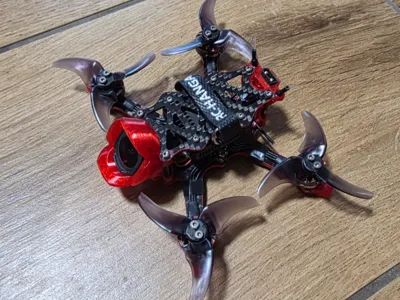
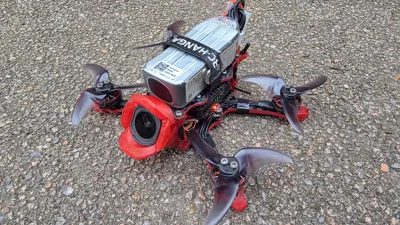
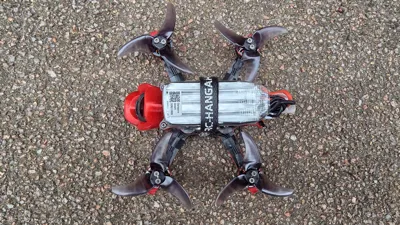
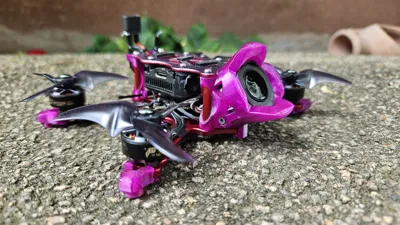
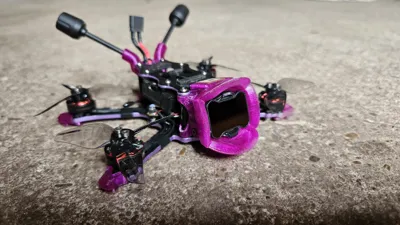
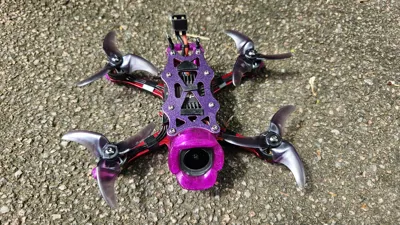
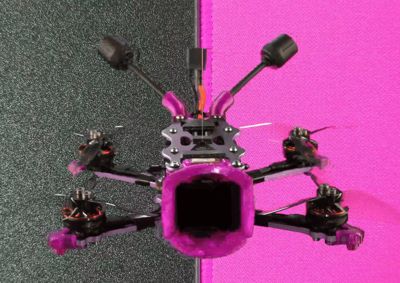
Also please note some Pictures here show the old (V6) Version of this Frame. If you buy this frame you will receive the newest Version (V7).
Ryn25 Links
Buy the Frame with Hardware and 3D Prints in the EU
What is the Ryn25?
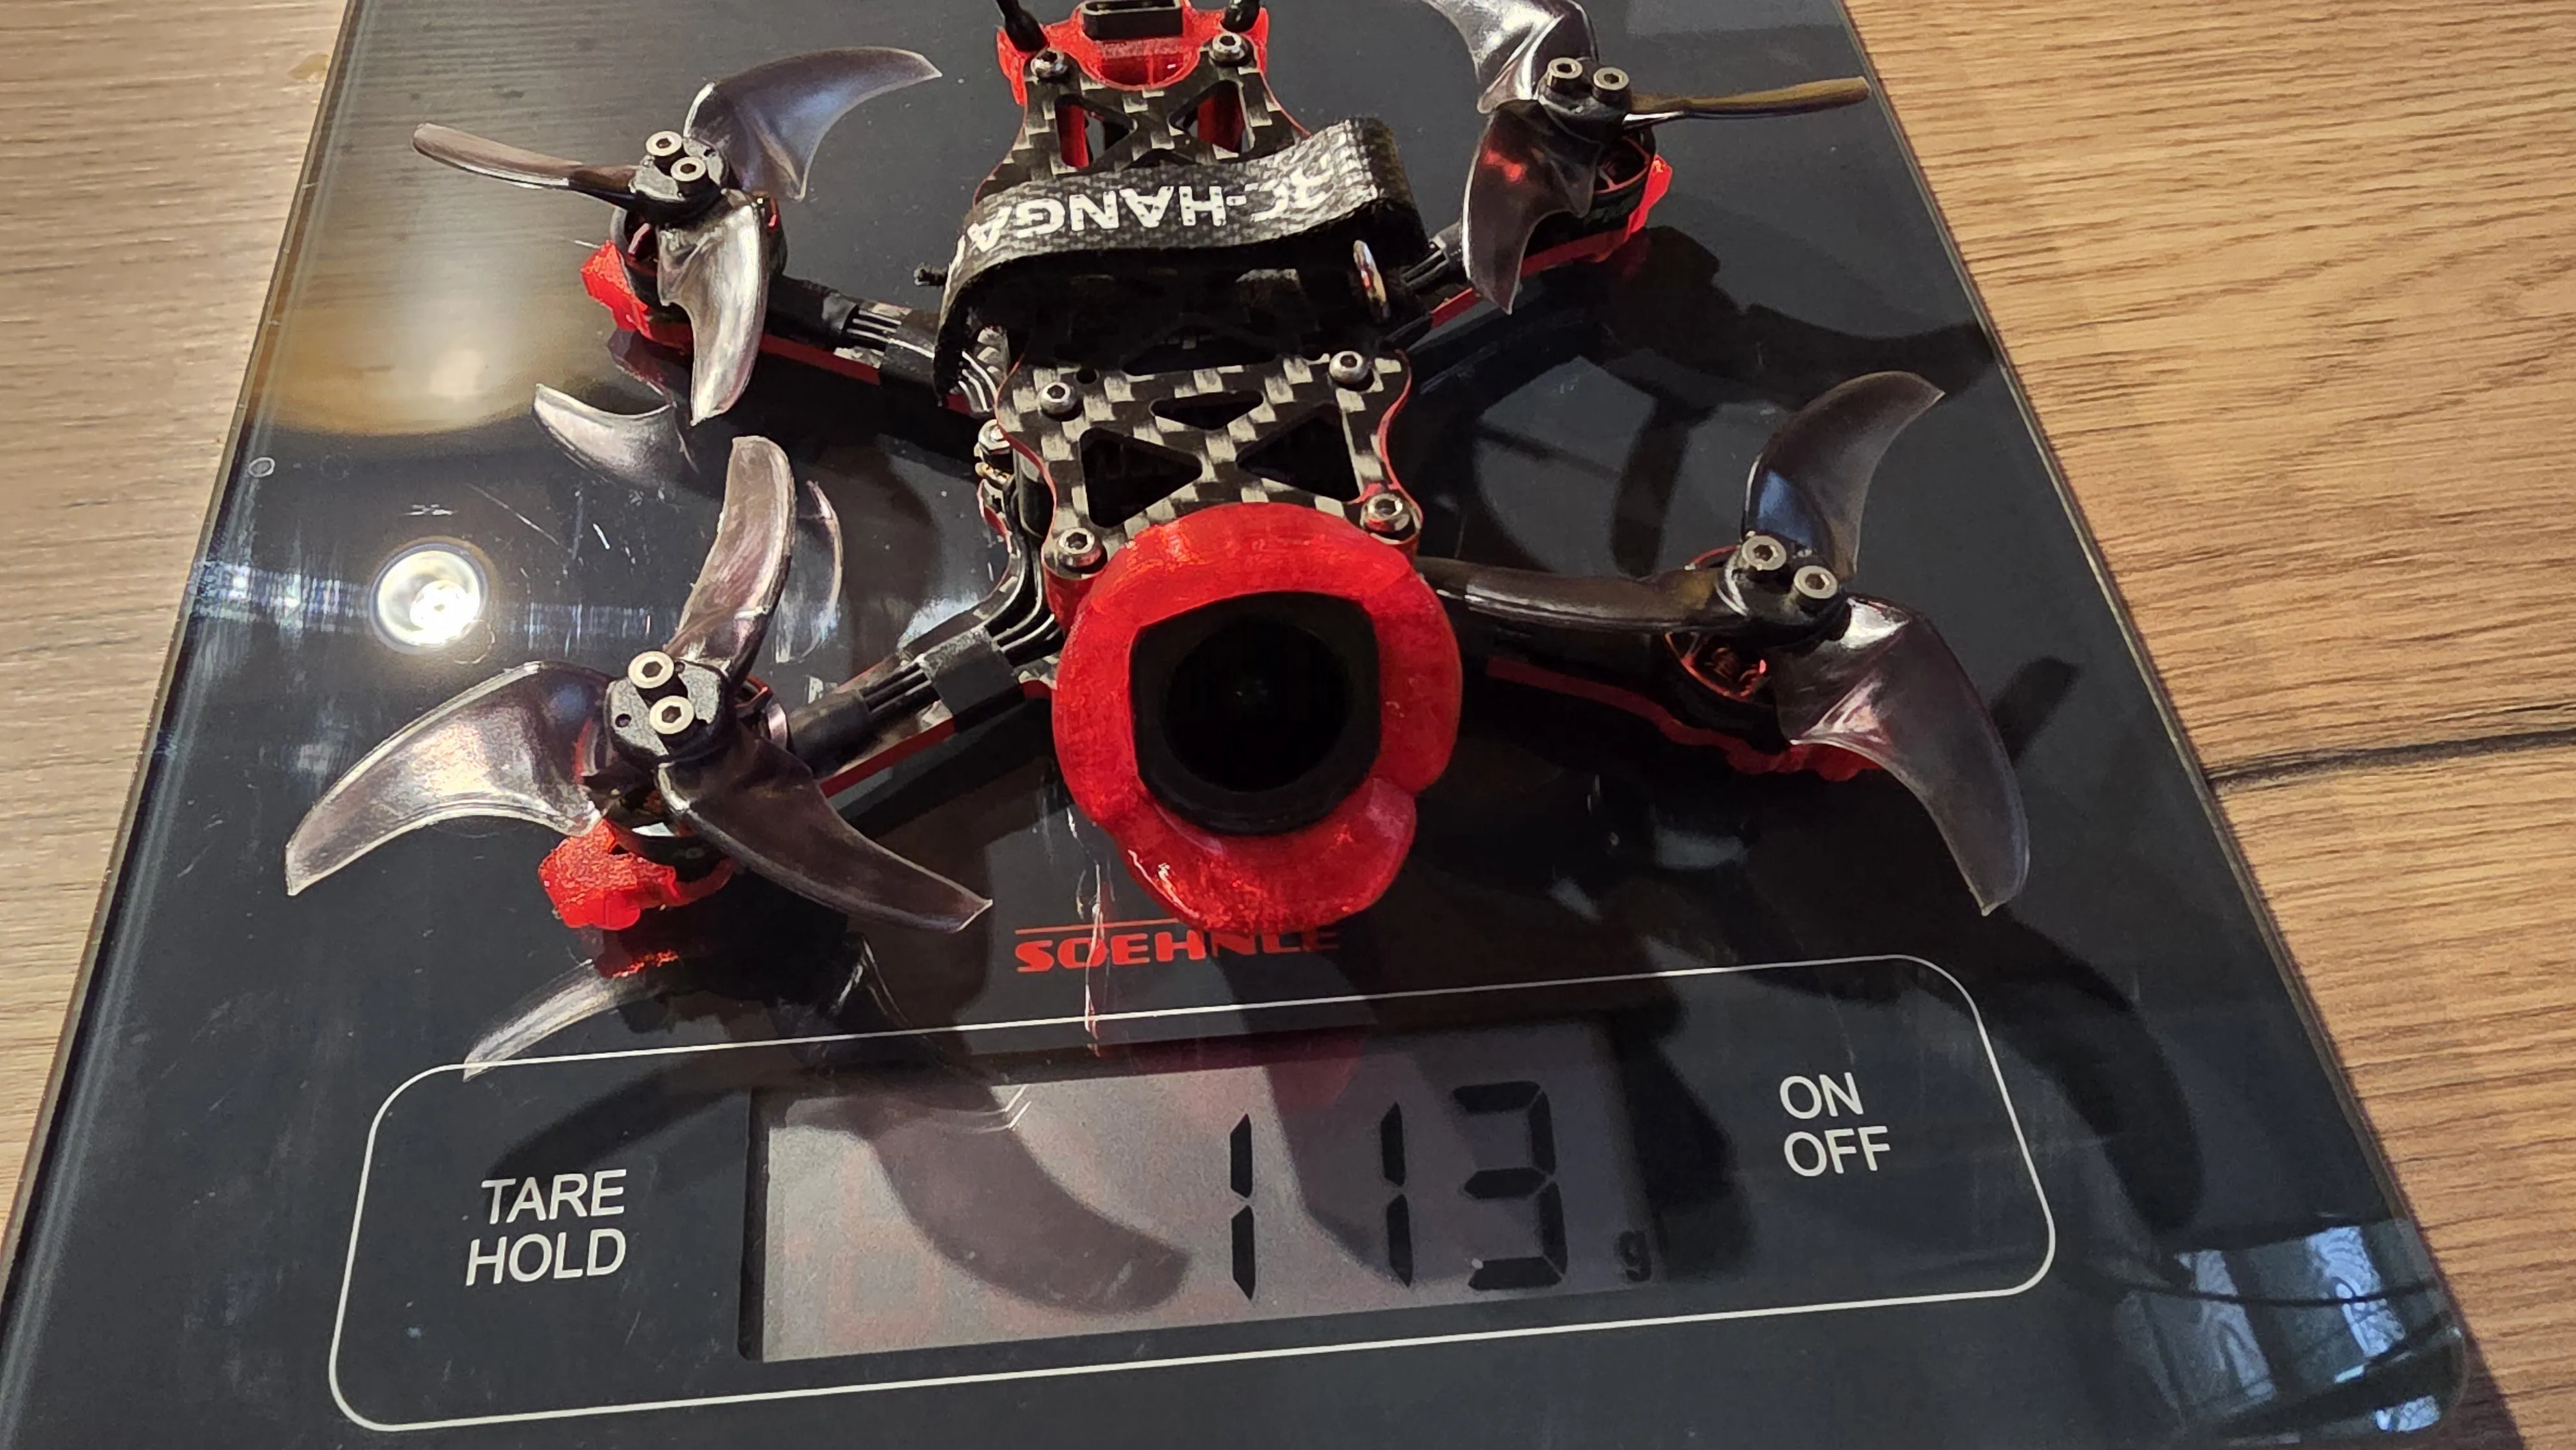
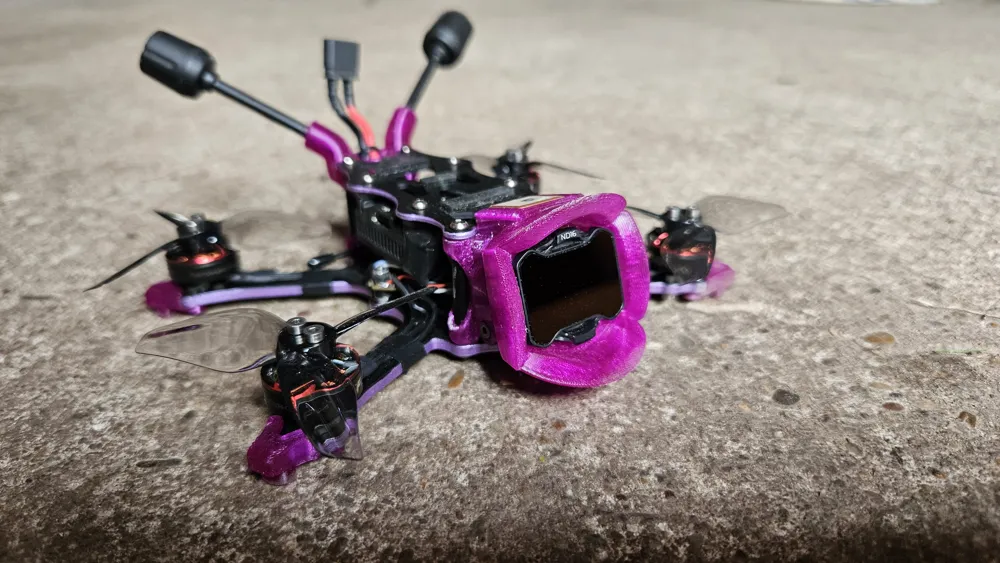
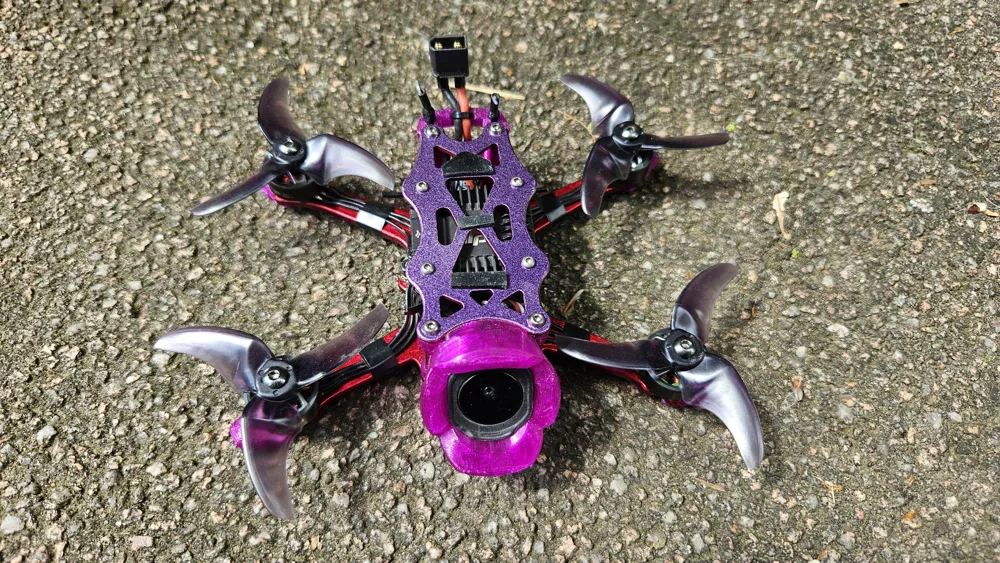
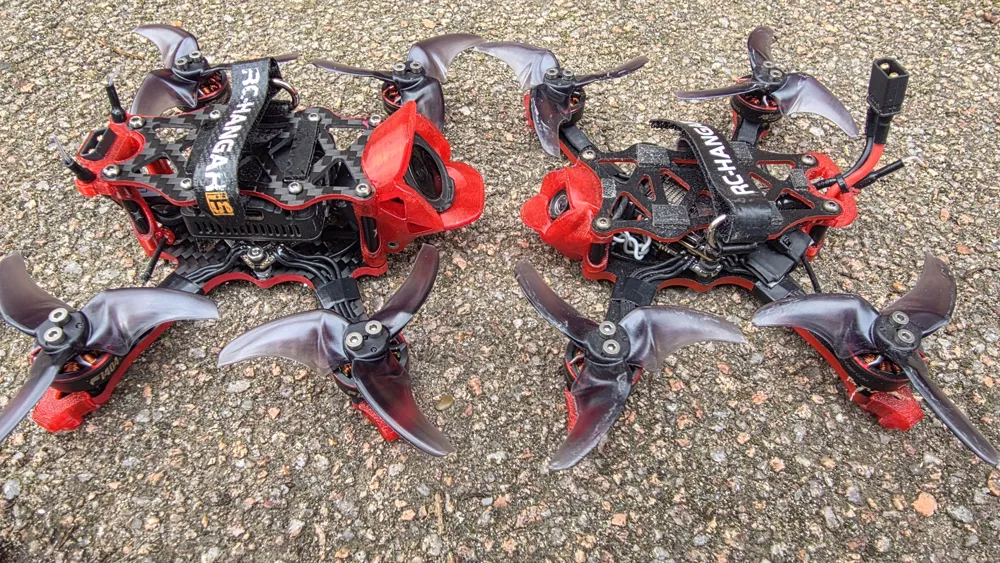
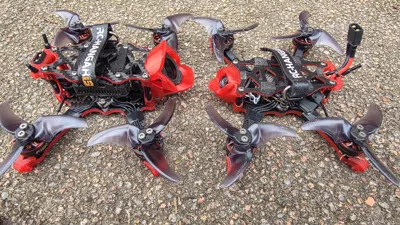
The Ryn25 is a 2.5" FPV Drone that after going through 6 prototypes is designed to be very durable while also being as light as possible made for the DJI O4 Pro Air unit.
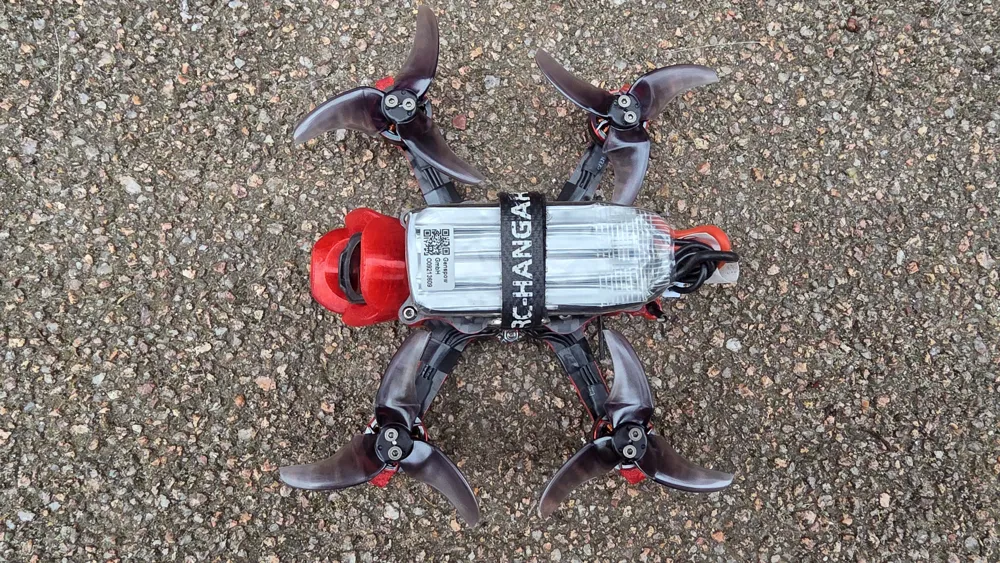
The Drone itself weighs in at only 113g and with the recommended 550Mah 4S Lipo it has a takeoff weight of 173g.
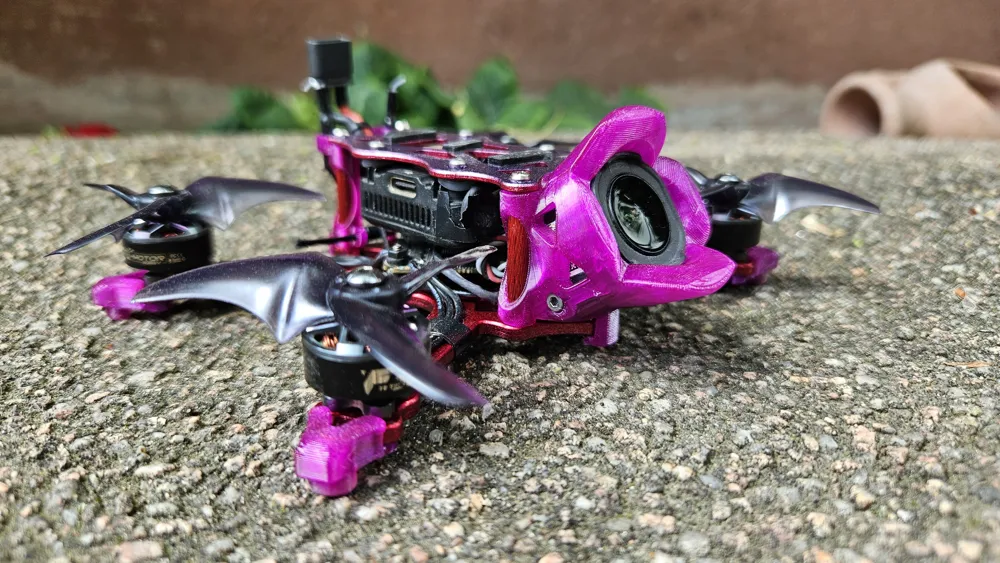
Meanwhile the arms are durable because at 2.5 inches they are very short and also not exposed to a lot of force due to the lightness of the build. The Frame is protected with 3D Prints in all the right places and most importantly: the o4 Pro Camera is maximally protected without limiting the FoV in a tough 3D Print.
The Quadmula Djinn built with identical parts weighs in at 148g (this is already much lighter than most people build it). Which makes
it about 28% heavier than the Ryn25.

This all means the Ryn25 is a great choice especially for freestyle pilots looking for a smaller drone. Its powerful, has all the advantages of the wider FoV, greater Image Quality, 4k recording and lower latency of the O4 Pro while still being very small, light and reasonably quiet.
Main Stats:
Prop Size: 2.5"
Frame Dimensions (with prints): Length: 10.5cm, Width: 13cm
Weight fully built with recommended parts: 113g
Takeoff Weight: (including LiPo): 173g
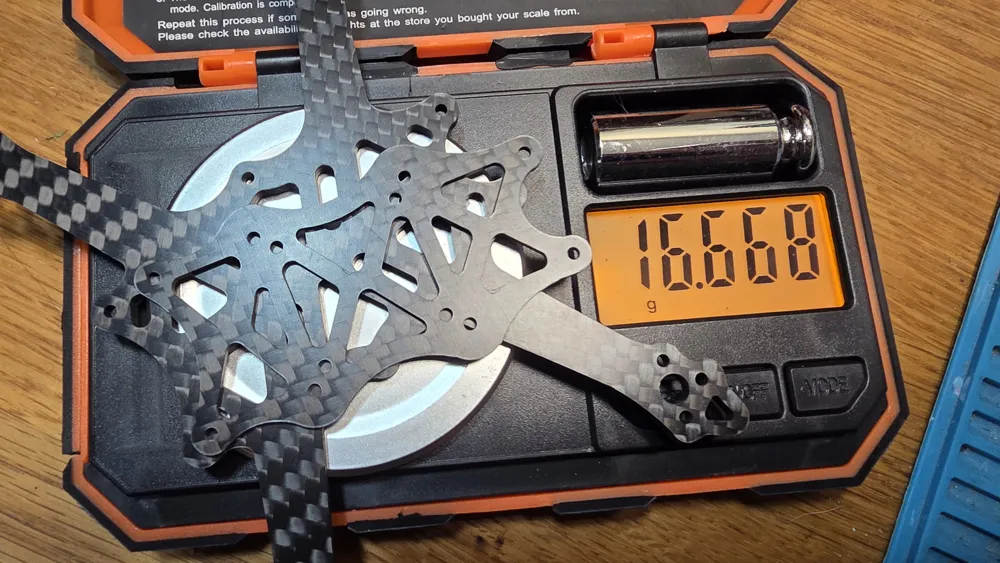
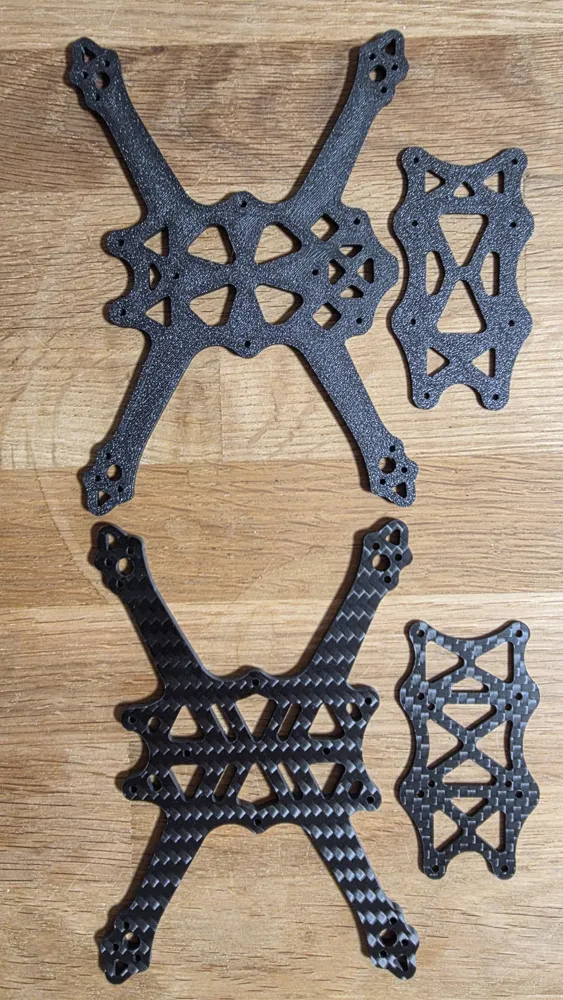
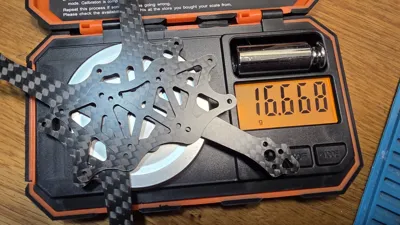
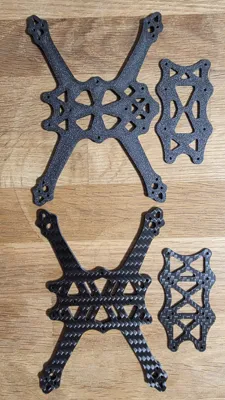
Weight Carbon only: 16.7g
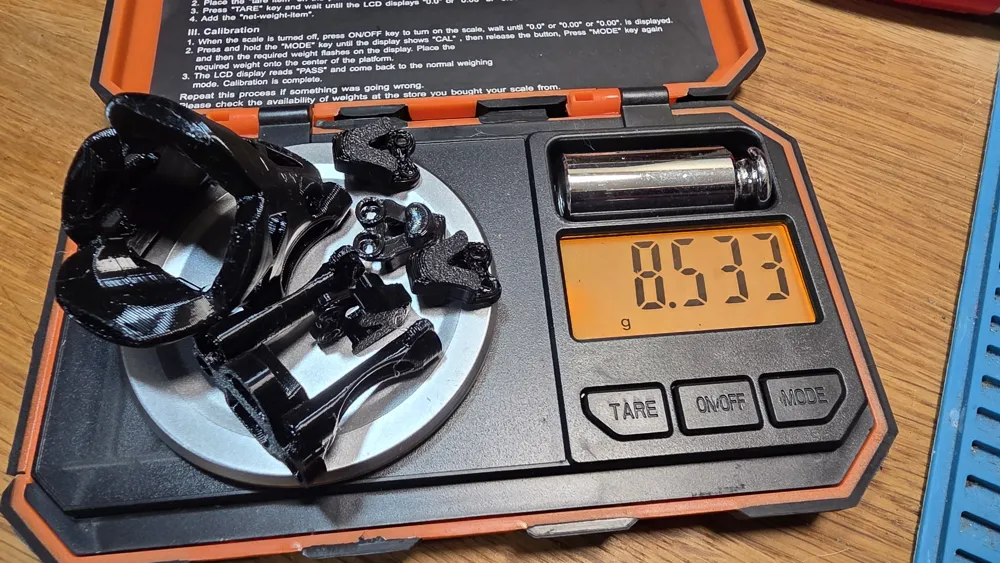
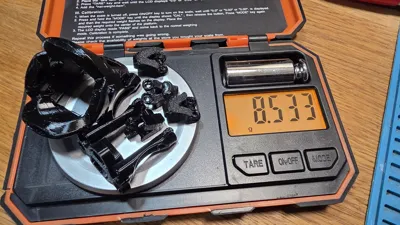
Weight Carbon, Standoffs, full Prints: 28g
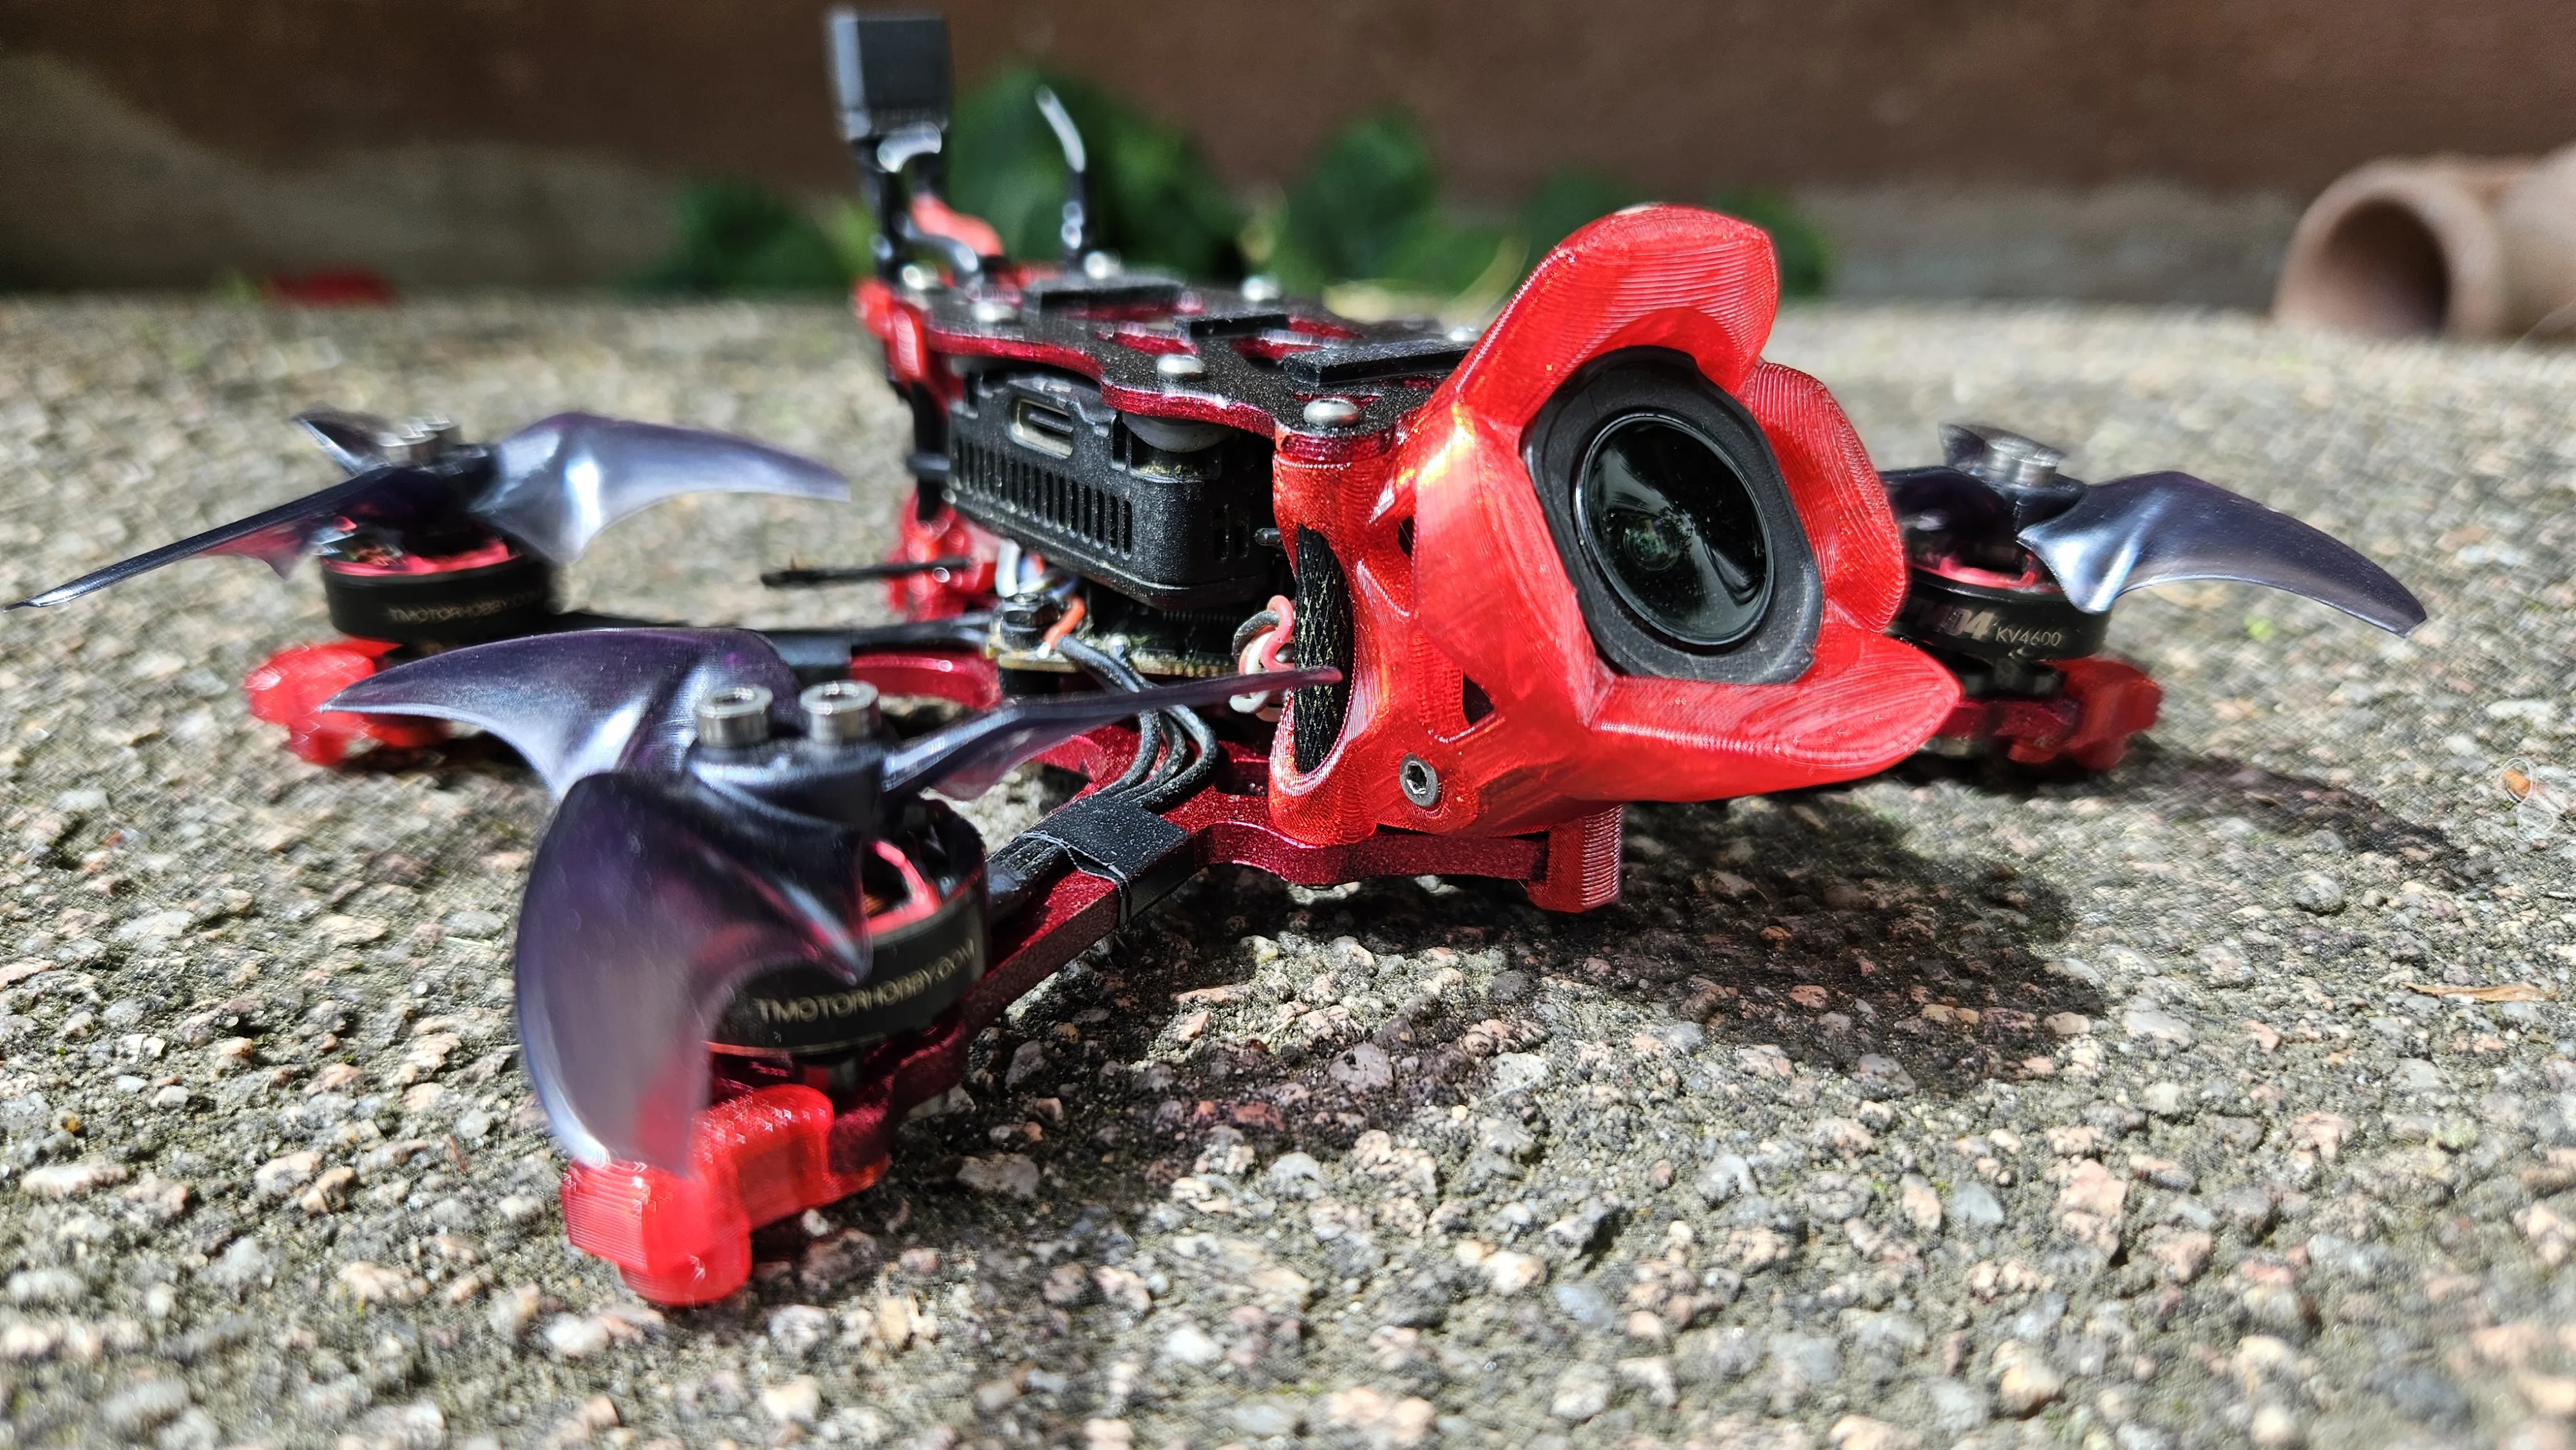
Bottom Plate thickness: 3mm
Top Plate Thickness: 1.5mm
Motor Mounting Pattern: 9mm (M2)
AIO Mounting Pattern: 25.5x25.5mm (M2)
VTX Mounting Pattern: 20x20mm (M2) and 25.5x25.5mm (M2)
Flight Time slow cruise with HQ TR2.5x2.5x3 Props:
with Tattu R-Line 4s 550 Mah: 8:30 Min
with Tattu R-Line 4s 850 Mah: 11 Min (still ~30g below the 250g Limit)
Flight Time slow cruise with Avan Rush Props:
with Tattu R-Line 4s 550 Mah: 7 Min (aggressive Freestyle: 3 Min)
with Tattu R-Line 4s 750 Mah: 9 Min
with Tattu R-Line 4s 850 Mah: 10 Min
Top Speed with the Rush Props: 130 km/h, more is possible
by using a higher Pitch Prop. I only tested with the Rush Props
New Version Ryn25 V7
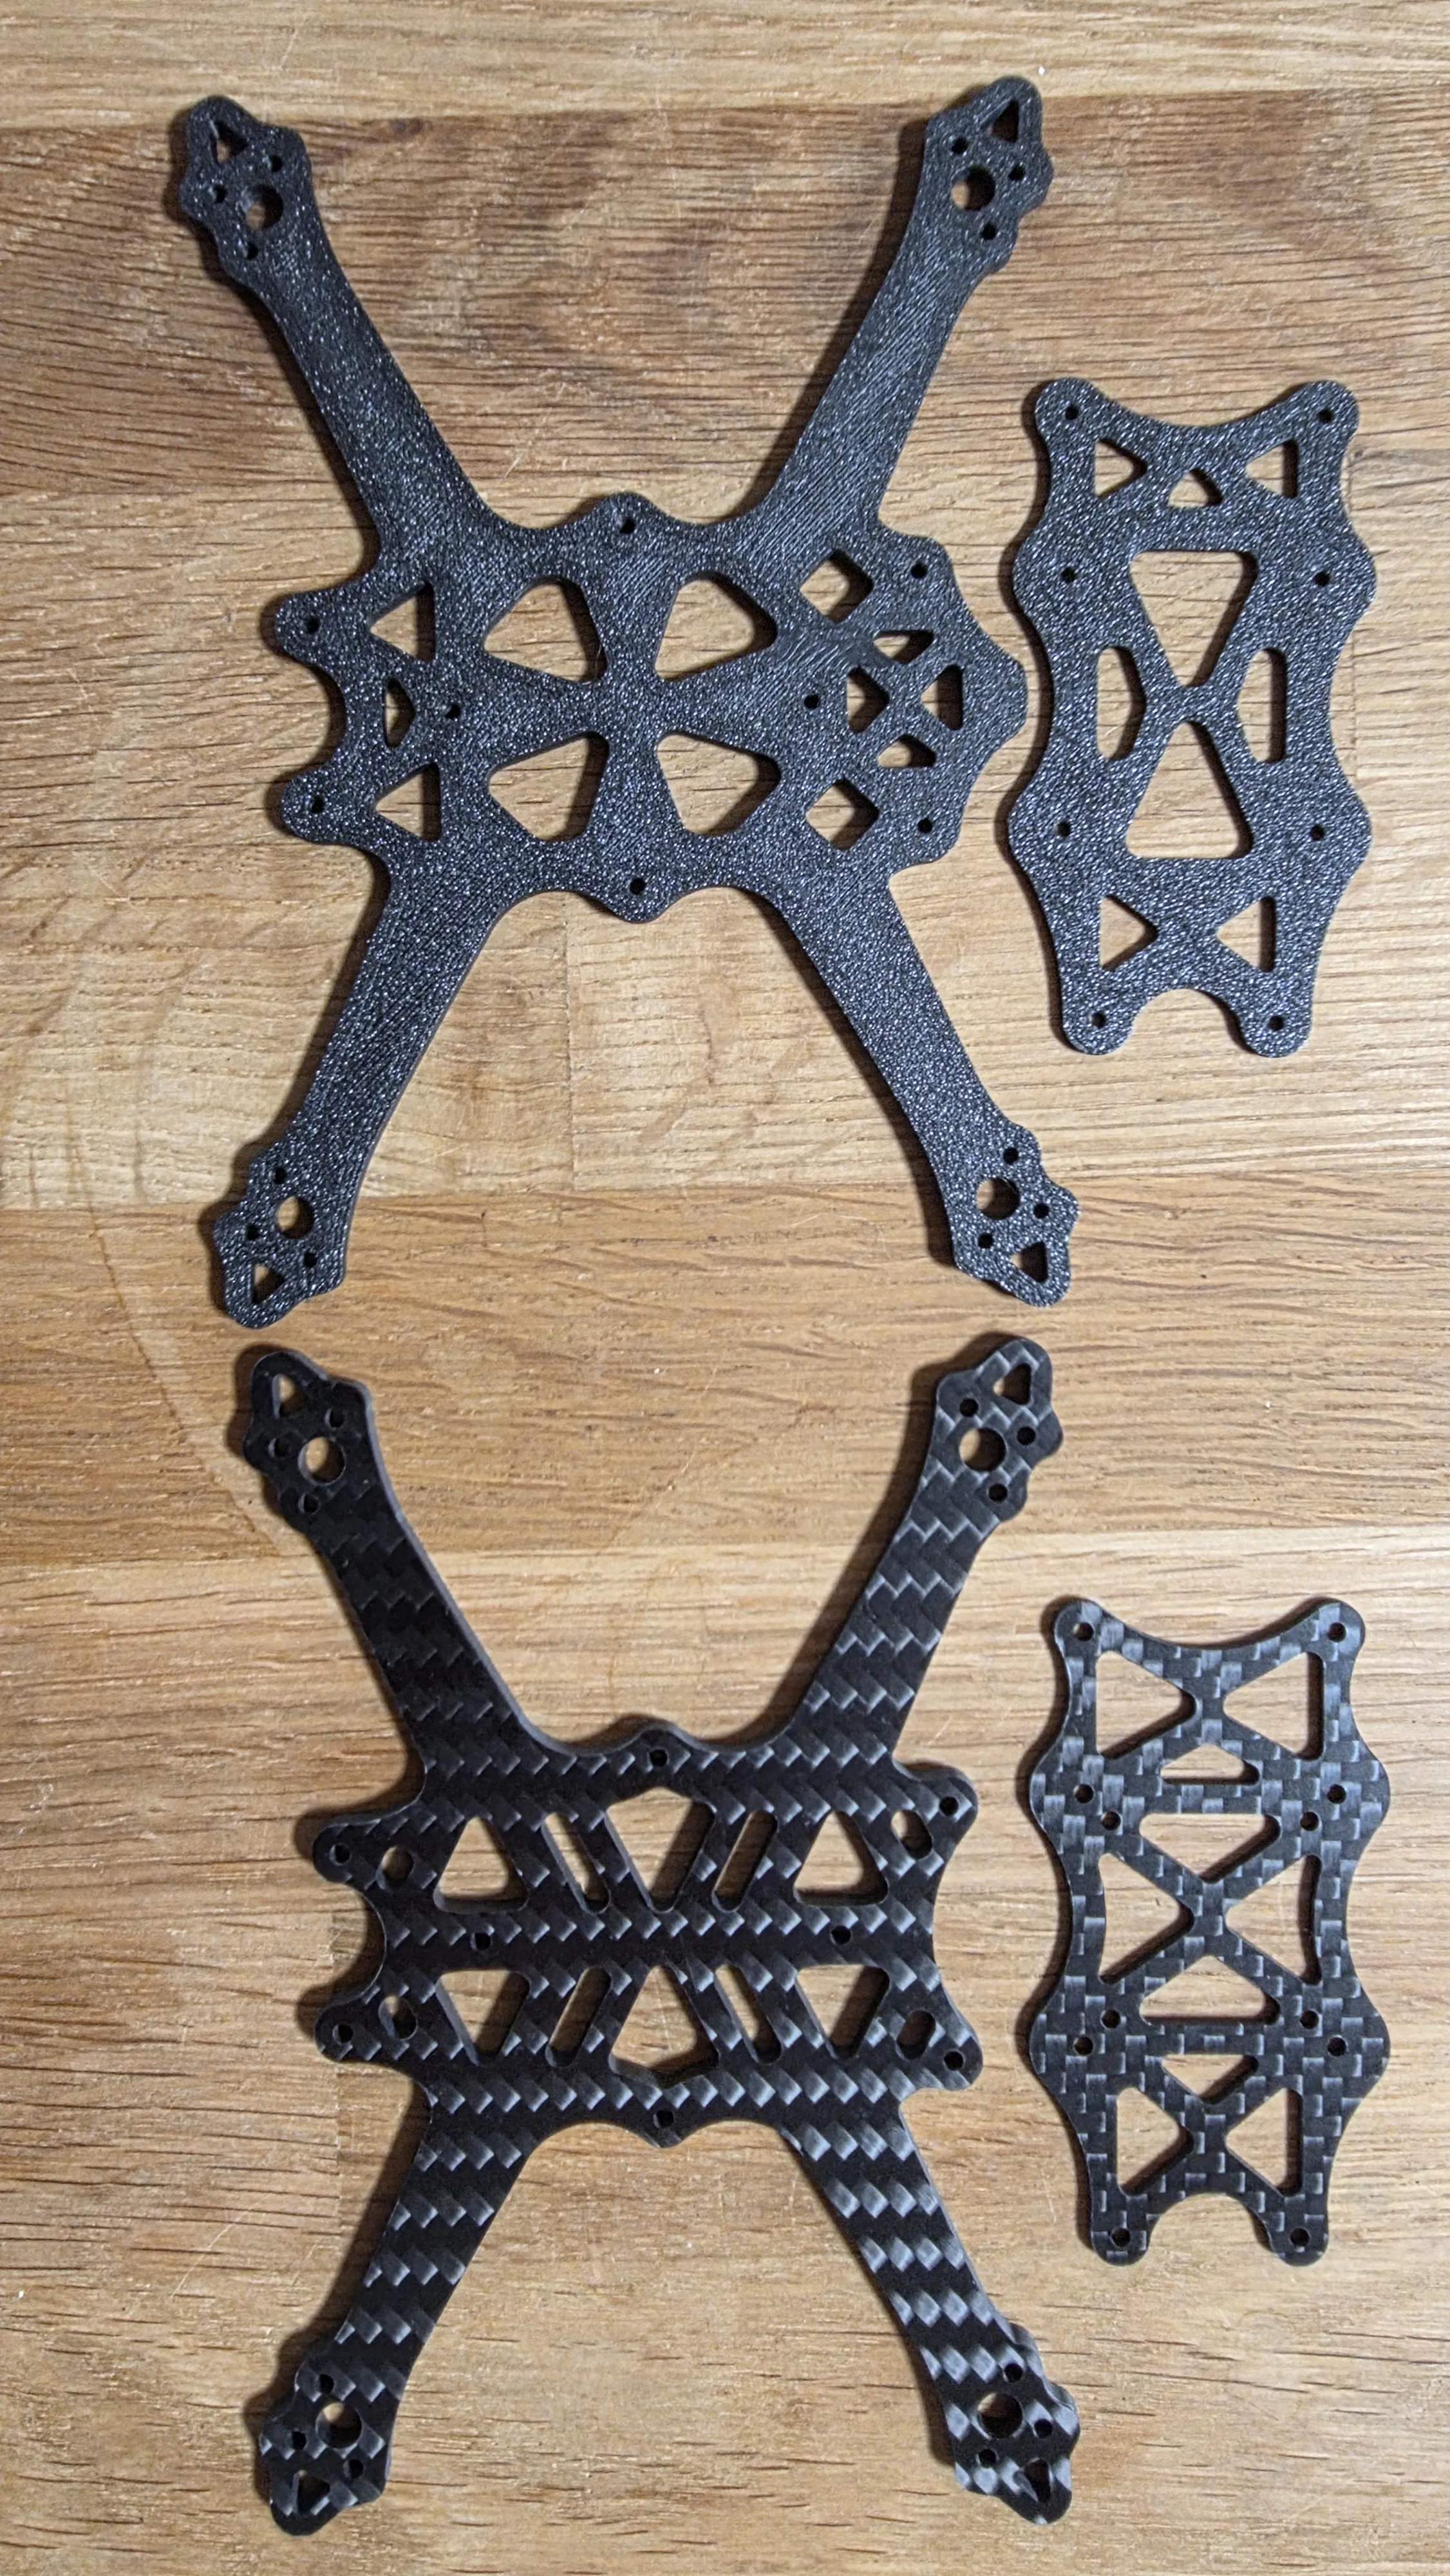
As of 21.10.2025 a new Version of the Frame is available. The first public release version was V6 now its V7. If you buy the Frame after 21.10.2025 you will receive said new Version.
Main Changes are completely redone Frame Cut-Outs to reduce weight. The Carbon Plates have a slightly reduced footprint in the front and back in accordance with going from 4mm Diameter Standoffs to 3.5mm Standoffs.
The arms have been shortend and moved further in (minimally).
20x20mm VTX Mounting has been added if someone wants to do a DIY HD-Zero Race build or something similar.
With a slightly lighter frame, prints and standoffs the overall weight is reduced by ~3g.

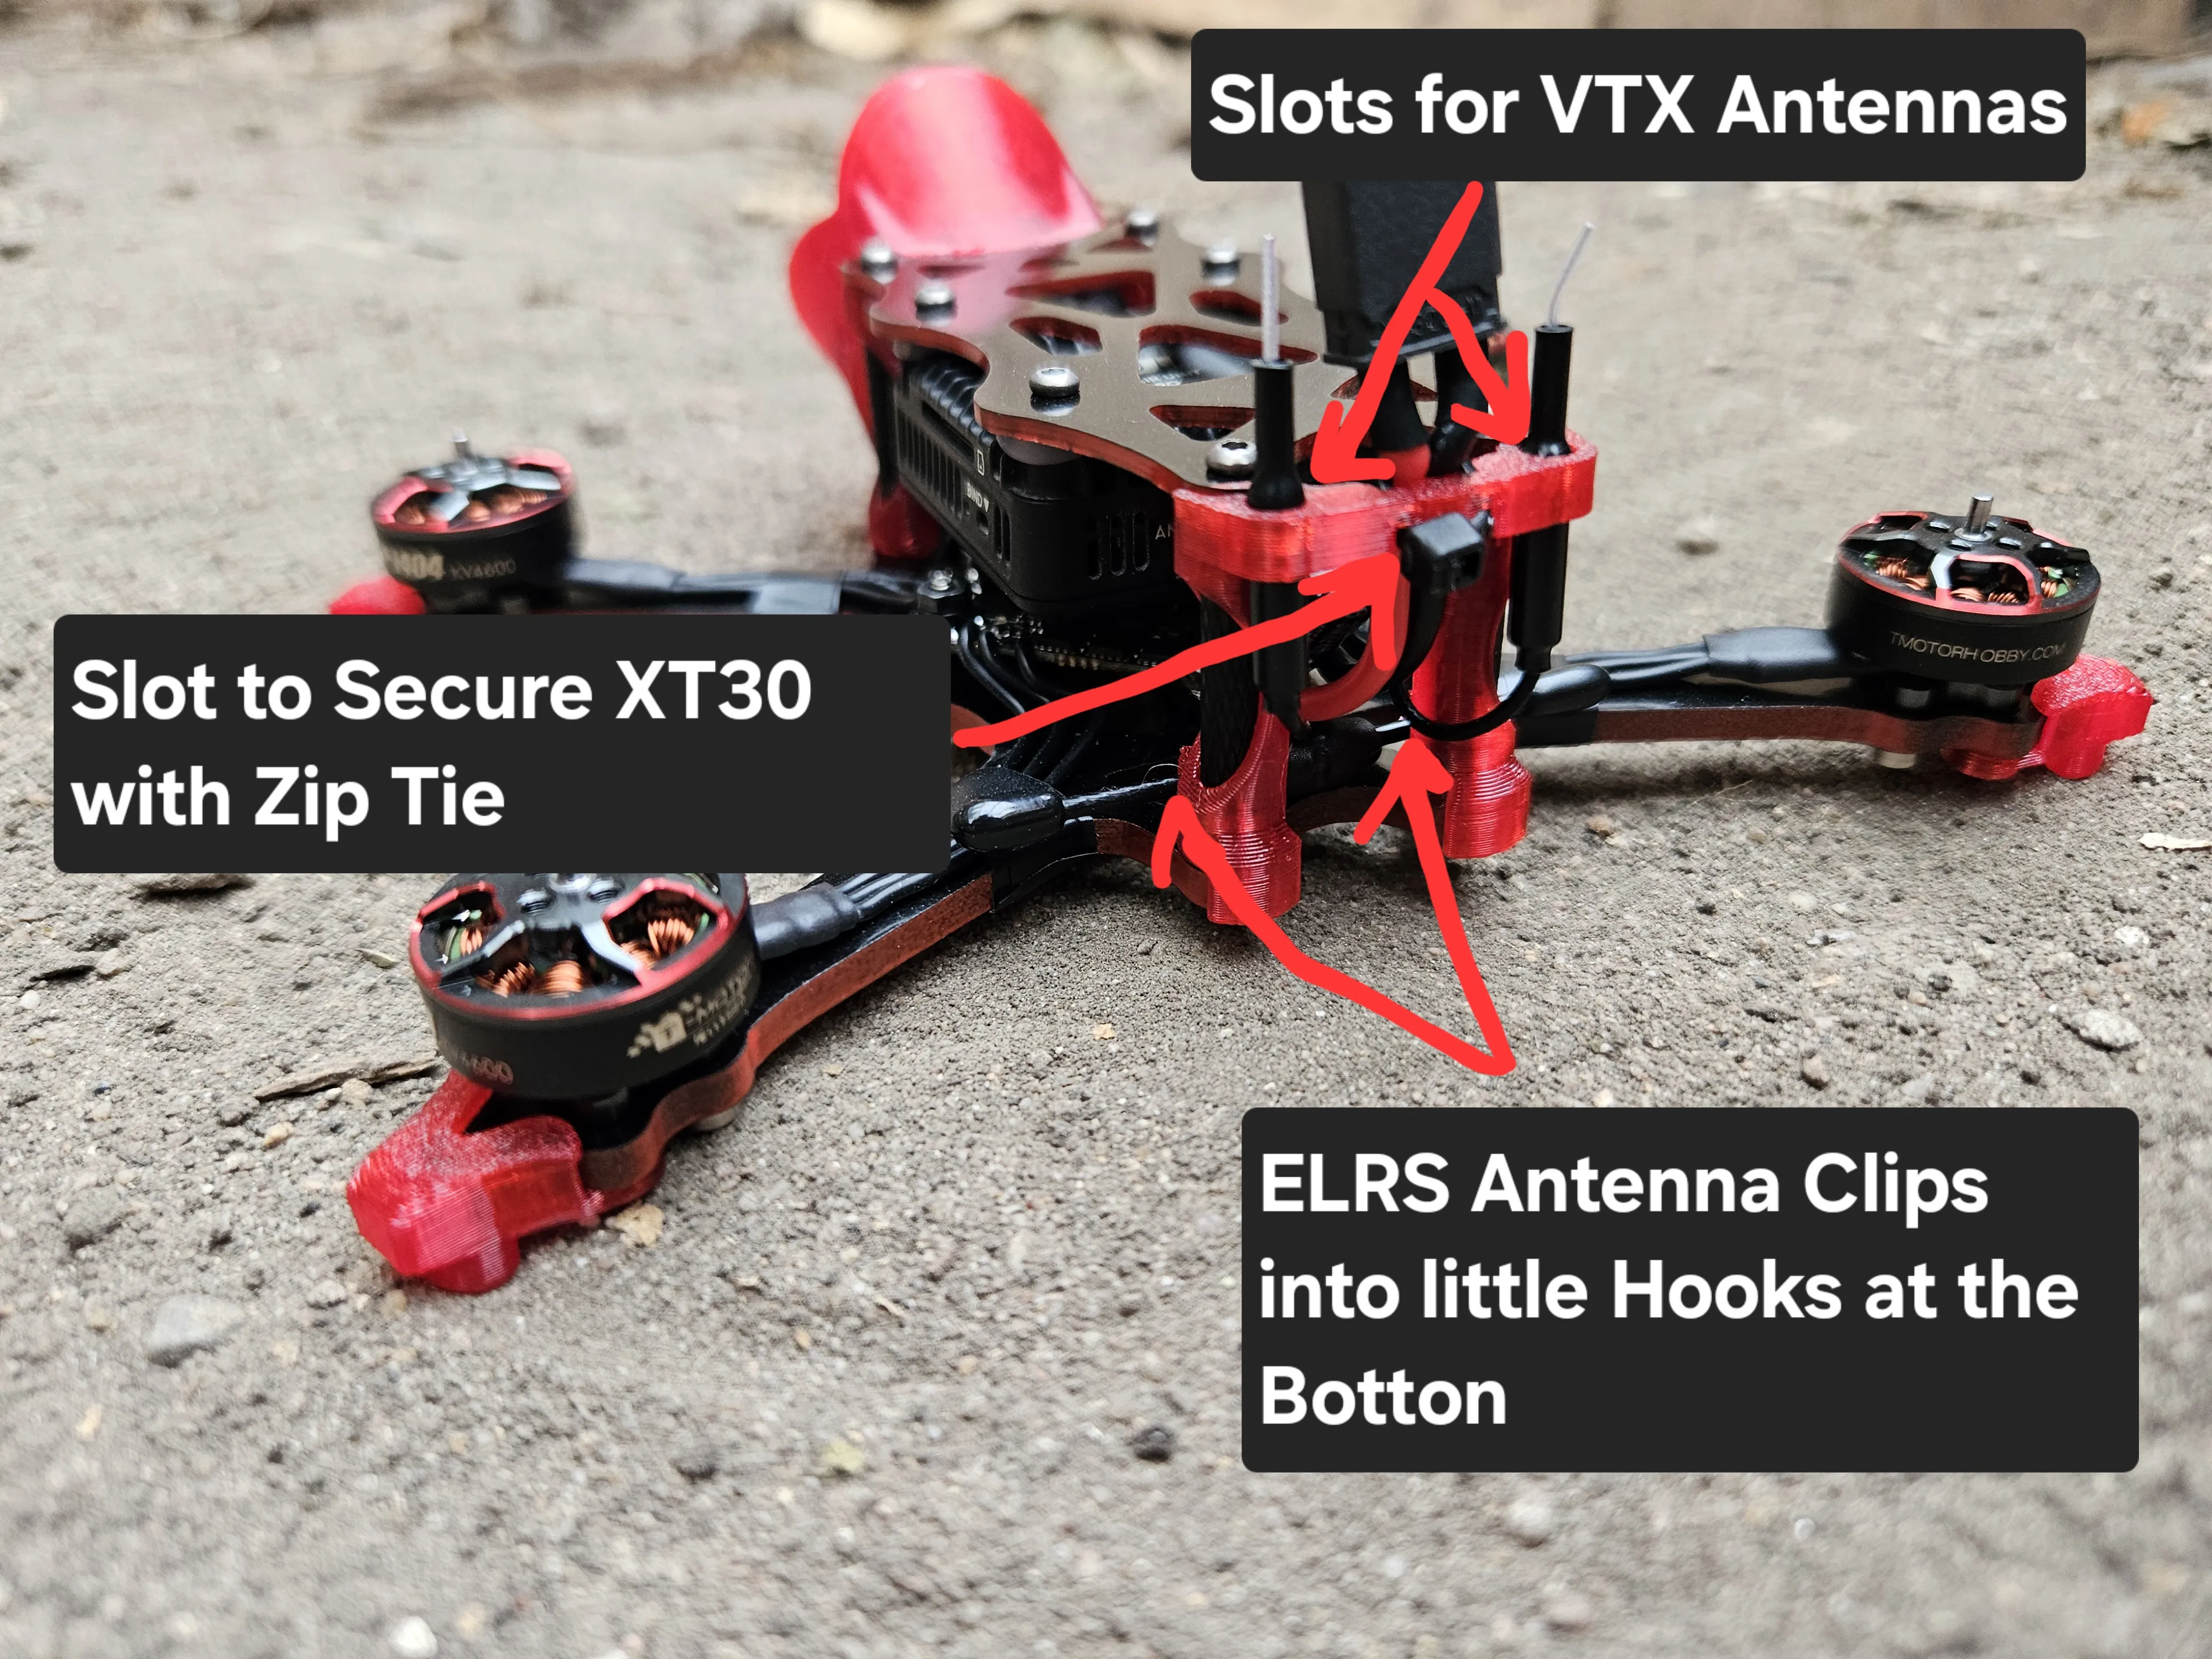
The new version comes with new 3D-Prints. Notably the Antenna Holder now has a slot for the XT-30 Plug. The Slot is purposely very tight, so even if plugging in and unplugging the XT-30 it hopefully stays in the slot.
I Recommend Sliding in the XT-30 from the Bottom into the slot before sliding the Antenna Holder onto the Standoffs.
If your XT-30 does not slide in easily, you will probably need to apply a bit of glue securing the XT-30 in the slot so it stays in place. The glue can be easily cut with a small knive if you need to remove the XT-30 and then can be reapplied.
If you dont want to use the new slot just use it to secure the Power Cables with a Zip-Tie like with the old Antenna Holder design.
The Antenna Holder can be used with the stock O4 Pro Antennas or the recommended linear Antennas.
O4 (Light) Version
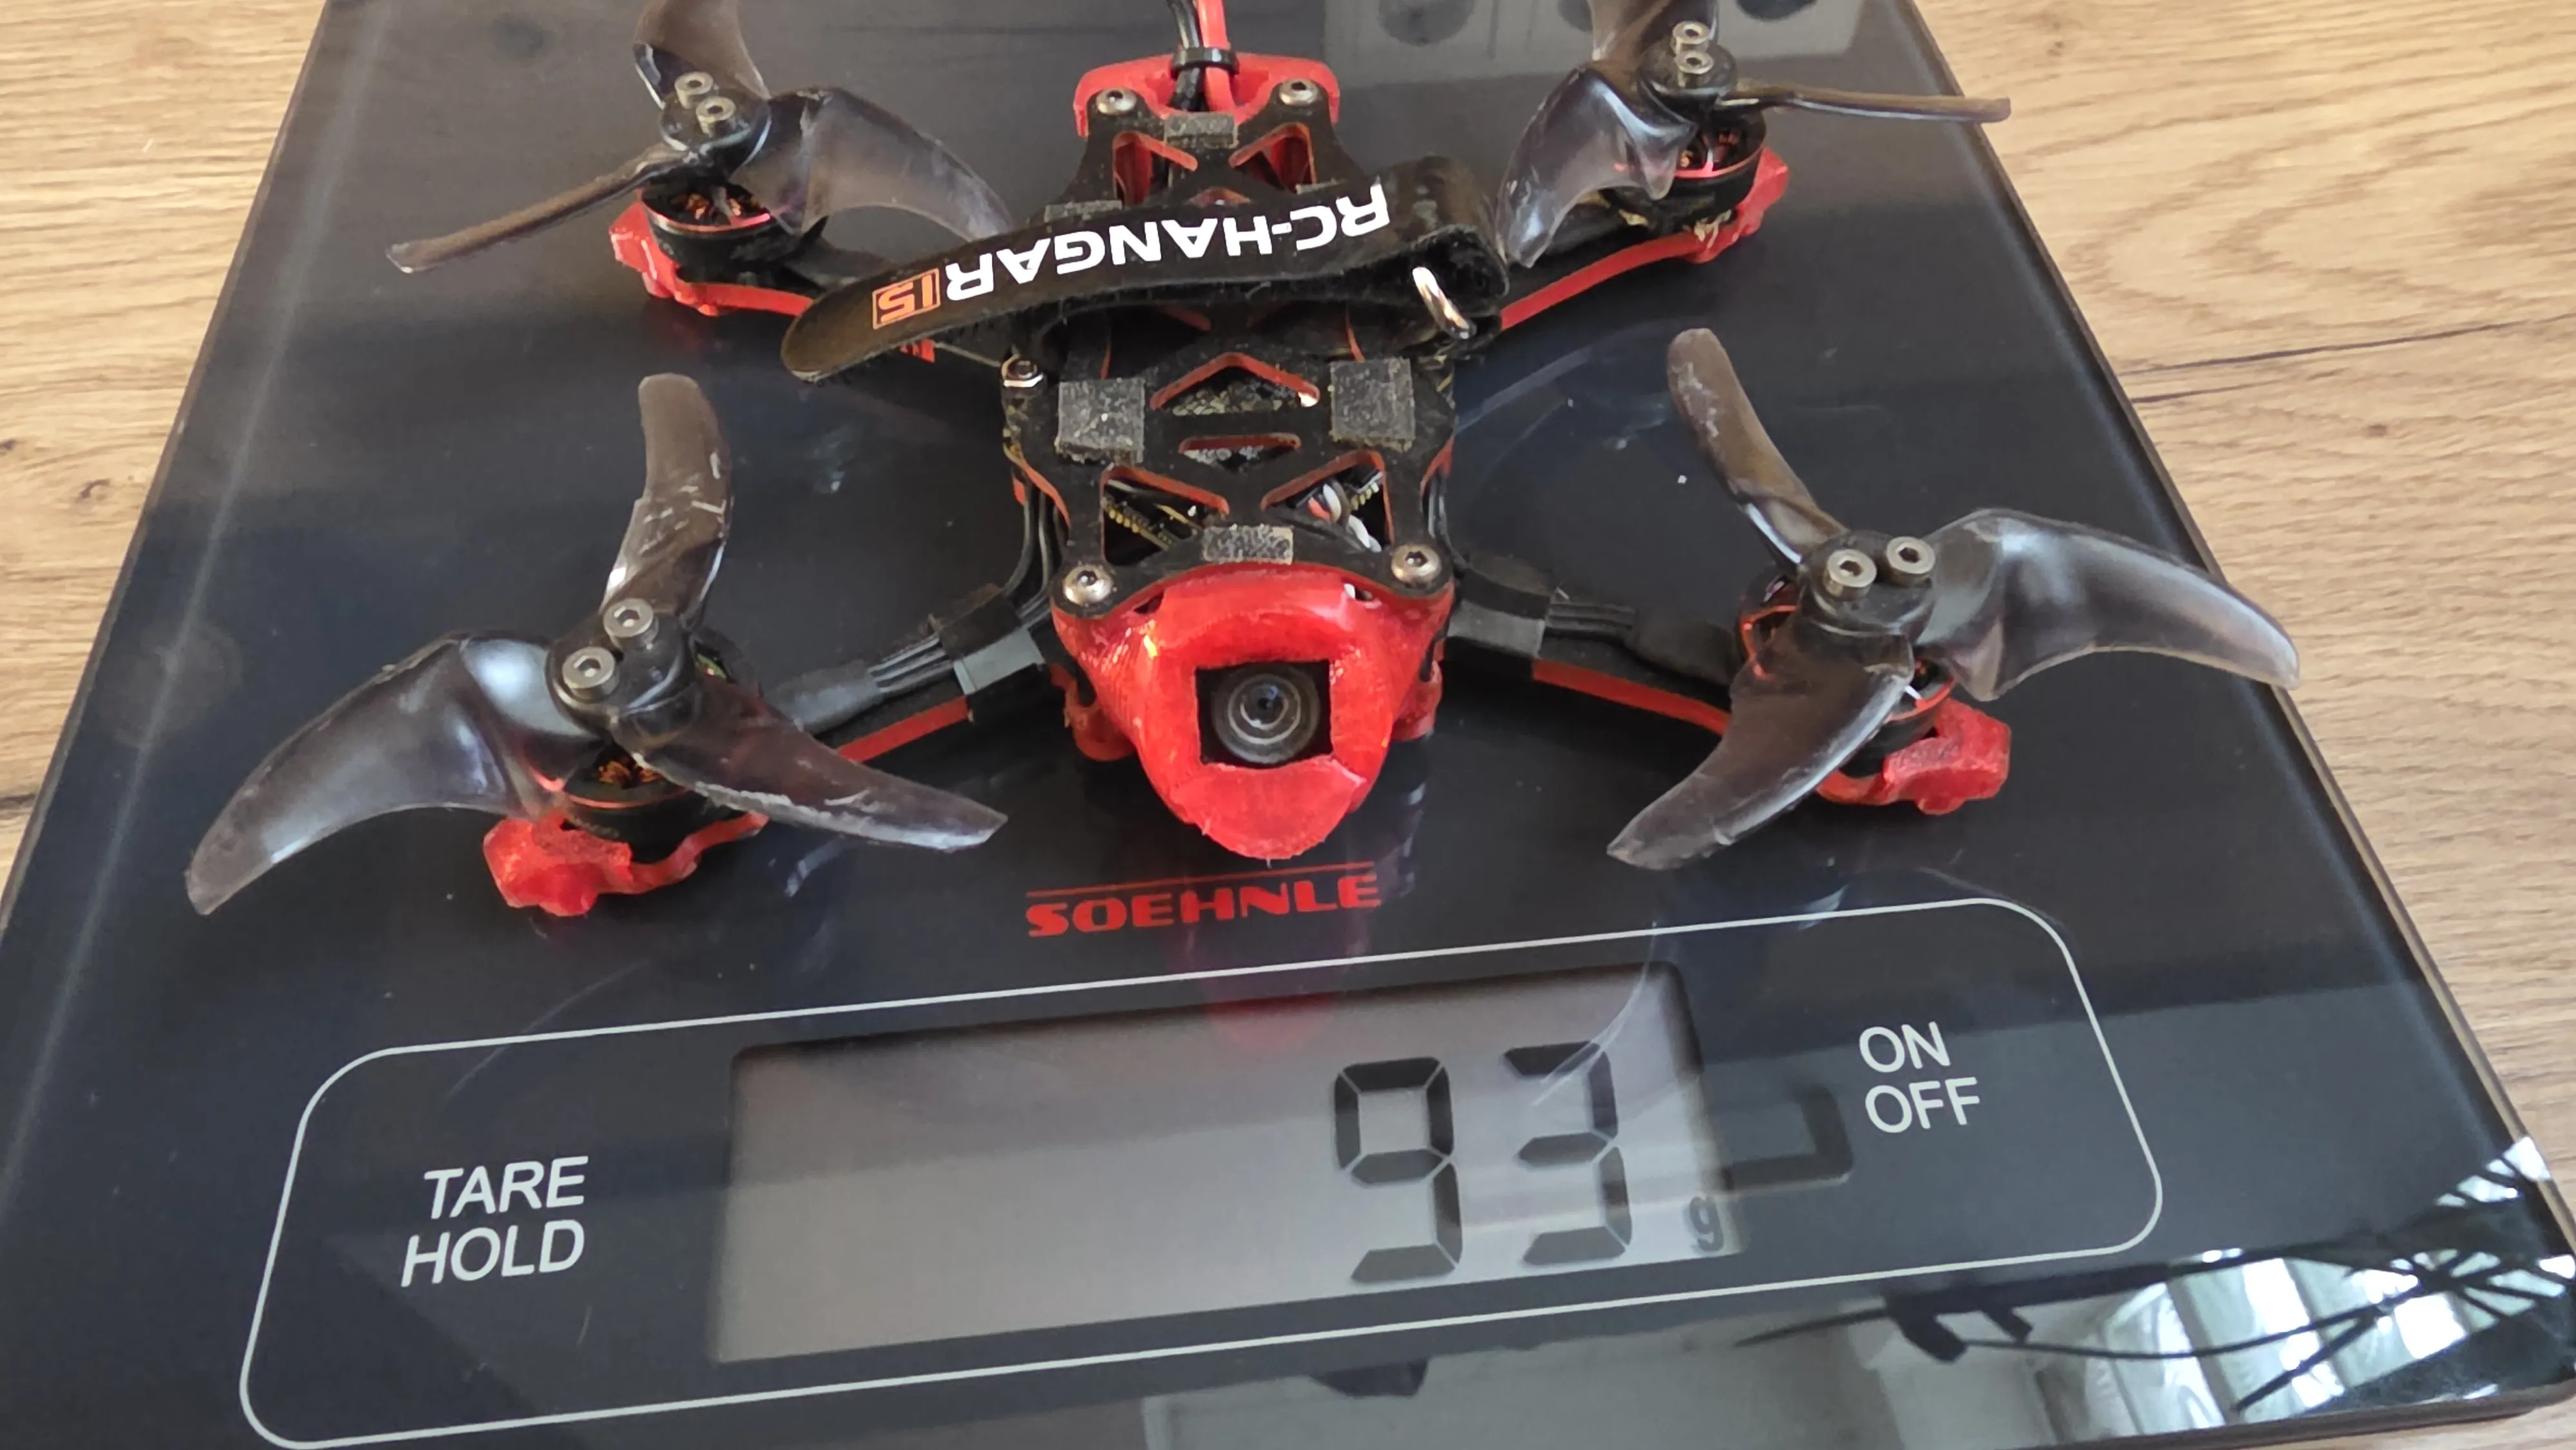
With the Ryn25 V7 release I have also designed 3D-Prints to build a O4 (Light) Version. This isnt really my recommended path as I built this frame specifially for the O4 Pro.
But if you want to do it its possible albeit its an even harder build than the Standard Ryn25.
Recommended Parts are identical except swapping the VTX and the Standoffs.
The Prints I made are for 15mm Standoffs. This makes for a very tight build so I recommend it only to experienced builders.
I also only made a 35 Degree Cam Mount.
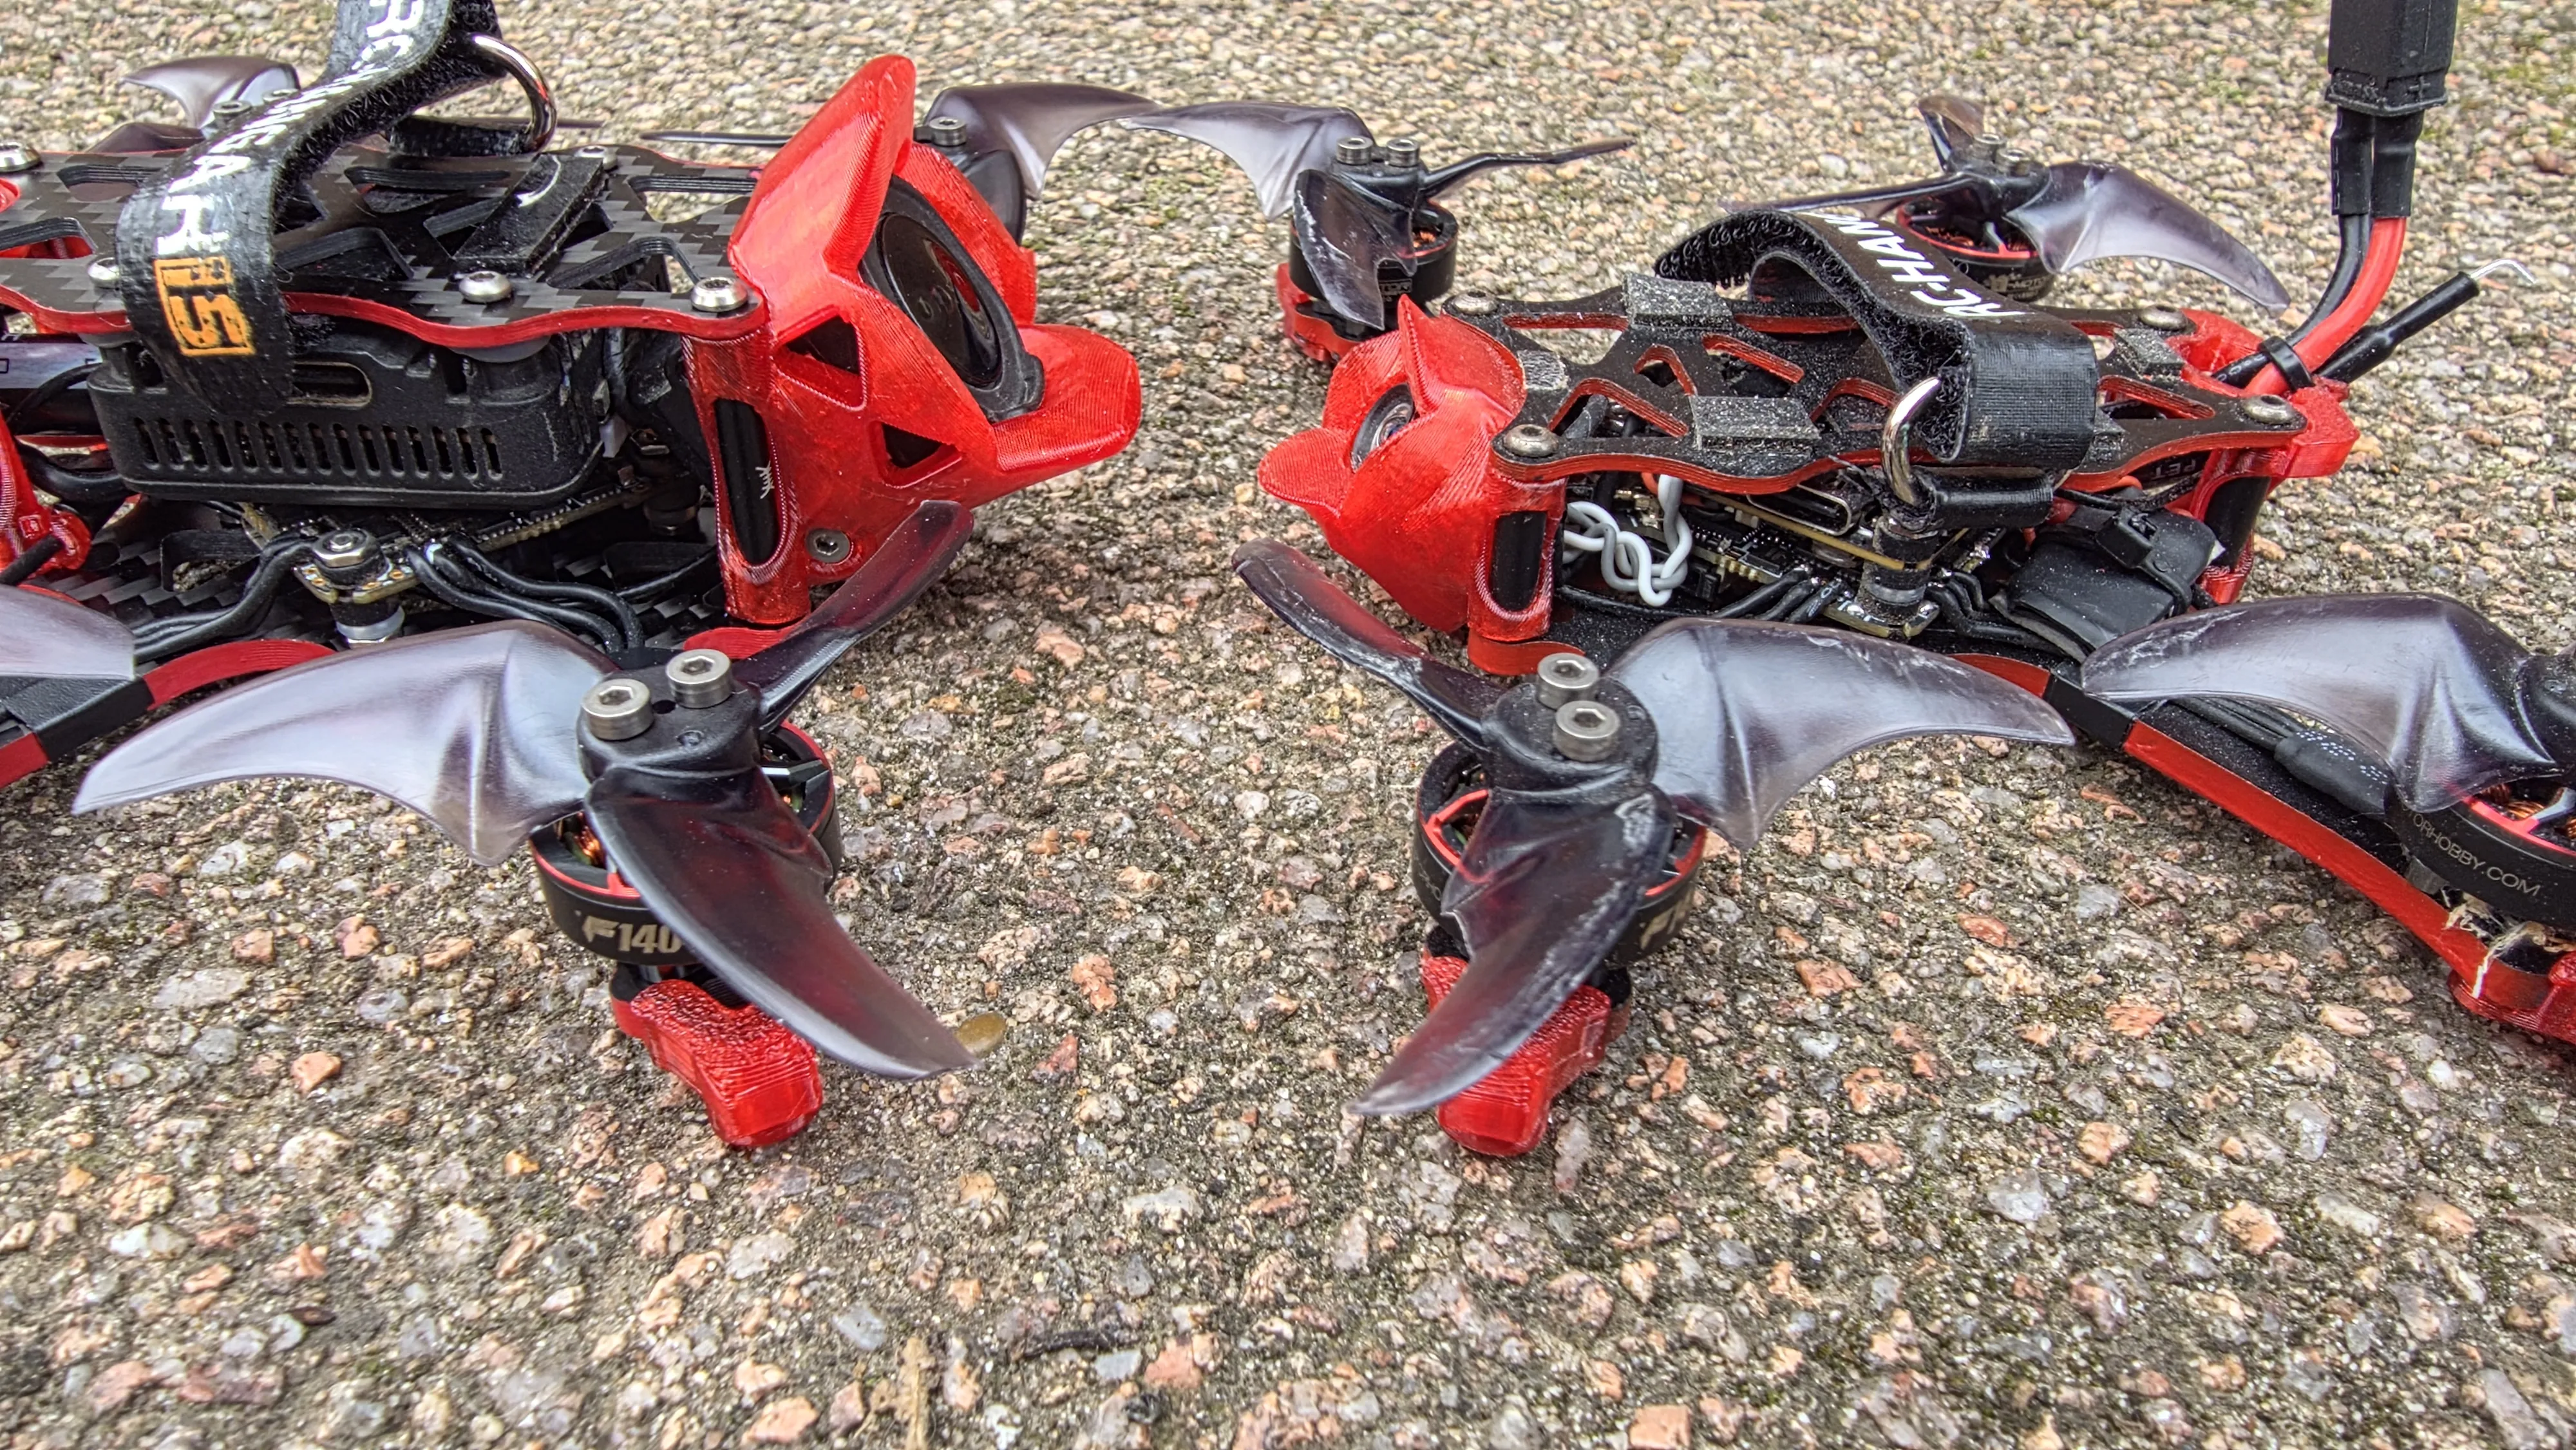
The O4 build is of course significantly lighter. Mine clocks in at 93g with an added ELRS receiver as the internal one in the AIO I used for this build gave out.
Frame Hardware
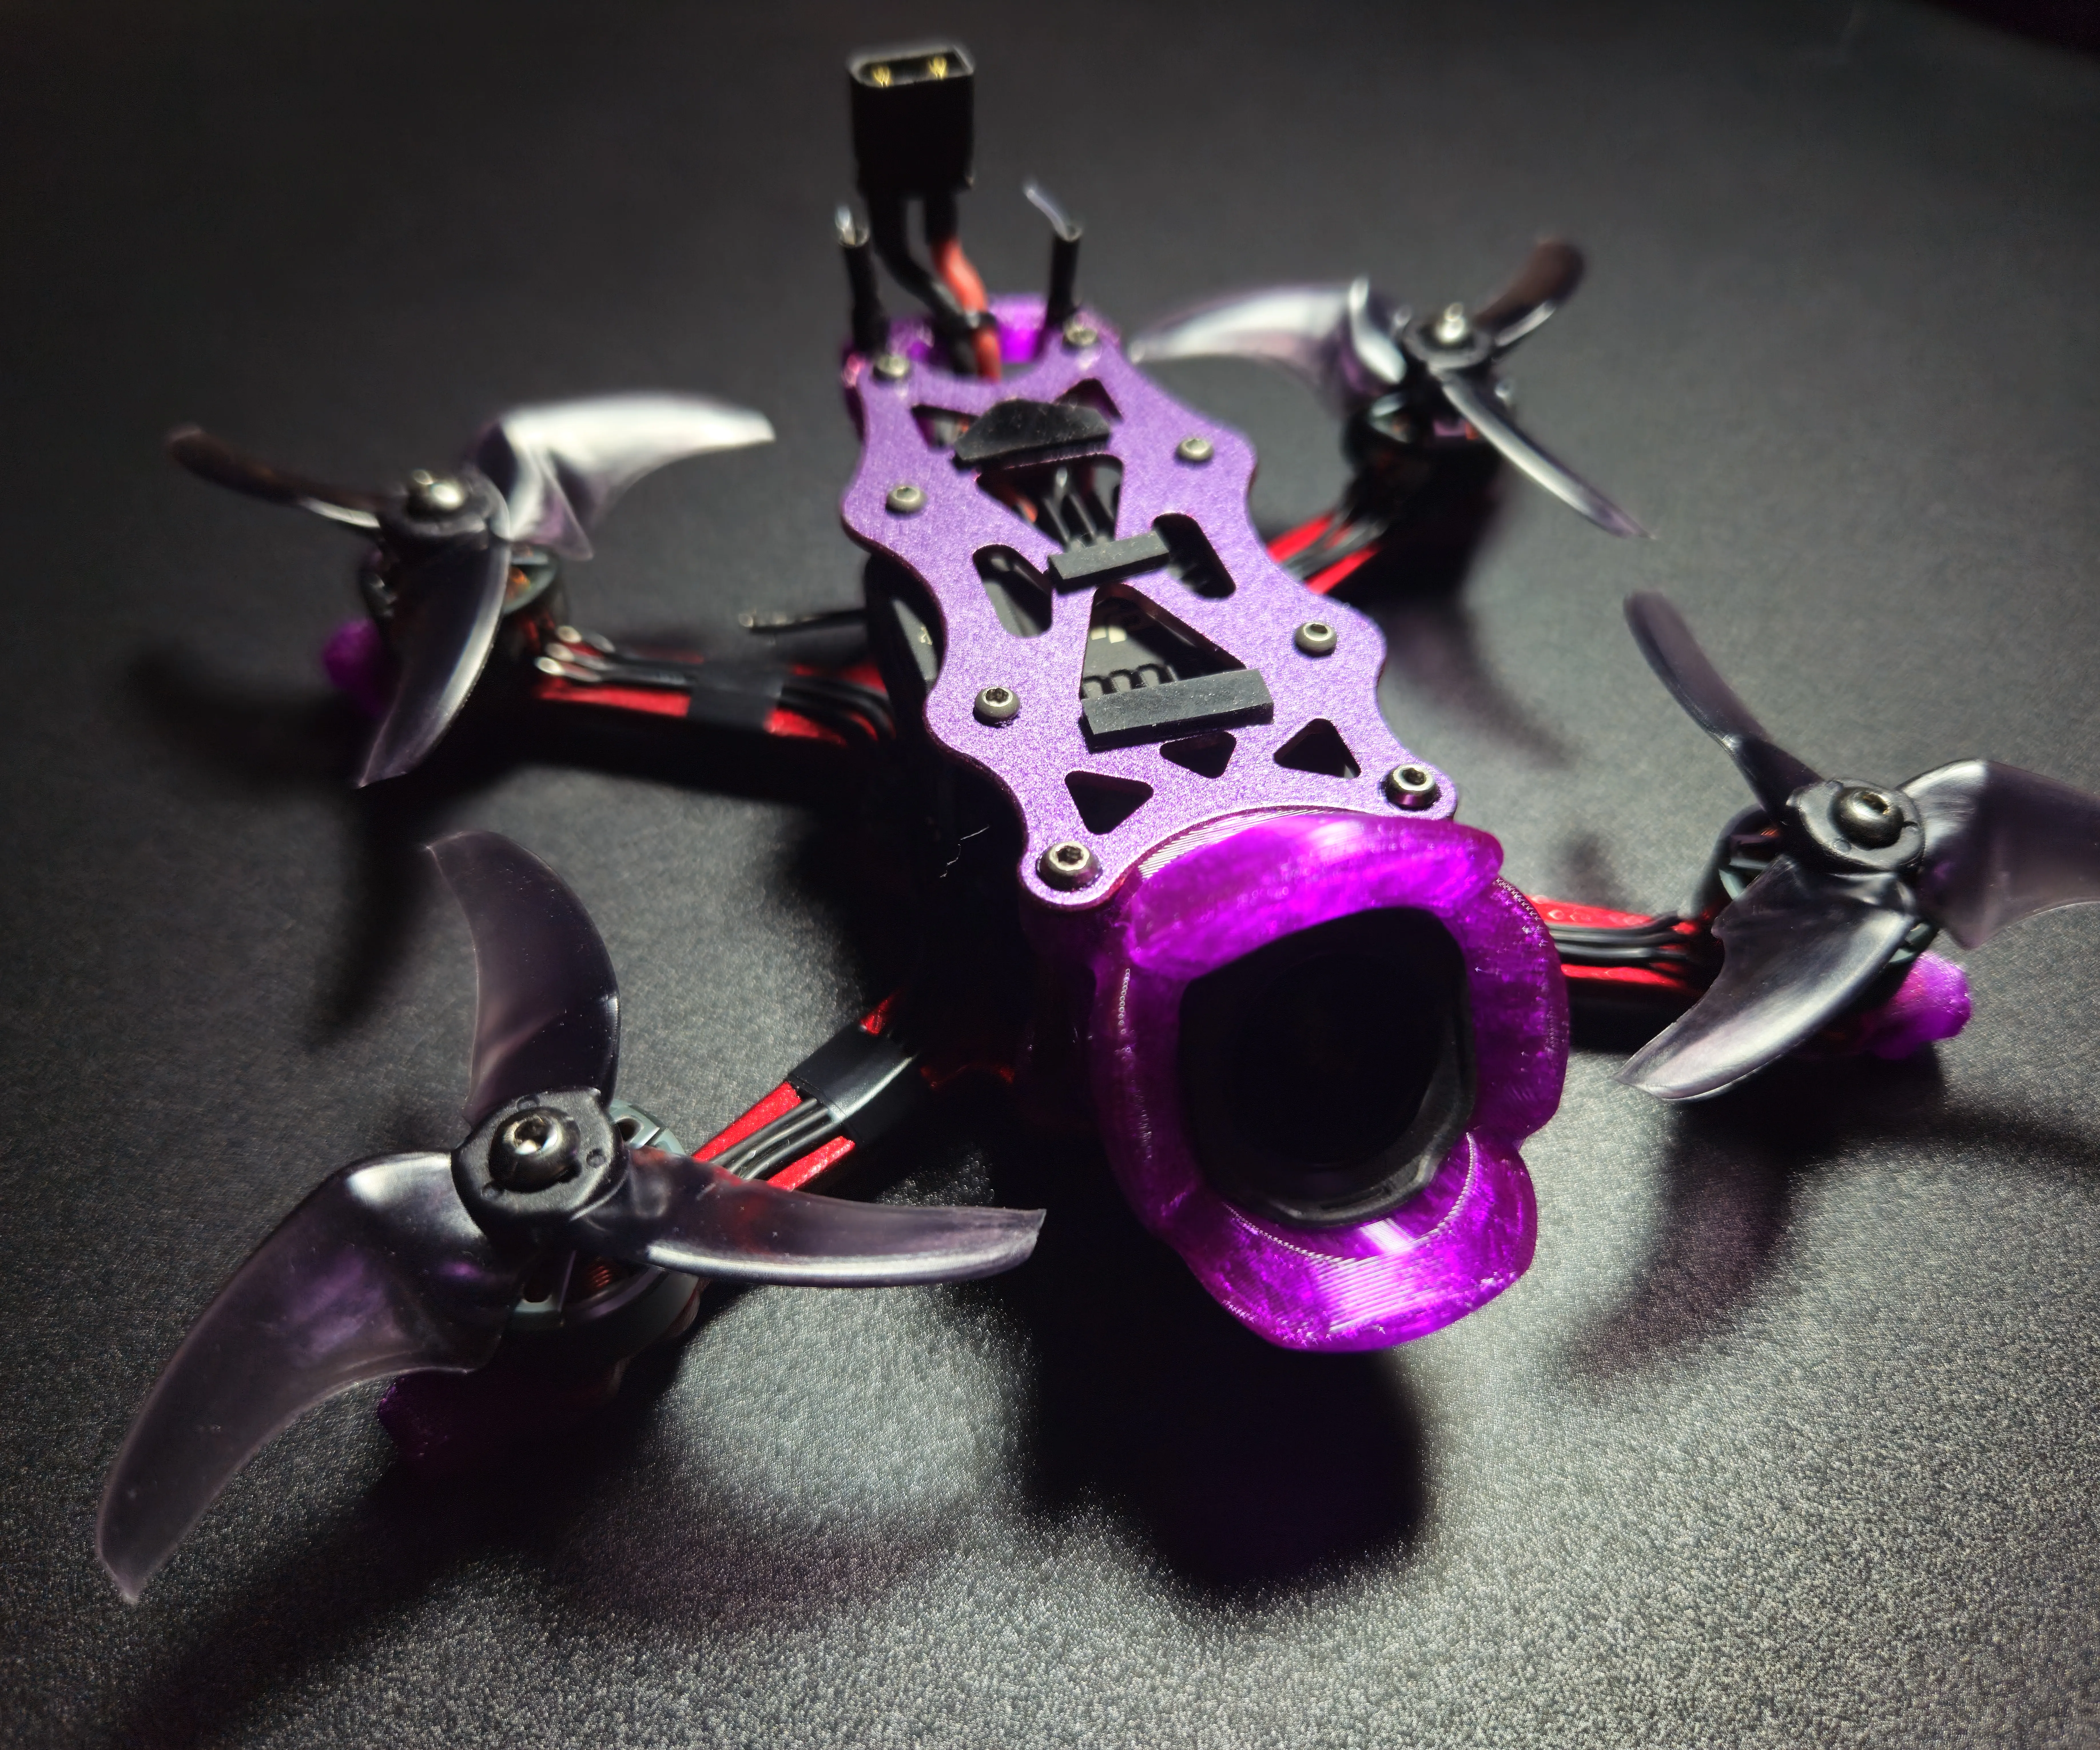
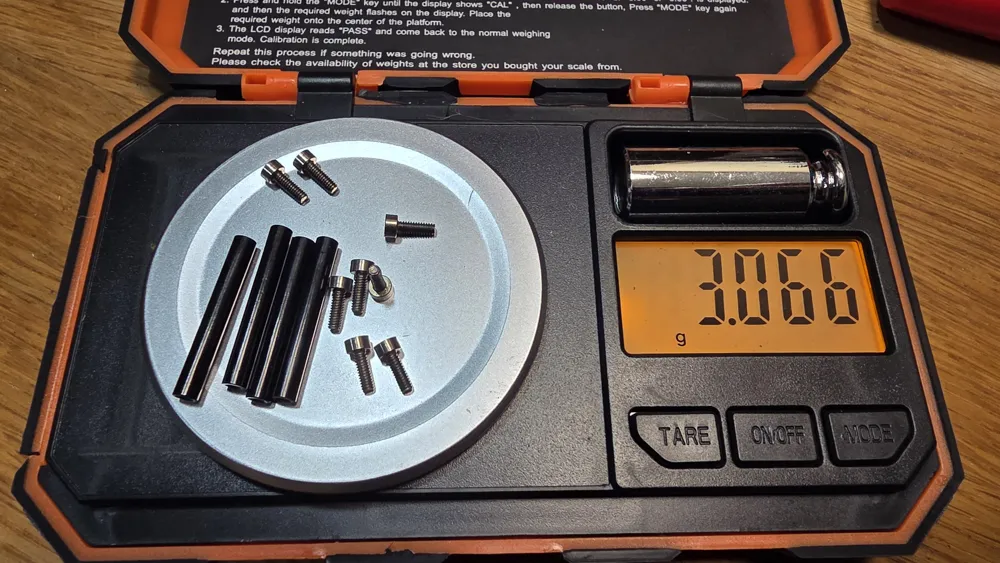
The necessary Frame Hardware comes with the Frame but if you want to use Titanium Screws as I do, then here is a full List of all the screws needed for your convenience:
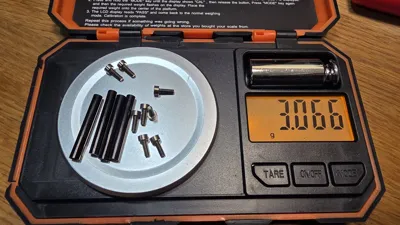
Frame Screws: 8x M2 6mm
AIO Screws: 4x M2 12mm (+ 8x slim M2 nuts ~1-1.2mm tall; 4 for as the “golden nuts” below the AIO and 4 above the AIO to secure it)
O4 Pro Air Unit Mounting Screws: 4x M2 8mm (+ soft M2 O-Rings to reduce risk of a cracked chip, example)
O4 Pro Cam Mounting Screws: 2x M2 3mm (two are enough since the Camera sits securely in the Mount, if you use the O4 Pro Cam included Screws dont thread them in too hard as they are a bit long with minimal TPU between them and the Cam)
Motor Screws: 12x M2 5mm
Prop Screws: 8x M2 7mm
Standoffs: 4x 25mm M2 with 3.5mm Diameter
Zip Tie to secure XT30: 1.8mm width or narrower
Recommended Parts:
VTX: DJI O4 Pro Air Unit
AIO: Happymodel Super F405HD ELRS 20a AIO (very light, ELRS built in, but small motor pads, my main recommendation)
AIO Alternative: GEPRC TAKER G4 35A AIO (no ELRS but solid AIO, good for DJI Remote users)
Motors: T-Motor F1404 4600kv (light and performant)
Motors Alternative: SpeedyBee 1404 4600KV V2
Props: Emax Avan Rush (very durable)
VTX Antennas: I recommend getting Whip Antennas for durability, lightness, very low price and surprisingly good performance, example
The Stock O4 Pro Antennas can be used too.
ELRS Antenna: Pretty much any normal 2.4GHz ELRS antenna that isnt very short so its long enough to reach from the recommended AIO to the TPU Holder, you can of course just mount the very short antenna that comes with the Happymodel AIO to an Arm or rotate the AIO
LiPo: Tattu R-Line 4s 550mAh 95C XT30 (best), for longer flight times you can also use 750 or 850mah Versions of this LiPo. You will need a longer Strap than the one that is recommended below for these bigger LiPos.
LiPo Alternative: Betafpv LAVA 4S 550mAh 75C LiHV
LiPo for Maximum Flight Time: Flywoo Explorer Lionpack 18650 3000mAh 4s (its huge, fits just barely but offers the best flight time)
LiPo Strap: recommended Length 140mm (much longer one needed for the Flywoo Explorer Pack)
LiPo Pad: Cut out a few small Pieces from any Sticky Pad
O4 Pro Cables: A shorter MIPI-Cable and Cable Harness for the O4 Pro are nice but not needed.
The TPU Prints
I recommended a high quality TPU (95a) like Sainsmart TPU. Use the print settings in the 3mf File for best results.
Camera Mount
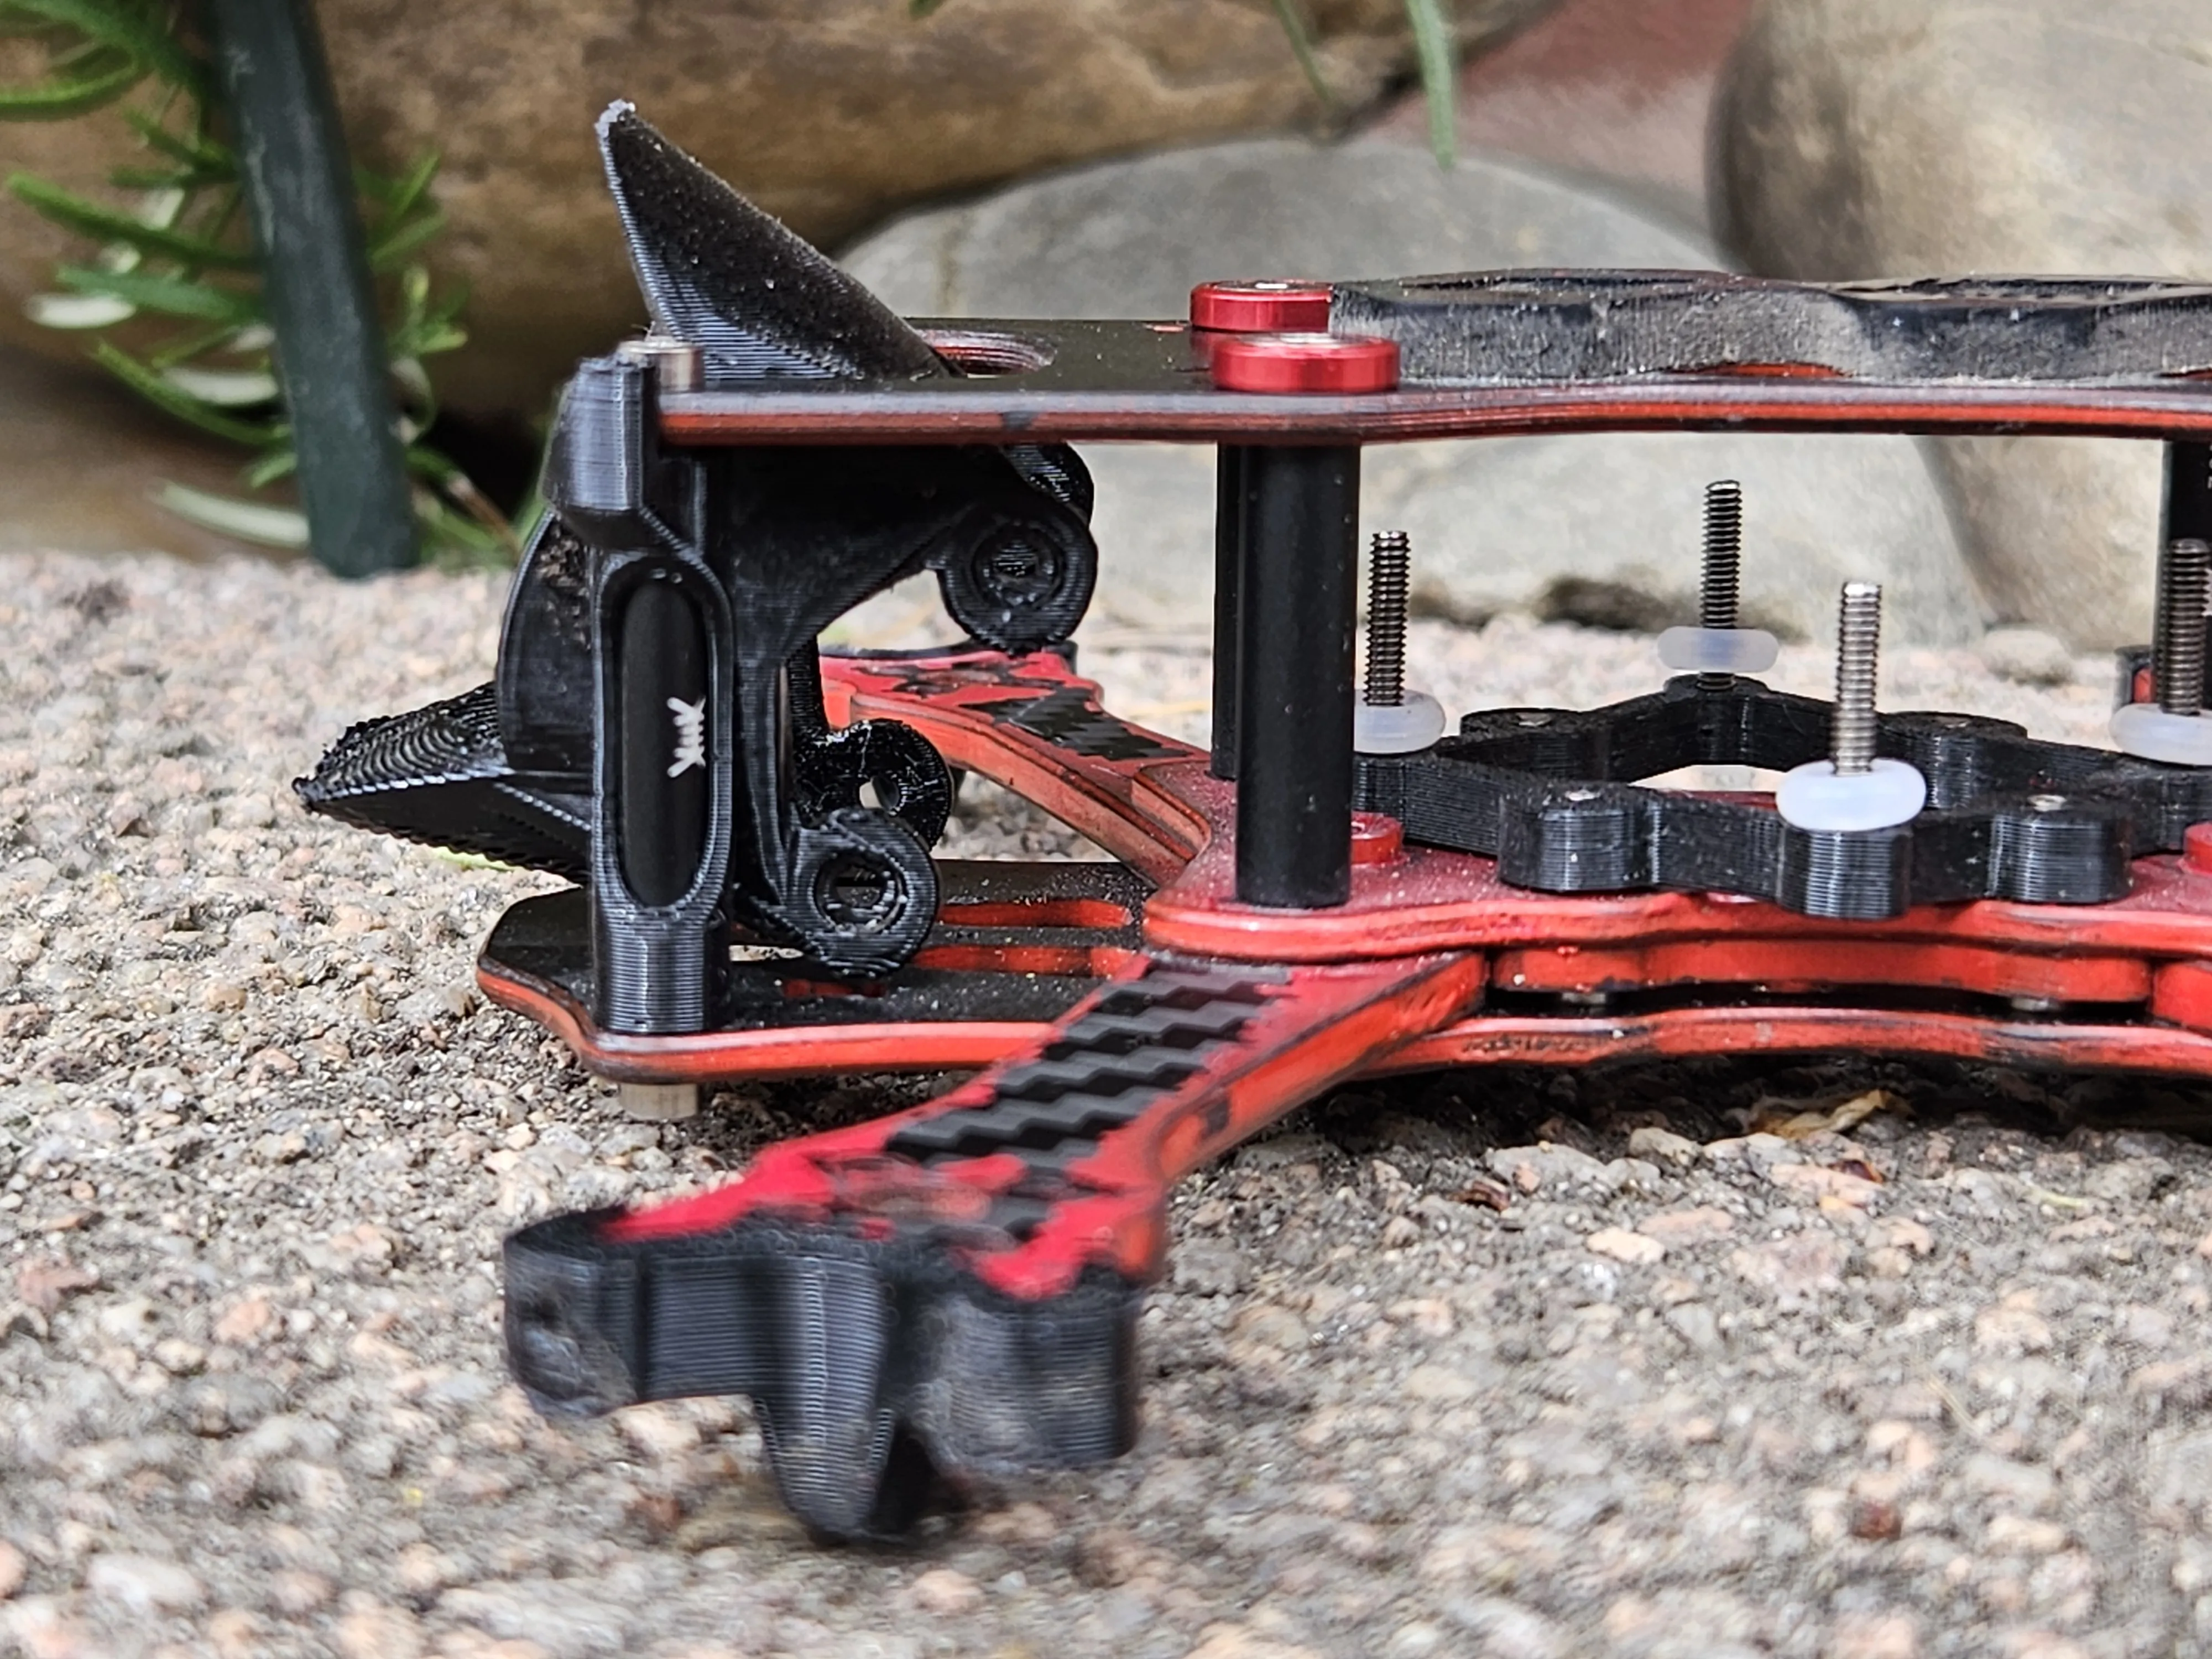
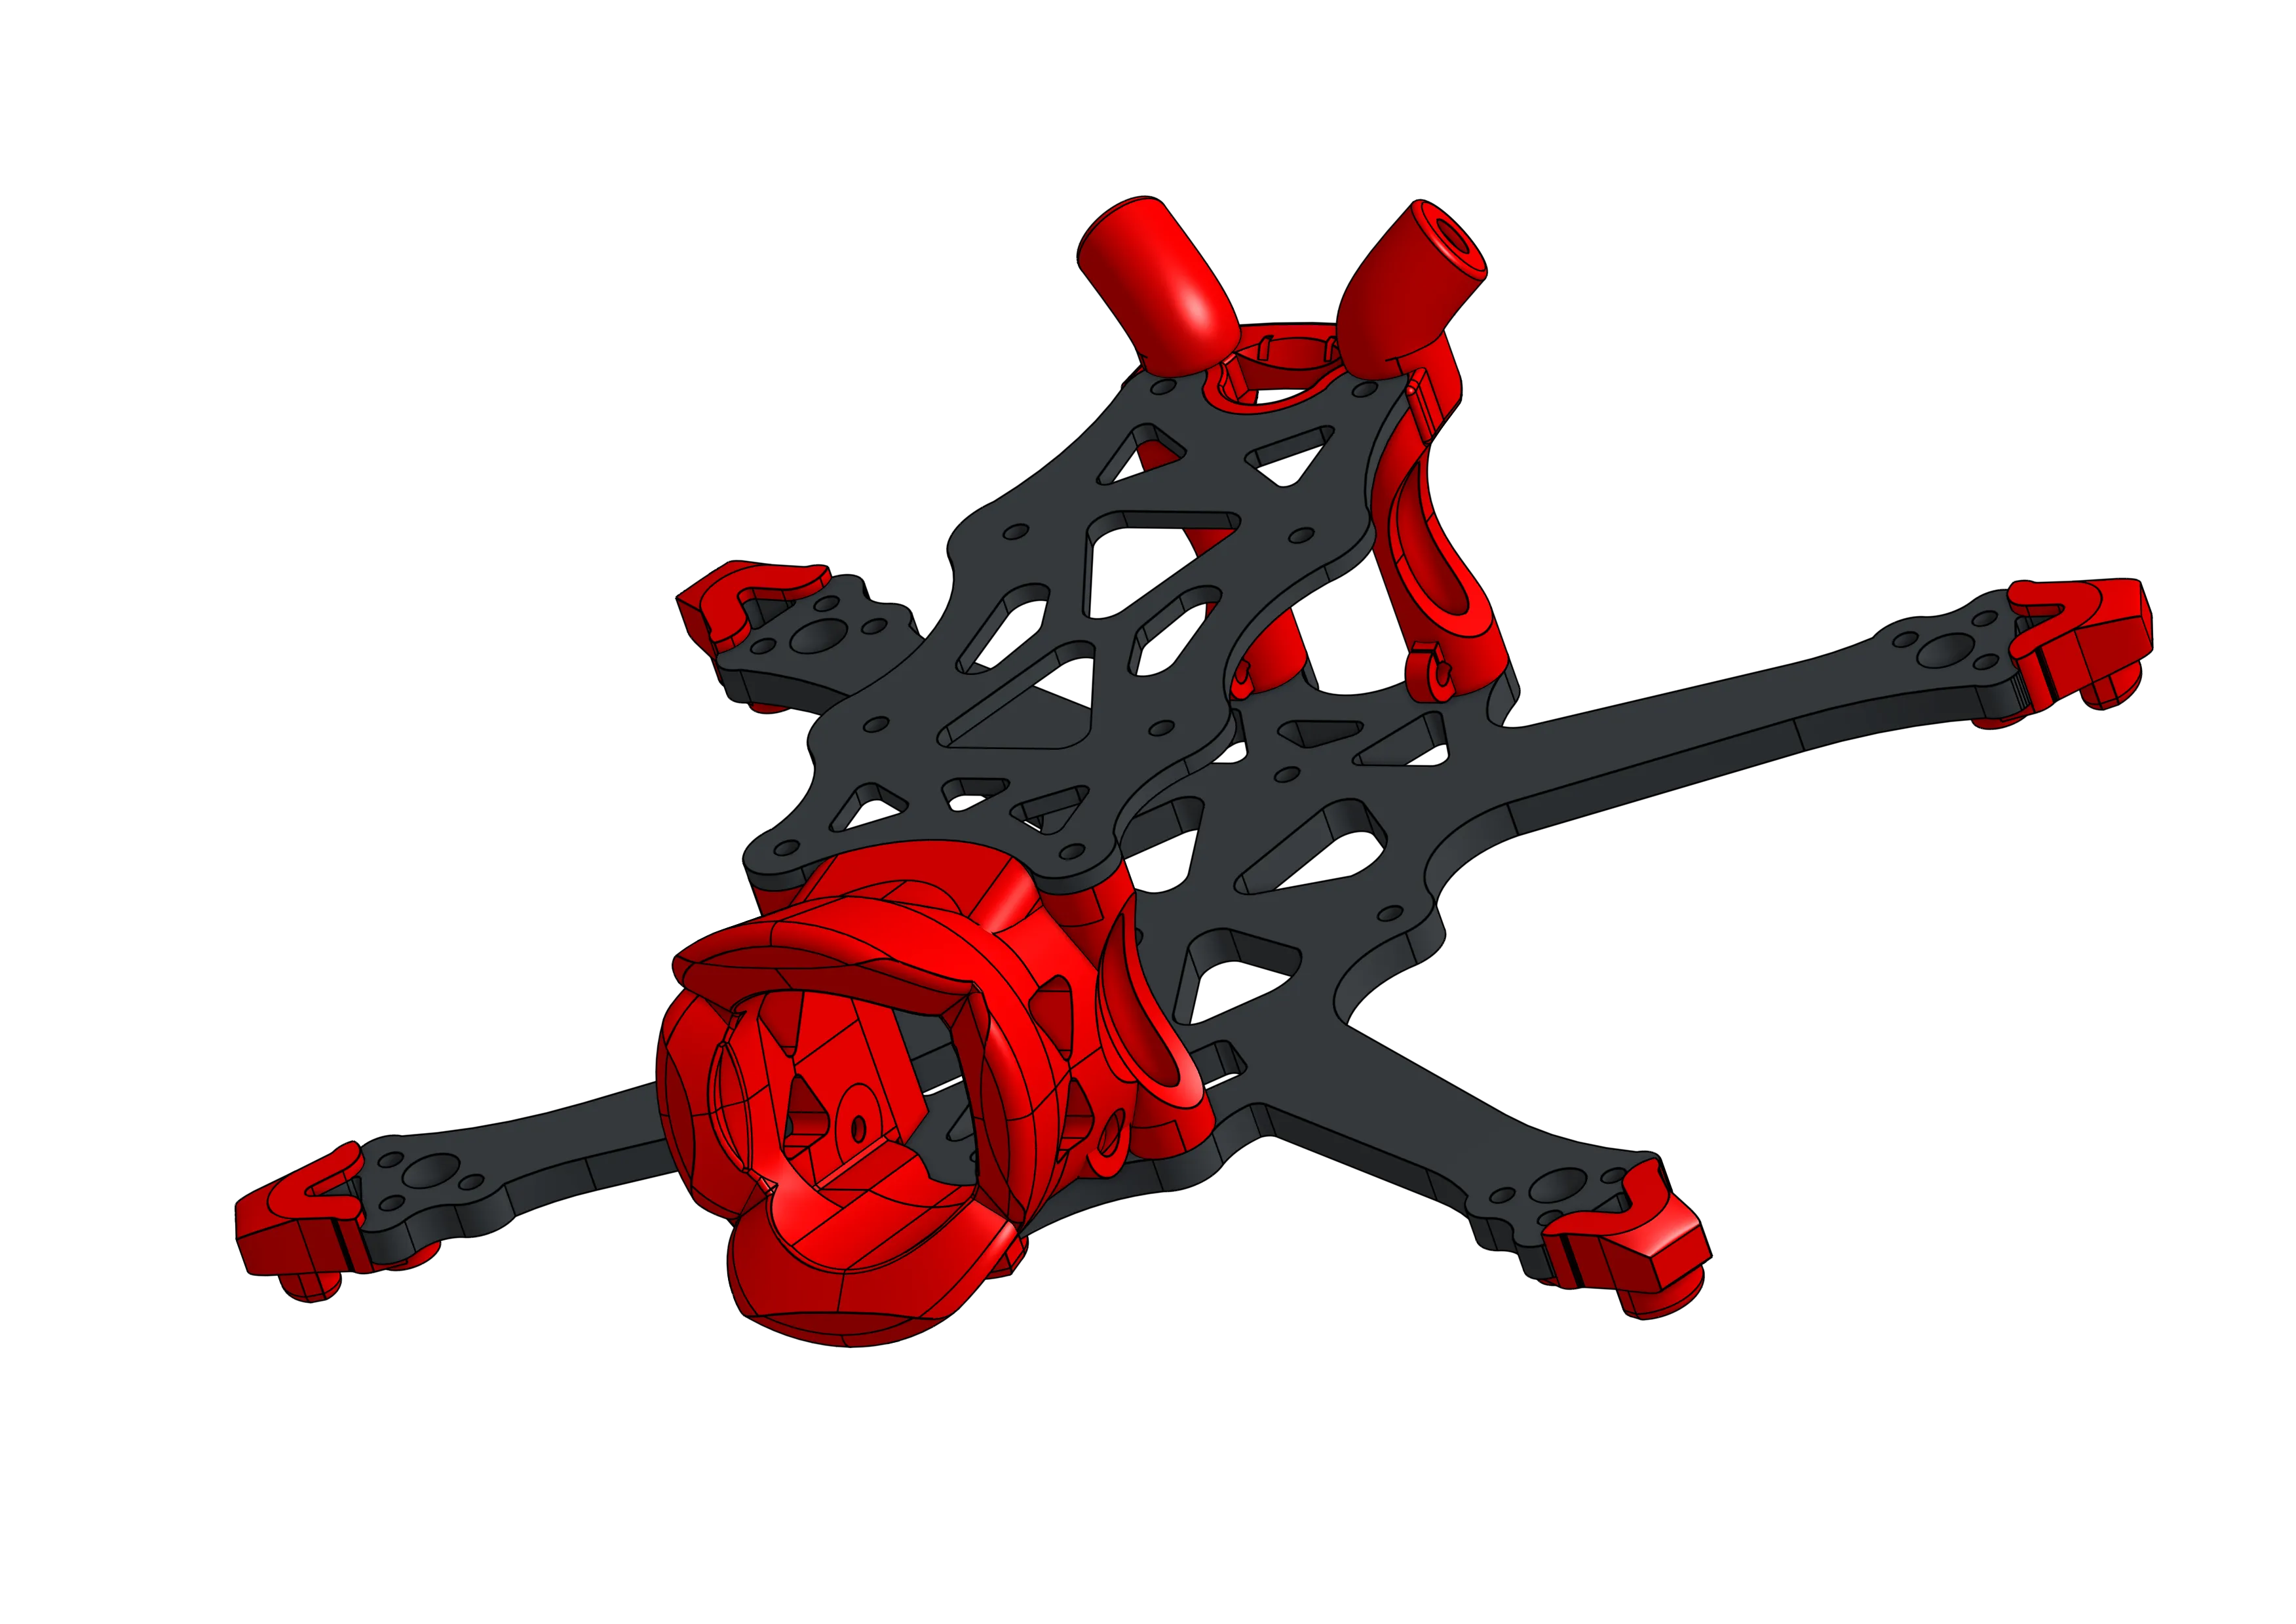
I never felt like the O4 Pro Camera was fully protected in any of the available 2.5" Frames. So when I saw the O4 Pro Pod Mount from Tim O'Brien. I wanted to create something like that but still within the carbon frame as extra protection.
For example the Bottom “Lip” of the O4 Pro Camera still sticks out of the Quadmula Djinn Frame and could therefor be the first thing to potentially slam into an obstacle.
So with the permission from Tim O'Brien I took the front half of his O4 Pro Pod mount and designed my own Pod Mount that sits within the Quadmula Djinn Frame but also sticks out further than the frame to maximally protect the Camera.
In the pursuit of optimizing this built I eventually realized a lot of weight could be saved with a different frame. After hundreds and hundreds of crashes I never broke any arms on my 2.5" Builds and realized that at this size the arms are very unlikely to break because they are so short. Si I figured a Frame without removeable Arms could be optimal for the 2.5" Category. But I realized that on pretty much every frame I could find there was even more opportunity to decrease the
frame size and save more weight.
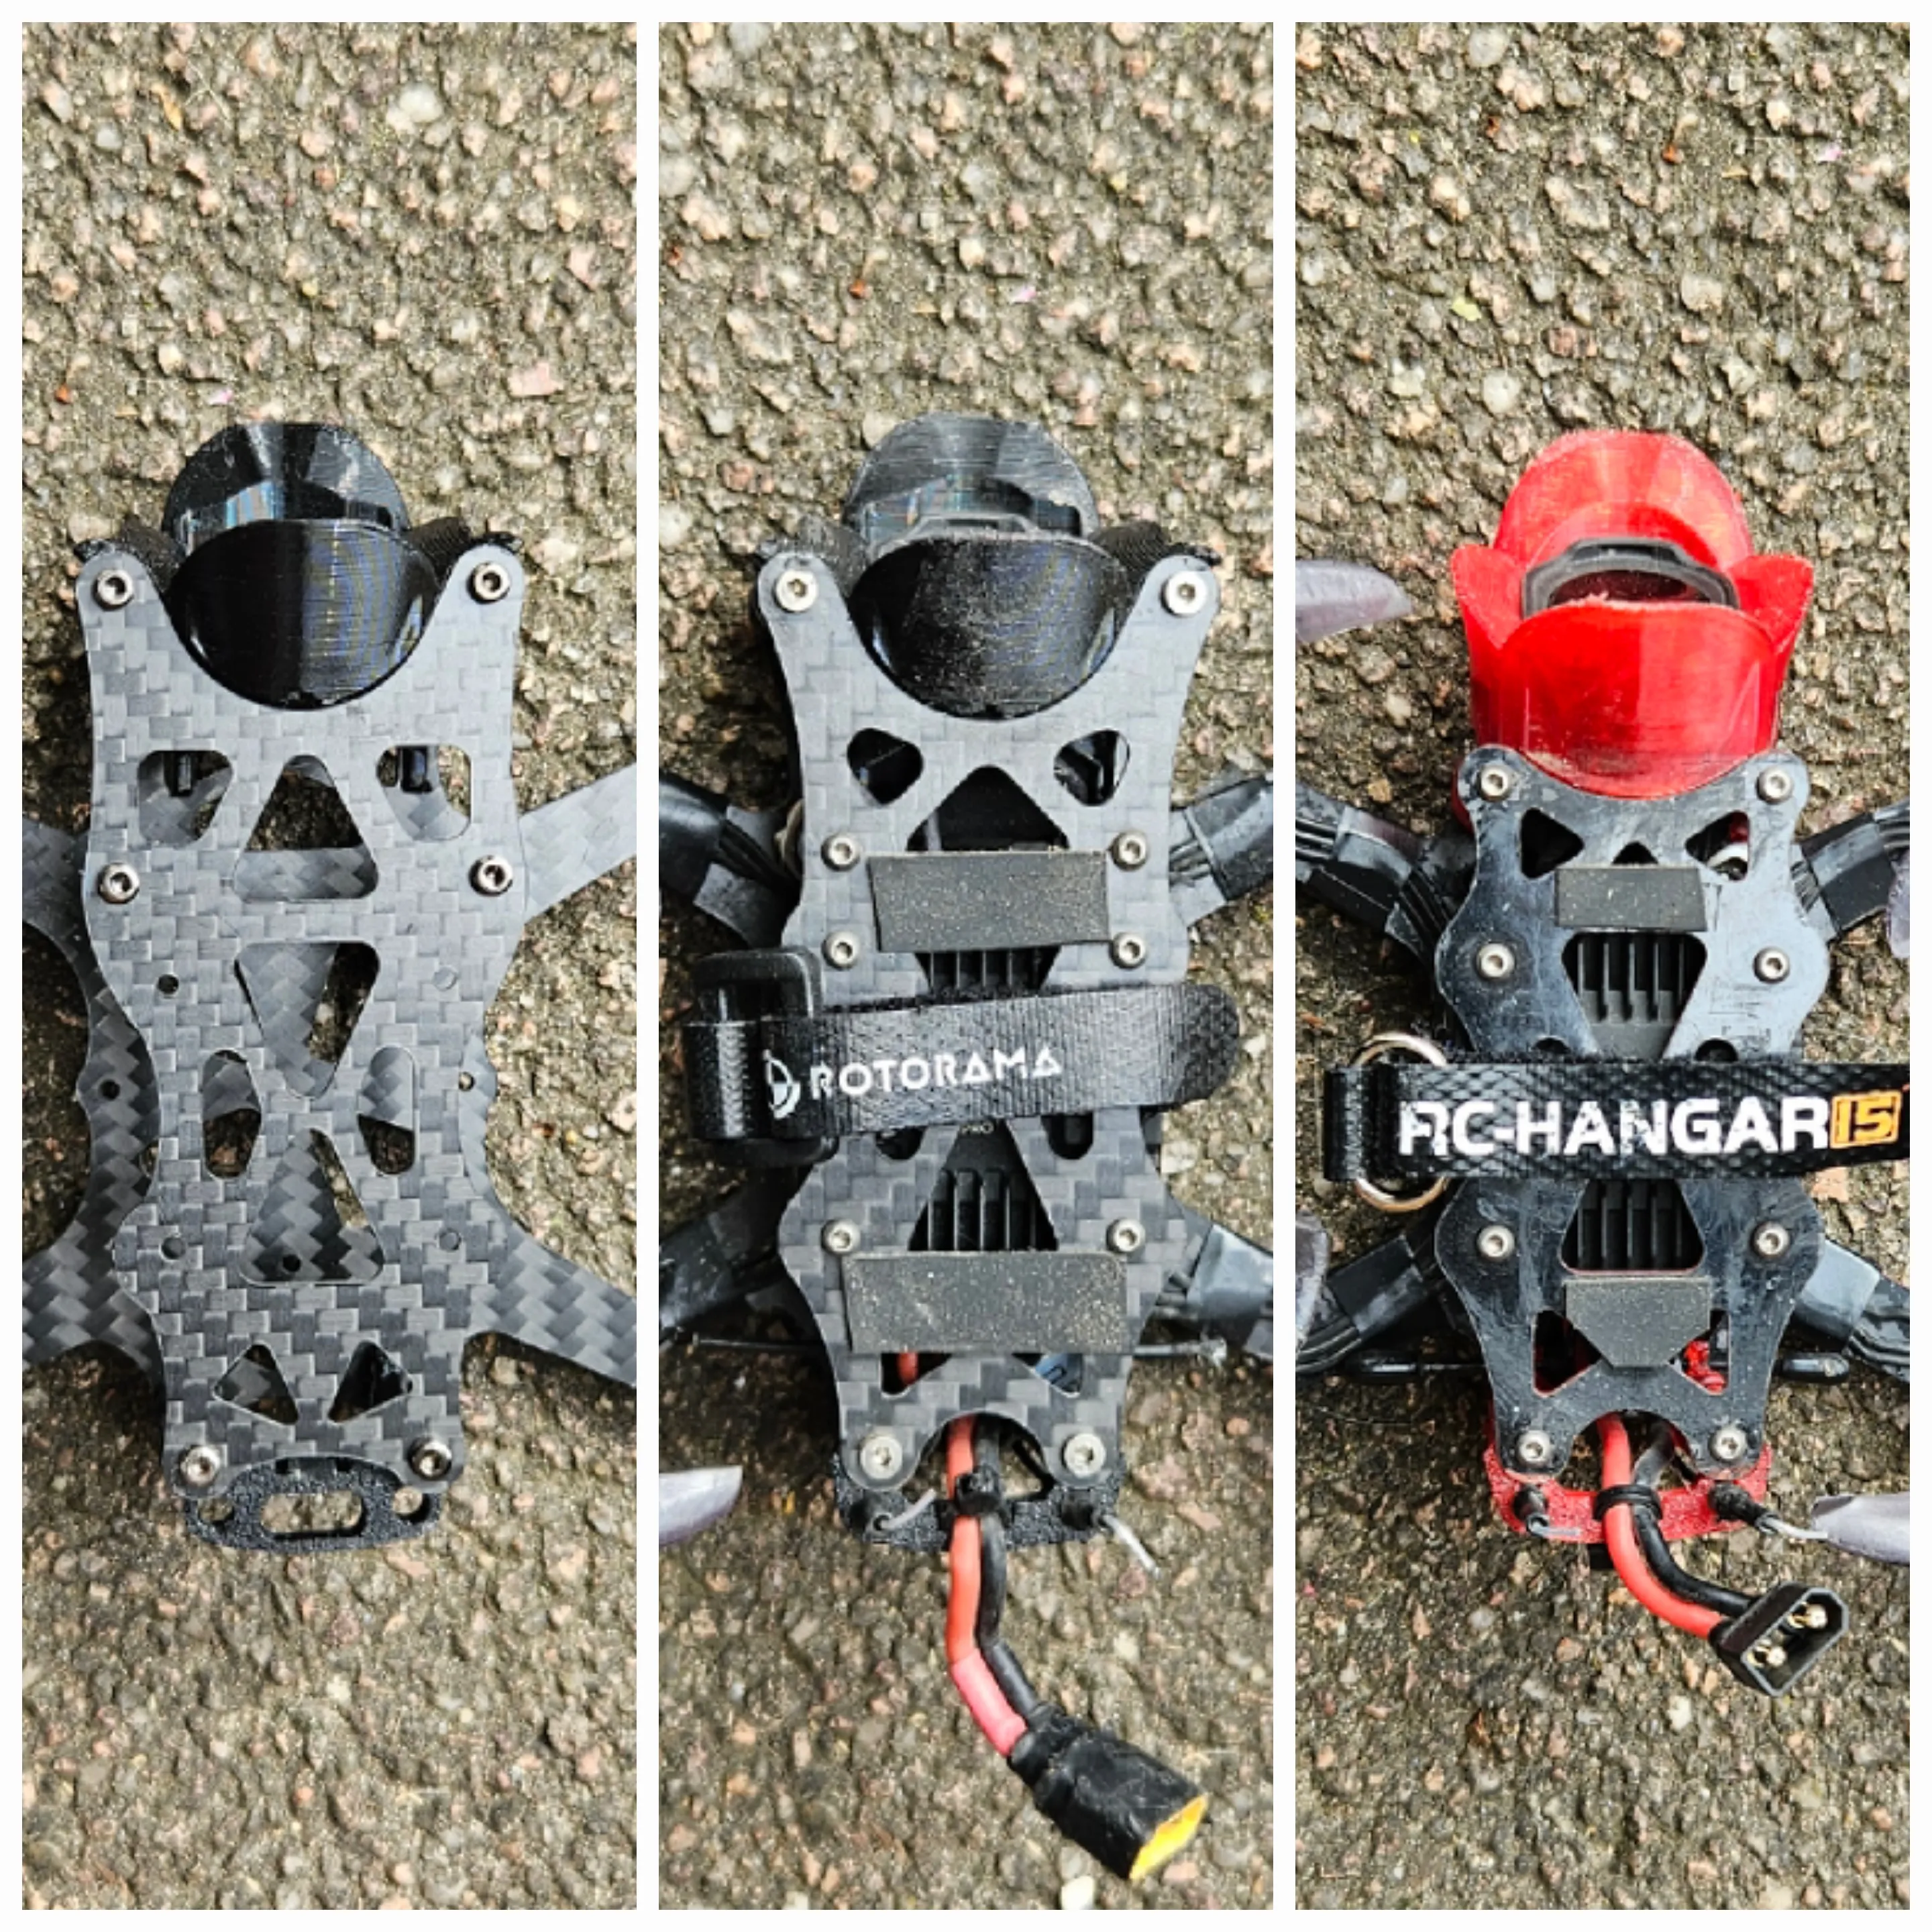
So with these Ideas in mind I set out to create my own Frame.
At first I made sure to to extend the carbon of the Top Plate further out than the Lens to protectet it. Eventually I noticed the Pod Mount is the first Thing to touch the Obstacle in a crash anyway.
So I redesigned my Frame to not have any carbon in front to save weight and even remove two more Standoffs.
Some of the different iterations can be seen on the right.
In the final Version the Cam Mount is desgined completely from scratch and braced against the Top and Bottom Plate to create a Stiff Front End.
The camera sits tightly inside the Mount and therefor only needs 2 screws instead of 4 to hold it.
I made 3 Versions of the Camera Mount. for 15, 25 and 35 Degrees.
If you want even more Camera Angles to choose from, ND-Filter support or other Cam Mount customization check out the Discord
of the amazing Tim O'Brien.
Rear Bumper and Antenna Holder
I also wanted to include a rear Bumper to protect the Carbon from wear. It has a larger bumper next to the Top Plate that also serves as the Holder for the little Whip Antennas for the O4 Pro (or for the full O4 Pro Antennas, depending on which Antenna Holder you choose)
The rear end of the Bottom Plate also gets a little bit of extra protection in the shape of small guards.
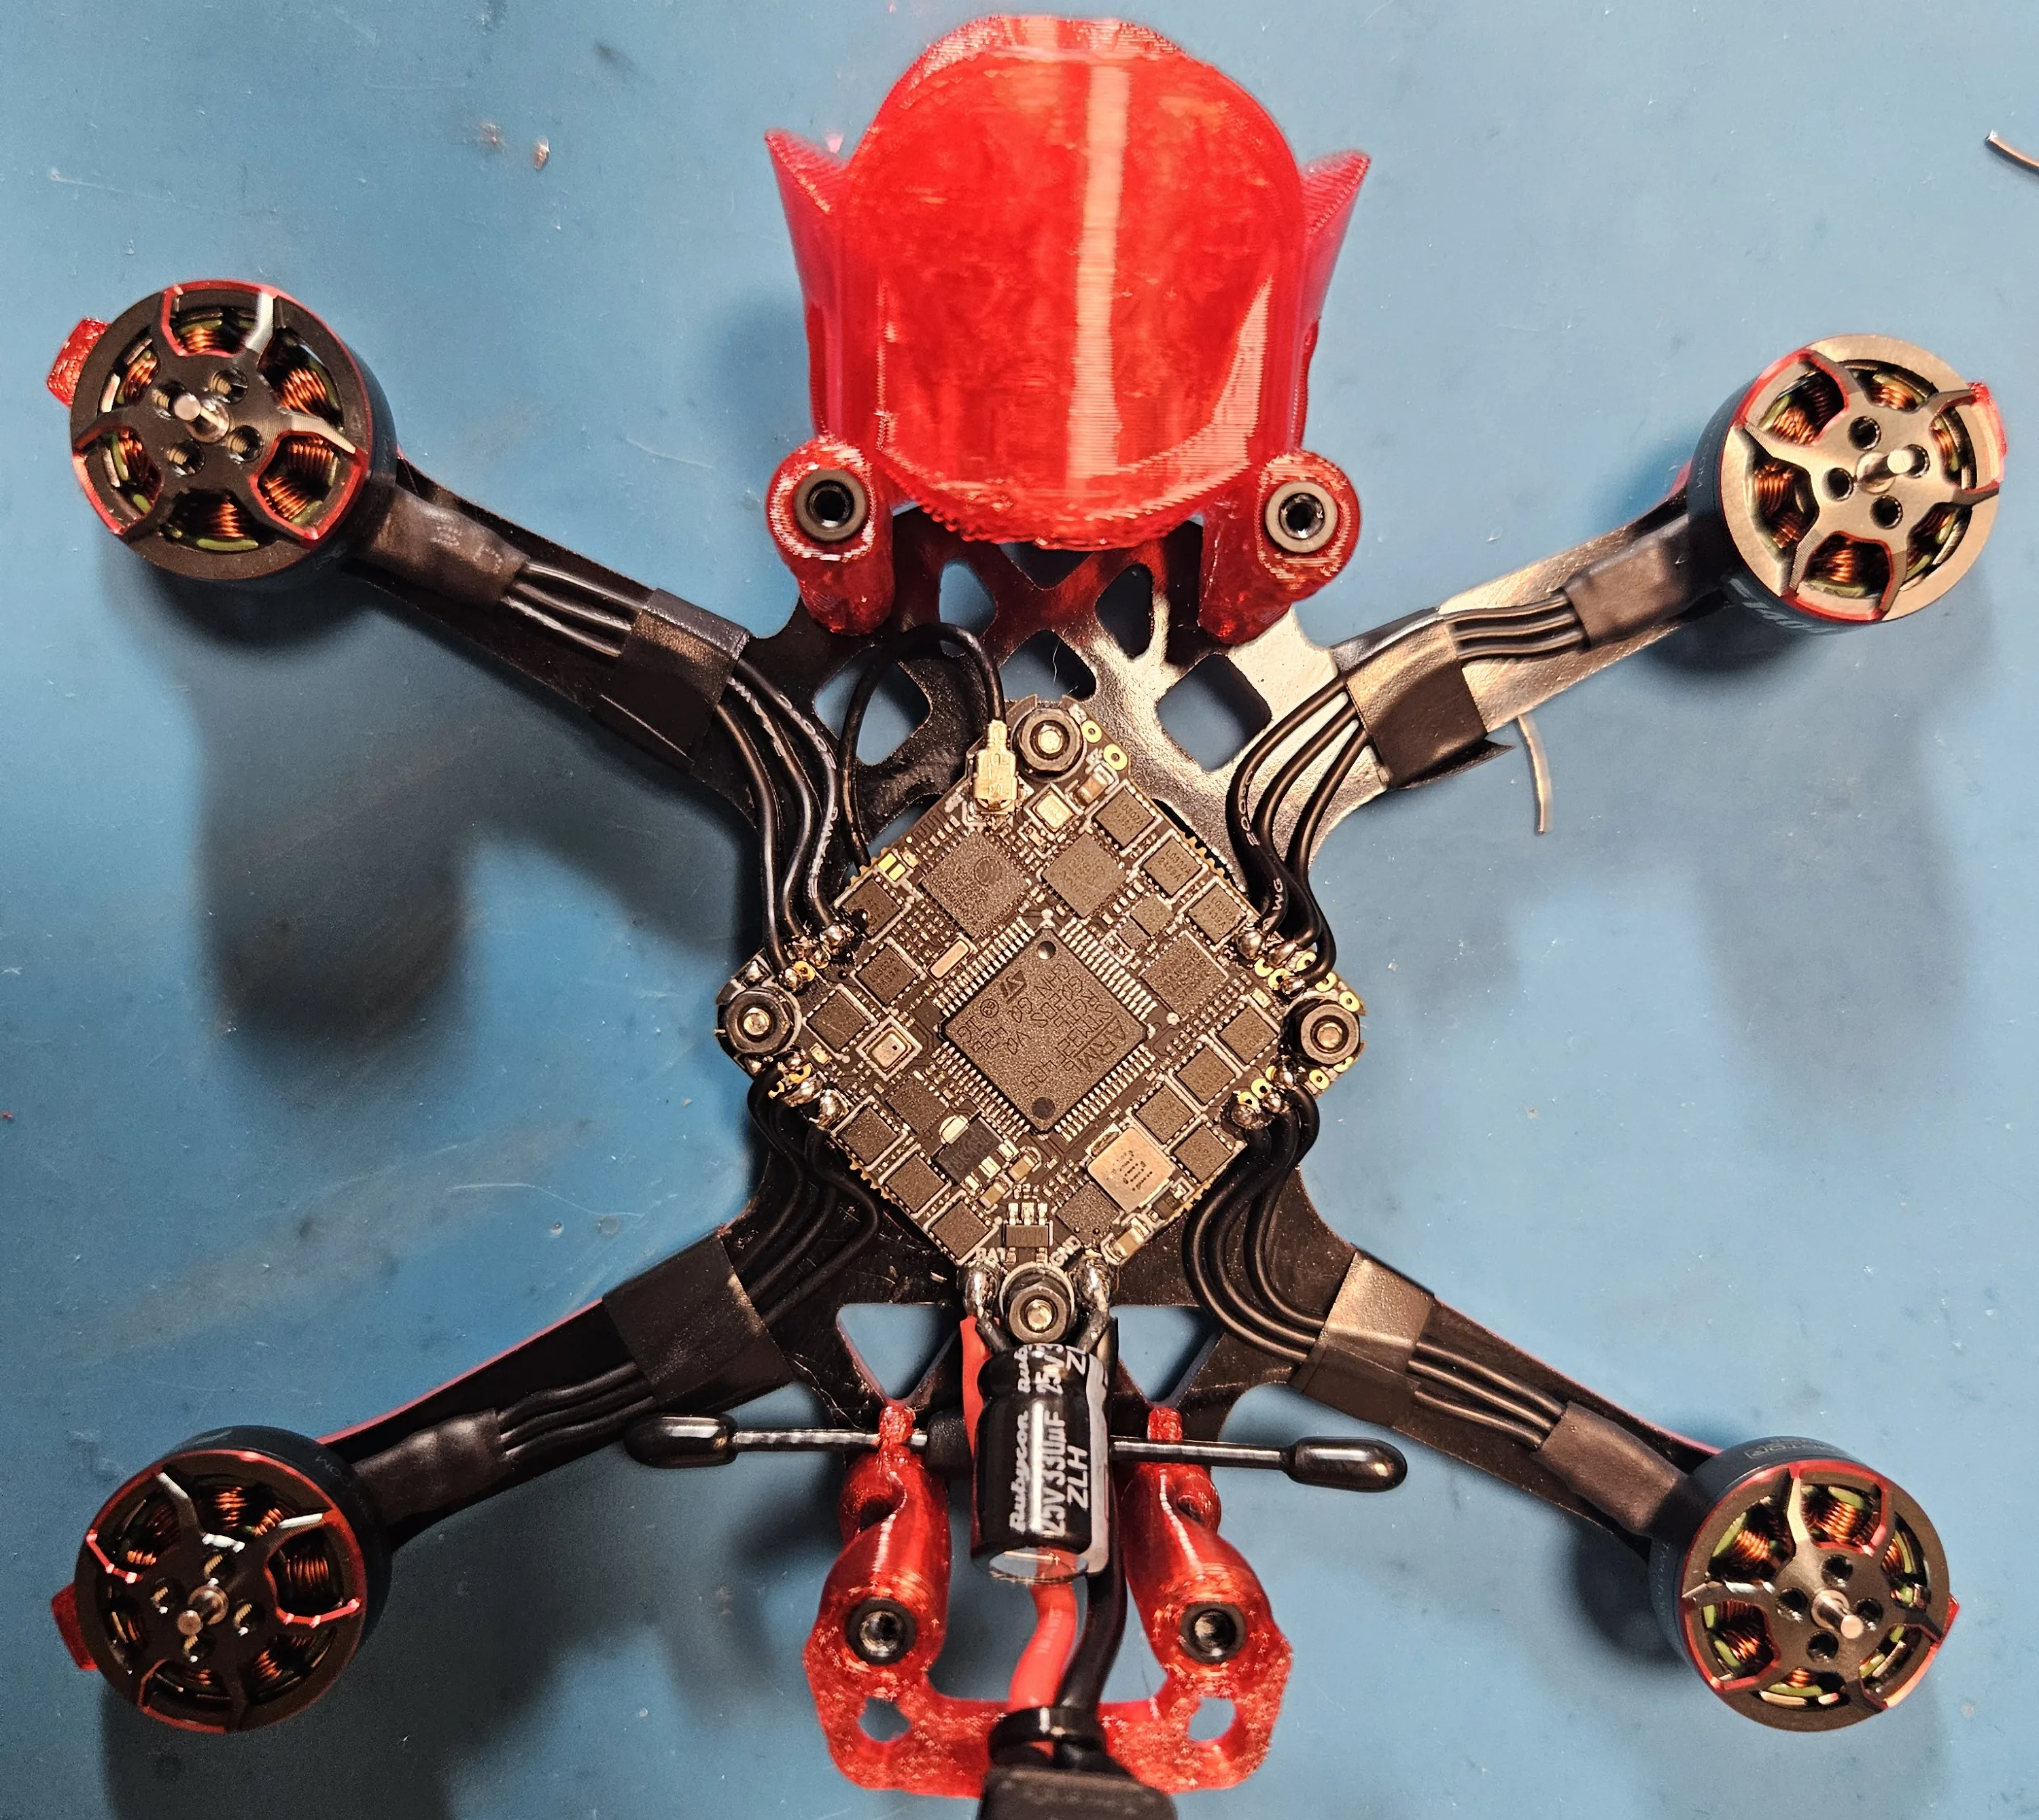
The ELRS Antenna clips into two little Hooks at the bottom of the Standoffs and is positioned securely on the inside of the frame.
The Top Plate Bumper als has two little Slots carved out that allow for a 1.8mm wide Zip Tie to slide through and secure the XT30 Plug in case of a Battery ejection.
Arm Guards and Landing Feet
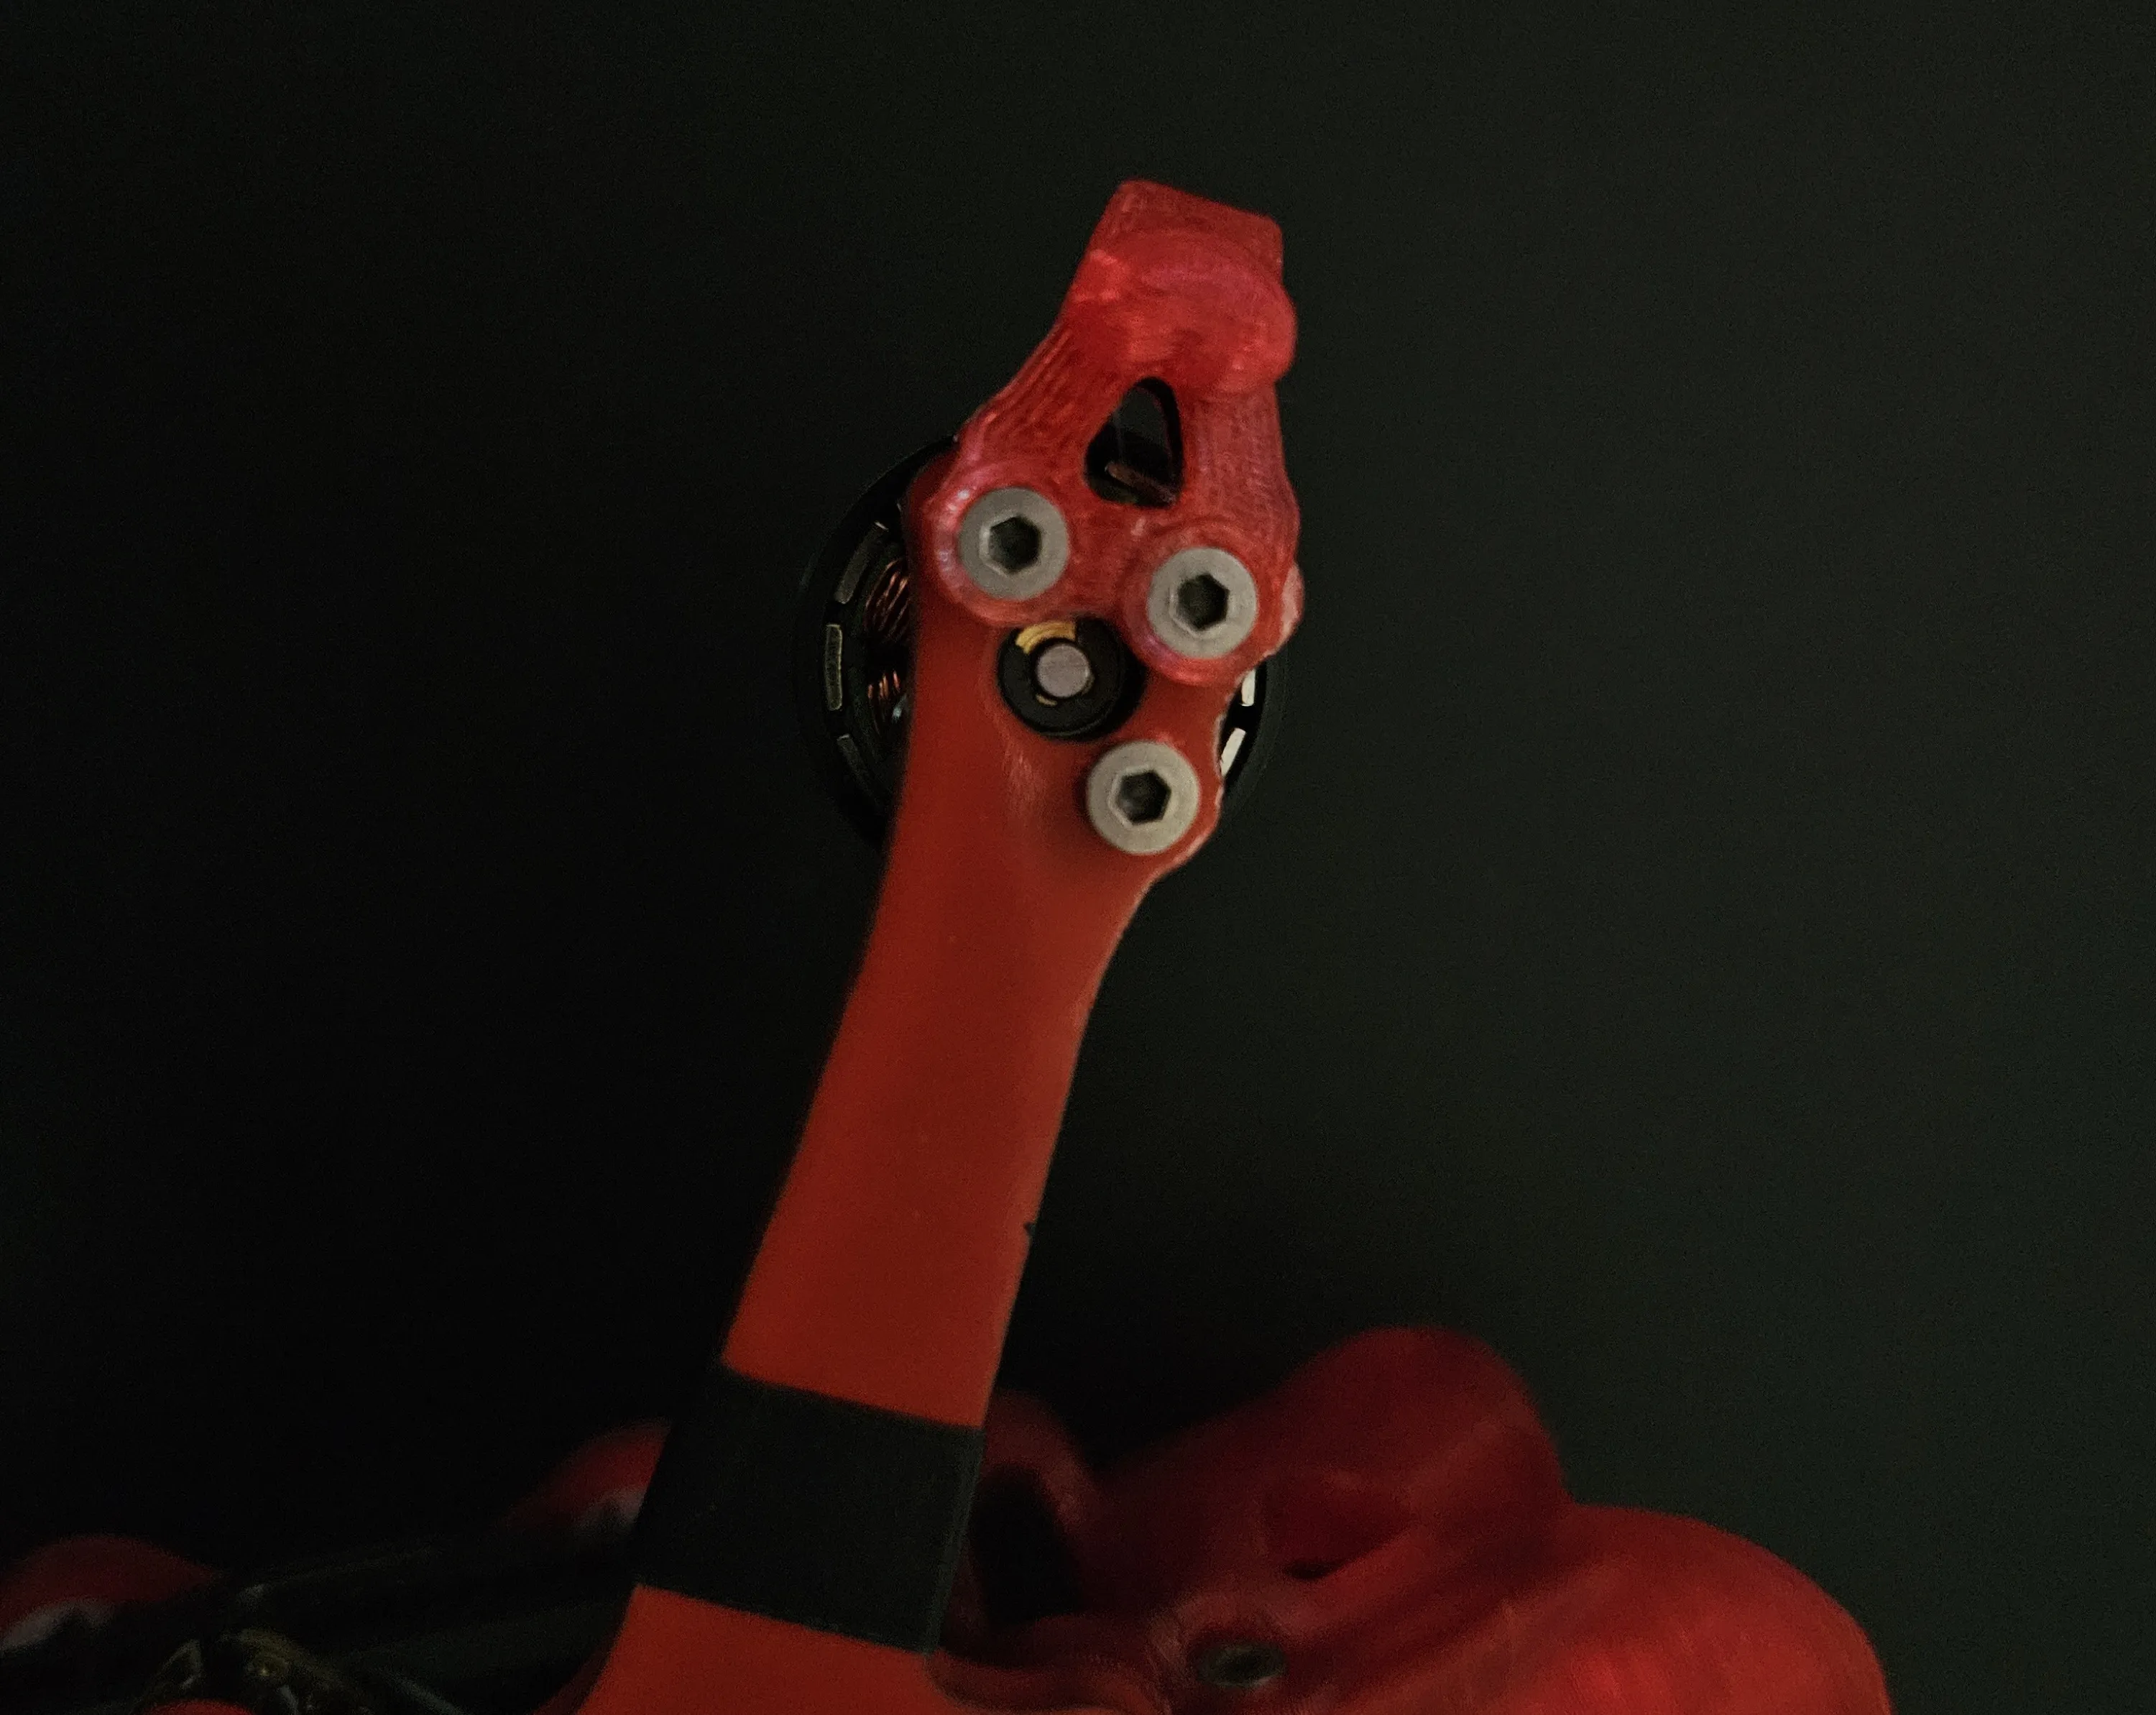
Since the Arms are not repleaceable Arm Guards were important to me to prevent wear.
I also wanted them to remain securely on the arms even in hard crashes.
The Arm Guards are secured with 2 of the 3 motor screws. They have little feet to allow for save landings and some skidding.
The ends have the most Material to soften crashes.
The Material is minimized in every other place to keep them light.
A single Arm Guard weighs about 0.4g yet I only needed to replace a single one in all my crash testing.
An alternative version of the Arm Guards is also available. I detected a little bit of wear on the carbon on the sides of the arms (next to the screws). These alternative Arm Guards offer a bit more side protection to prevent this wear.
Crash Testing
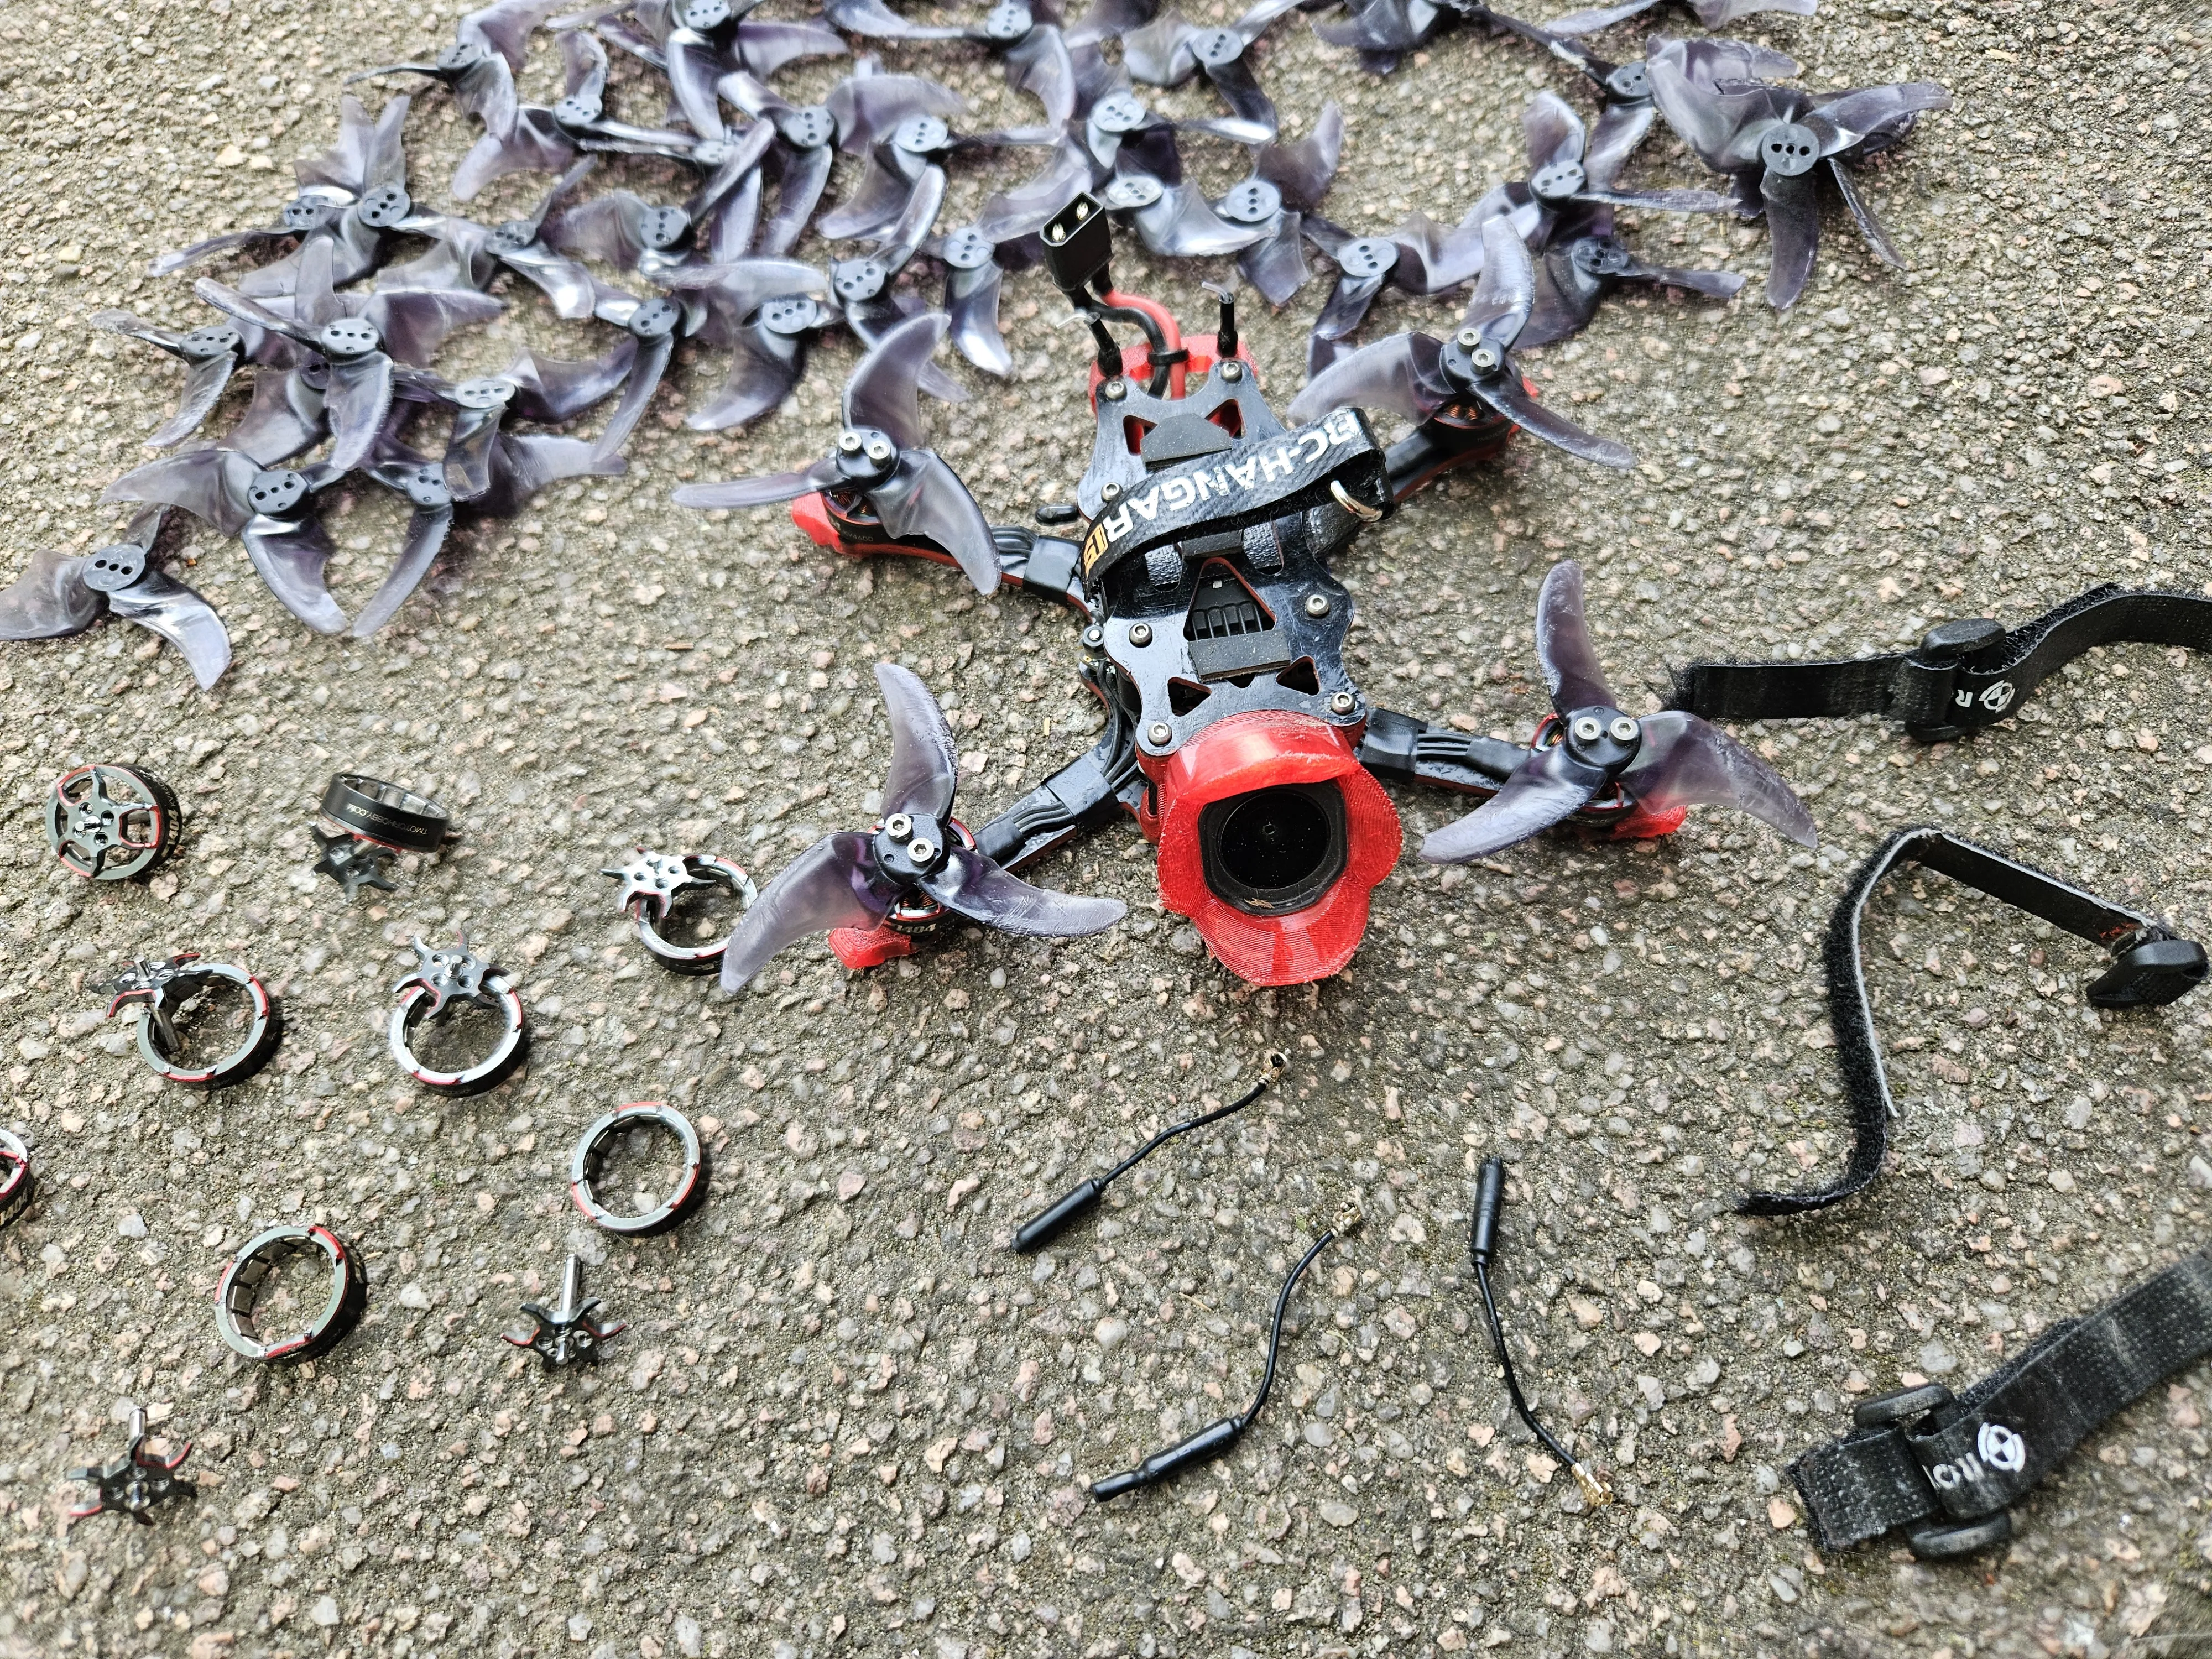
I mostly flew in the large barn as seen in the Trailer made mostly out of wood but with concrete walls and floor. I flew well over 100 packs and crashed many many times per Pack.
In this time I did not break the Frame or the O4 Pro (or even the AIO).
What I did break was 8 T-Motor F1404 Bells. These dont break because the Motors have inadequate protection but because of the repeated stress of the very stiff Avan Rush Props crashing into obstacles so many times. Eventually the center of the Bell breaks away from the rest of the bell.
That means I only ever needed to swap bells and not full Motors. This probably could be prevented by using less stiff propellers.
Altough I personally prefer having very durable propellers.
Otherwise I still of course broke a bunch of propellers, a few Lipo Straps and a few Whip Antennas over my time testing this Frame.
All in all the crashing testing showed that the expensive and harder to replace parts are well protected.
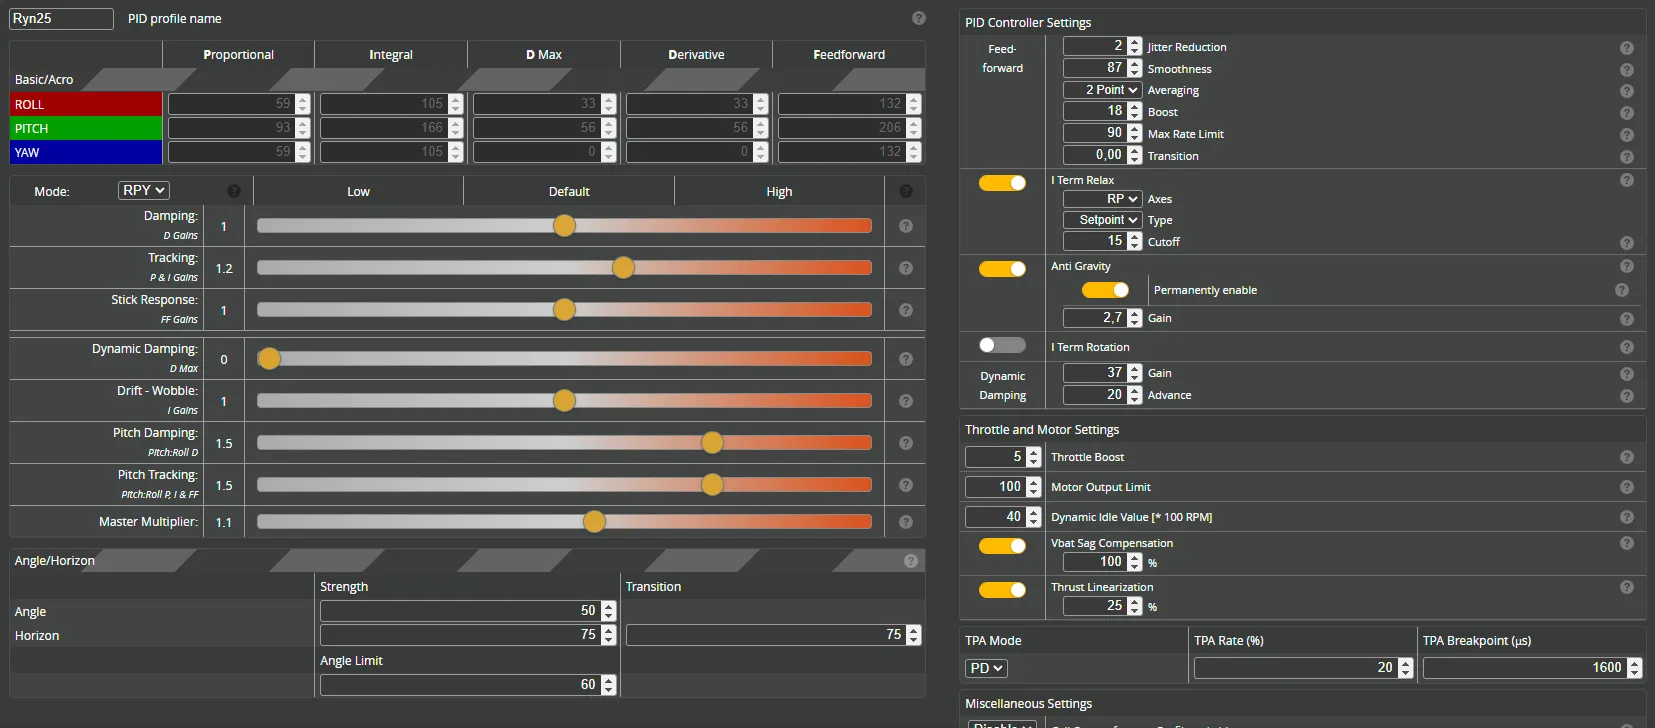
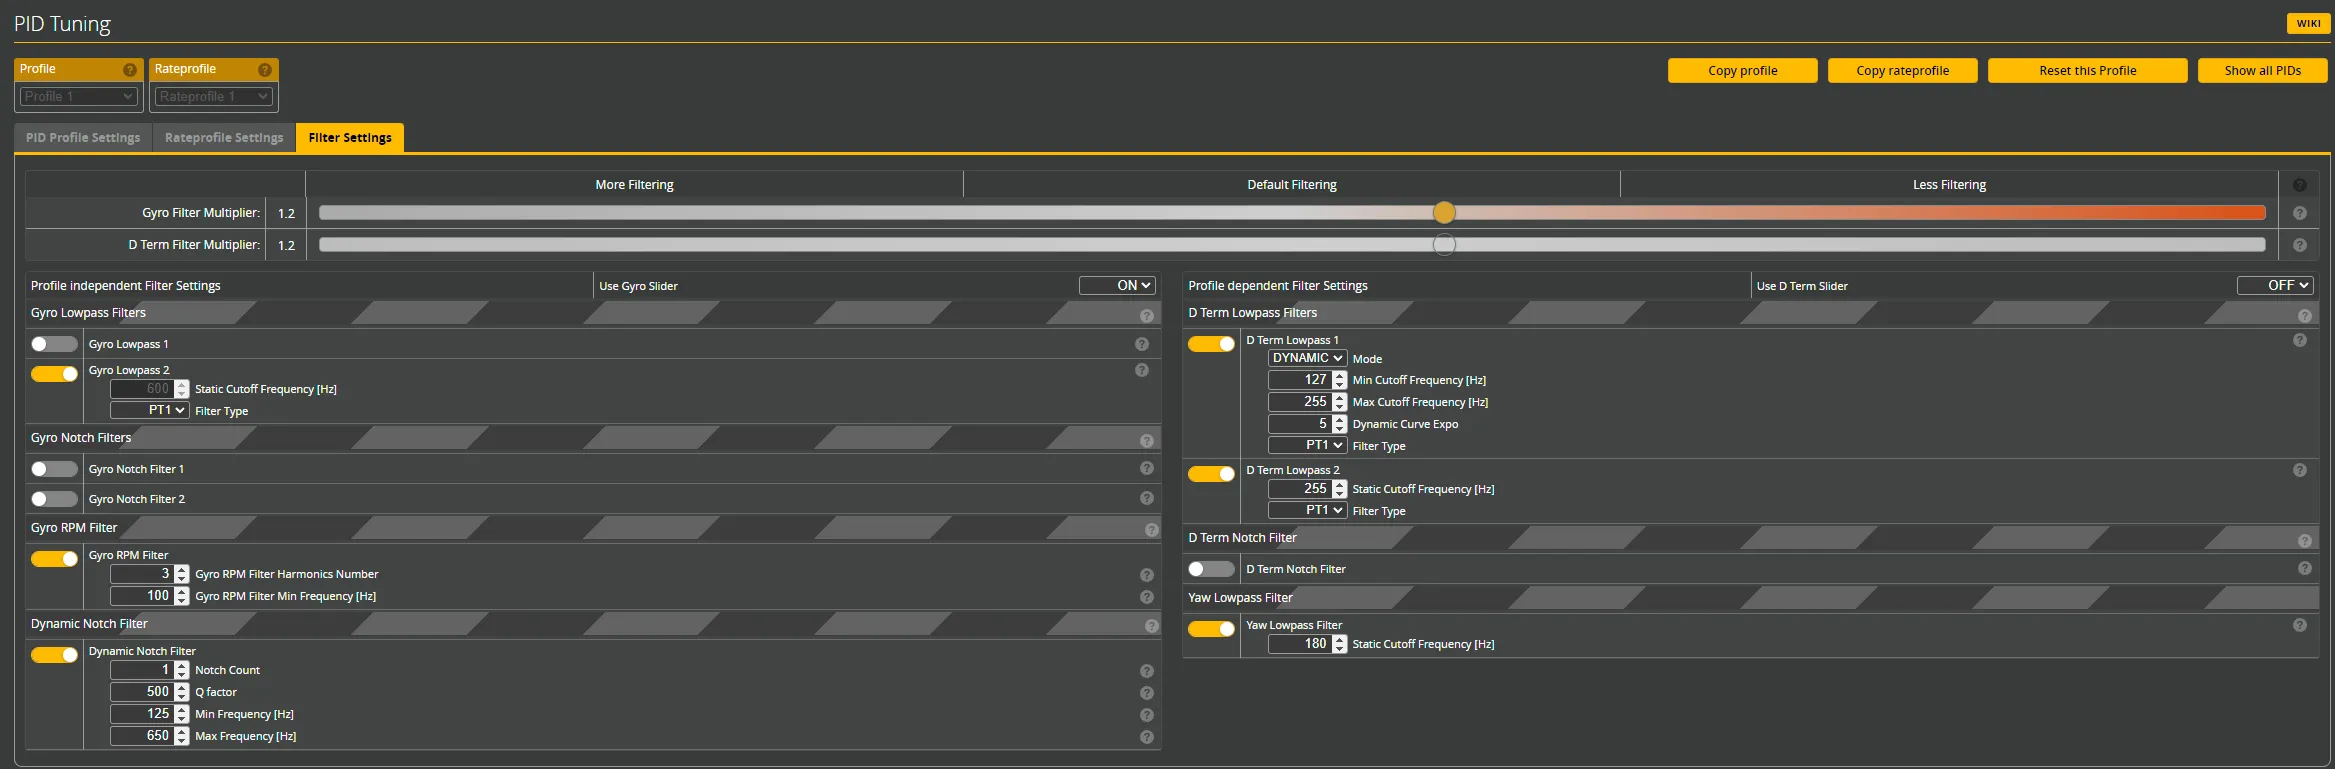
PID and Filter Tune
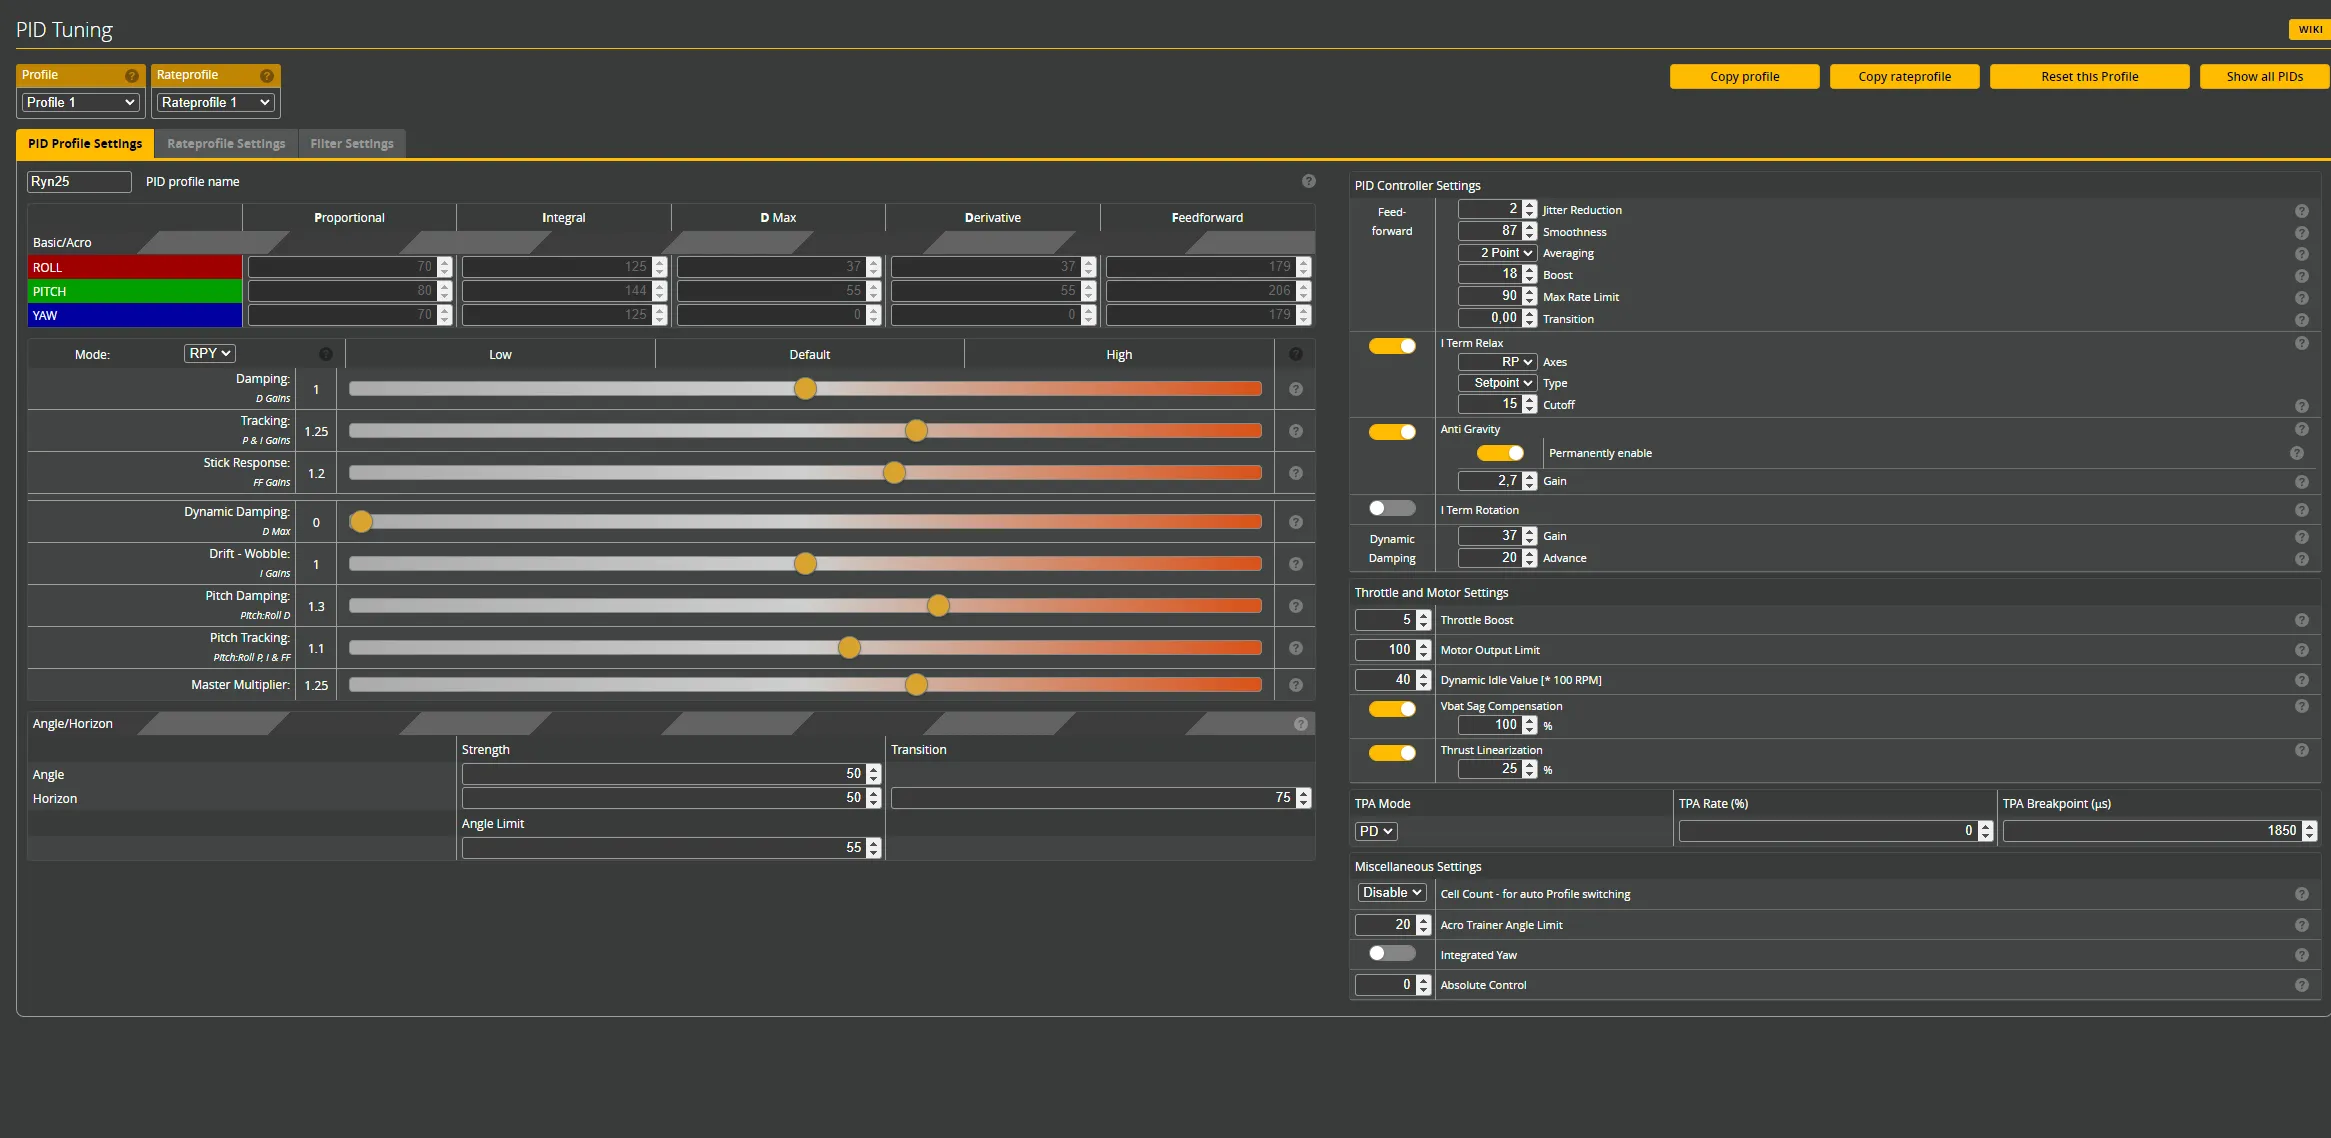
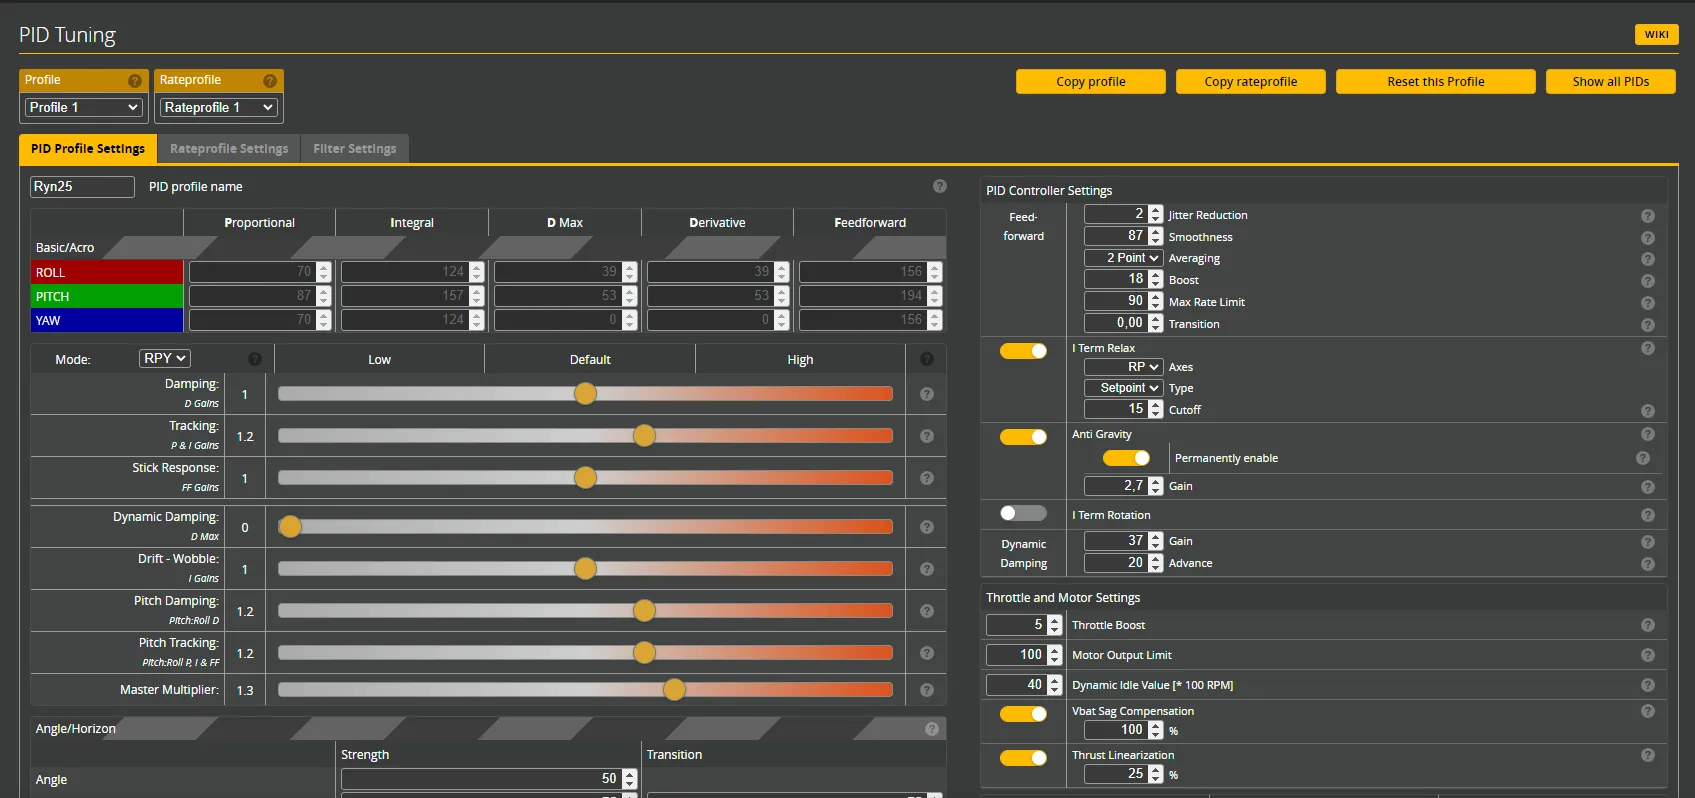
Im not much of a Tuner. I started by copying my Preset from my previous 2.5" Builds based on MurdersFPV Djinn Tune. Then did a quick BlackBox Explorer tune. I did not even touch the filters tho. It flies fine but I am sure it could benefit from full tune. Maybe I'll do that in the future or if someone else does it please send it to me and I'll post it here after testing it.
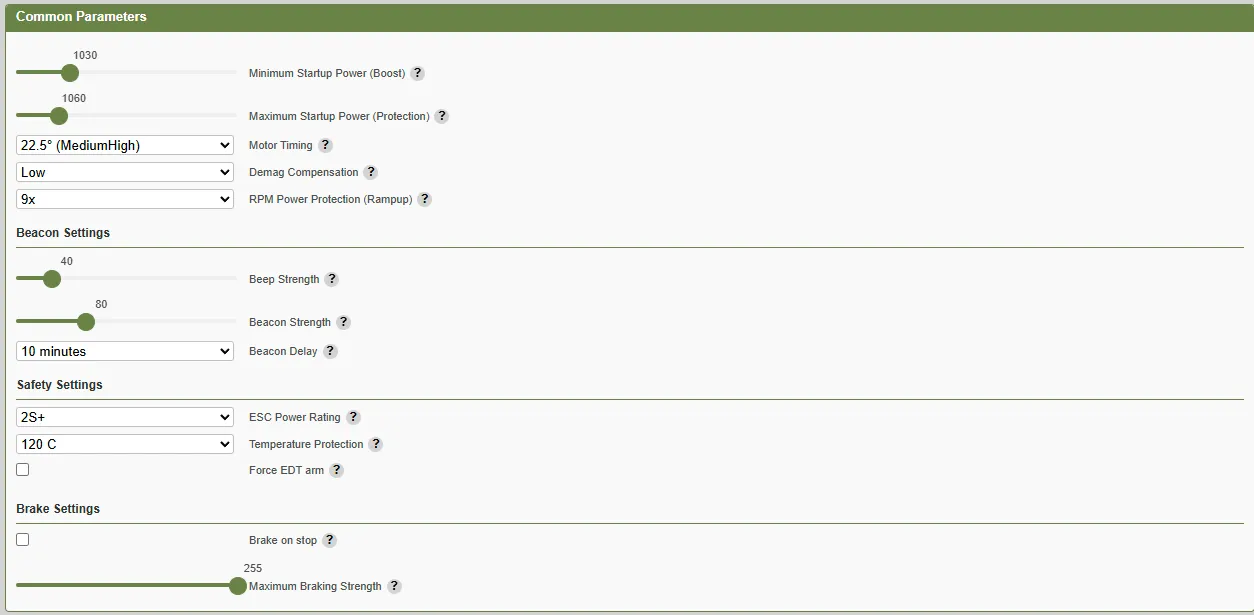
Update your AIO to Bluejay if it comes with BLHeli S and dont forget to enable Bidirectional D-Shot in the Motors Tab.
In the following pictures the master multiplier is set to 1.2 or higher, which I use with the Avan Props but I recommend that you start with 0.8 and then increase it until you are happy with the flight characteristics or the Drone starts sounding wrong / flies away.
Final Words
Looks like I could have wrote a Book about this drone….
Well a few last tid bits that might interest some people.
The color is just a custom paint job done using acryl spray paint and has nothing to do with this frame in particular.
I made this frame to create the perfect Drone for ME. I also spent a lot of time making this Drone and I think many others could get a lot of enjoyment out of it which is why I made it available and wrote down all this info for it.
If you think this could also be the perfect drone for YOU with some changes, leave a comment or E-Mail (ryn25fpv@gmail.com) me with your Feedback and if I agree I will adjust my design.
You can also use this E-Mail or the comment section here if you have any questions about the Frame, the Parts or trouble with your build!
License

You shall not share, sub-license, sell, rent, host, transfer, or distribute in any way the digital or 3D printed versions of this object, nor any other derivative work of this object in its digital or physical format (including - but not limited to - remixes of this object, and hosting on other digital platforms). The objects may not be used without permission in any way whatsoever in which you charge money, or collect fees.


Comment & Rating (40)