Compression Spring Designer - Parametric


Print Profile(2)


Description
Ever needed a compression spring NOW? Or have 1,000 on hand, and none with the right measurements? Spring Designer can save the day!
I was tired of trying to find compression springs, especially ones that met the models needs that I was printing as springs come in almost every dimension thinkable. So I designed a parametric spring maker to make any spring you need! All you need is spring/piano wire, which you can find all over on Amazon, in any wire thickness you need. Then you can plug in whatever spring dimensions you want and output a model that you can then create your own spring, of any length (up to your print bed size).
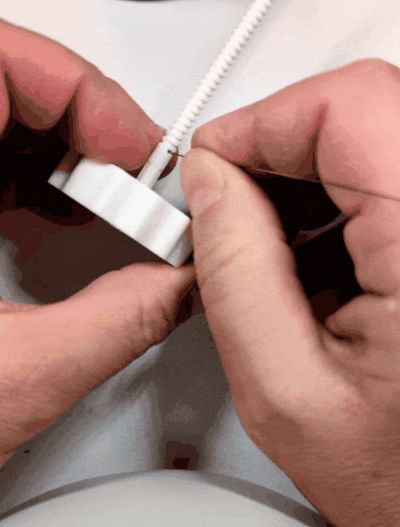
You can use this with a drill or the included knob. There's a gif in the images showing how this is supposed to be used.
I designed this Spring Designer/Maker with ease of use, and strength in mind. The bolt is not a normal thread, but it's specifically shaped to hold the exact wire dimension you want to use, and pitch. It also is printed horizontally, and not vertically on purpose to stop the layer lines from breaking very easily since they will be parallel to how the bolt will naturally bend when you are winding the spring.
Boost Me (for free)
If you found this useful, please gimme a boost or two! Thanks for the support.
Printing Tips:
- Use a textured plate to print for better adhesion. CLEAN your plate first with soapy warm water!
- PLA is fine, but using stronger materials when you have thicker wire dimensions is recommended. I made a thick 1.1mm wire spring using Bambu PLA, at 300mm long, and it worked without breakage. This is one of the example print profiles above.
- Generally a 0.2mm layer height is fine. If you are dealing with really small springs, you could lower it to get better wire clearance.
- Arachne walls
- 6+ walls
- 5+ top/bottom layers
- If you're not making the bolt solid, use gyroid infill, 15-35% depending on how hollow you want to go (I'd recommend just making the bolt SOLID with walls.
- Supports should be enabled (Organic Tree style), but they are ONLY needed for the shank part of the bolt (the part where the knob or a drill would be used. You do NOT need supports along the threading of the bolt. Depending on the parameters you have entered, Bambu Studio will attempt to add supports to the bolt, if that happens, please add a cylinder support blocker to the thread area of the bolt. There is a picture as an example.
- If you generated a rather long bolt, you will have to rotate it to fit your build plate, and possibly split the objects out as it creates it as a merged model. Then you can move/rotate all 3 pieces individually. By using the diagonal of the build plate, you can print a bolt length of around 310-330mm on a A1/P1/X1! That's a very long spring!
Parameter Tips:
- When setting up the parameters for the spring, remember that 3D printing has dimensional inaccuracy. If you have a 0.6mm spring wire, I would suggest setting the spring wire diameter to 0.7 or 0.8. There is a built in wire tolerance as well.
- When a spring is wound, I've found different types of wire used will actually roll back on itself, which causes the inner and outer diameter to end up 5-15% LARGER than desired. I wound a 10mm outer diameter spring using 1.1mm piano wire, and the outer diameter after wound, ended up around 11.5mm. So make sure you account for this by lowering your inner/outer diameter knowing it will increase when the actual spring is made.
- On that same issue of the spring rolling back on itself, that also means that if you want to make a 40mm long spring, make a spring that is actually 60mm long, to account for some “shrinkage”. If anyone has some insight on how to make this not happen, please let me know!
Usage Tips:
- WEAR GOLVES (Workshop/Gardening type, not latex)! BE SAFE! I know I didn't in the example, but don't be stupid like me!
- When starting the wind, there is a hole through the first thread. Make sure you start in this hole and not the other side:

- Always start the wire in the hole first using your hands. The guide tool isn't meant for the first bend. Use pliers if your wire is really thick.
- You can put the guide tool on the wire first, or after, it doesn't matter. If you have small enough wire, you don't even need it. USE GLOVES!
- Make sure to keep pressure clamped on the guide tool, no pressure is needed on the knob/drill chuck area, but holding the guide tool stable against the bolt gives really good results.
- If you use a drill, use low torque/speed, keep your motion smooth and steady.
- Once done, snip at the guide tool (if you still have wire left), and then you can snip at the start, where the wire bent into the starting hole. If it's not accessible, use a small flat head screwdriver, to pry it up. USE THE RIGHT SNIPS for your wire diameter!
- Then simply “unwind” it off the bolt.
If you enjoyed this design and want to show some support, I have a Ko-Fi page where tips are always welcome — but never expected. Every little bit goes right back into the hobby and helps me keep creating. Thanks for being part of the community! ☕🙏
License
You shall not share, sub-license, sell, rent, host, transfer, or distribute in any way the digital or 3D printed versions of this object, nor any other derivative work of this object in its digital or physical format (including - but not limited to - remixes of this object, and hosting on other digital platforms). The objects may not be used without permission in any way whatsoever in which you charge money, or collect fees.
Comment & Rating (76)