Poop - m42 H2D - Poop Chute and Bin


Print Profile(1)

Bill of Materials

Description
⚠️ Important Notice – Please Read Before Printing an AMS Riser
Due to a license change by benlevi, the original creator of my AMS Riser V2 Remix, I am no longer able to update the description of this model. I have already reached out to Support about this issue, but they were not able to help me – because of the license change, this situation is simply how it is, there is nothing more I can do on my end to modify the listing.
I'm currently receiving an increasing number of complaints from users who have printed the Riser V2 for the Bambu Lab P2S or X2D
⚠️ Compatibility – please double-check before you print:- Riser V2 → P1S, P1P, and X1C
Printing the wrong version will result in fitment issues, as the printer dimensions and mounting points differ between generations.
Thanks for your understanding, and sorry for any confusion caused by the locked description – my hands are tied here, but I hope this notice helps clear things up!
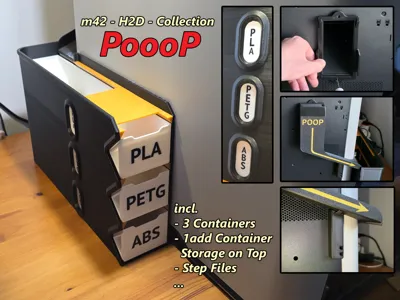
PoooP - The Poop Chute and Bin model for the H2D printer is now available.
Pooop Chute – Multi-Sorting Module for H2D
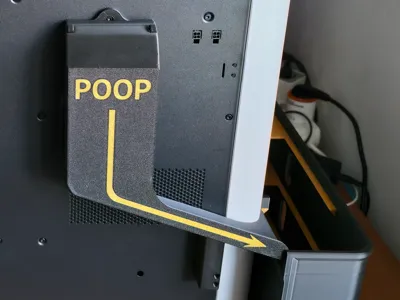
The "Pooop Chute" is a clever waste management system designed for H2D printers with a poop chute. It uses a slide to guide filament waste into one of three stackable containers.
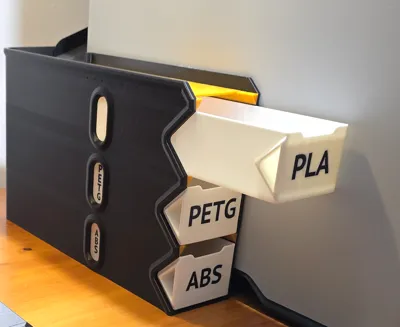
The sorting is controlled mechanically by how far the containers are inserted:
- Top container fully inserted: Waste goes into the top bin.
- Top slightly pulled out, middle fully inserted: Waste is routed into the middle bin.
- Top and middle slightly pulled out: Waste ends up in the bottom bin.
Perfect for separating different materials like PLA, PETG, and ABS. Includes a top shelf for extra storage and STEP files for customization.
Assembly:
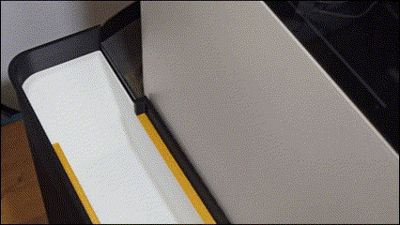
First, remove the two screws located above and below the purge chute on the printer housing. Then, mount the first part of the Pooop Chute in that position:

Use the two included screws from this part (see image) to mount the next piece in the designated position (see image)


Carefully slide the chute onto the first part from above and connect it at the bottom to the second part using the dovetail lock


The rear section is now complete. You can now move the printer to its desired final position..Now prepare the collection container. Insert the three stabilizer plates (see image) into their designated positions. In my experience, gluing was not necessary.


Now the collection container can be positioned next to the printer, aligned with the chute.

The next step is optional: Using the cross parts (see image), the collection bin can be fixed to the floor to prevent shifting when sliding the poop containers in and out. You’ll need a 35 mm × 15 mm double-sided adhesive strip. These can be ordered from Makerworld, for example (see link below).


Well Done

Edit 20250425
added m42 H2D - Container MIX.step (only as Model File)

 A heartfelt thank you to the entire Makerworld community! Your creativity, continuous support, and inspiring collaborations mean the world to me. It’s amazing to be part of such a dedicated and innovative group. Let's keep making great things happen together!
License
You shall not share, sub-license, sell, rent, host, transfer, or distribute in any way the digital or 3D printed versions of this object, nor any other derivative work of this object in its digital or physical format (including - but not limited to - remixes of this object, and hosting on other digital platforms). The objects may not be used without permission in any way whatsoever in which you charge money, or collect fees.
Comment & Rating (46)