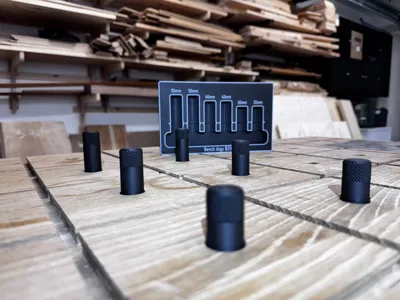
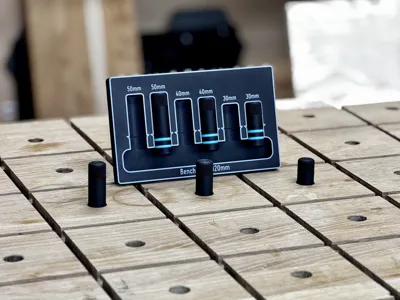
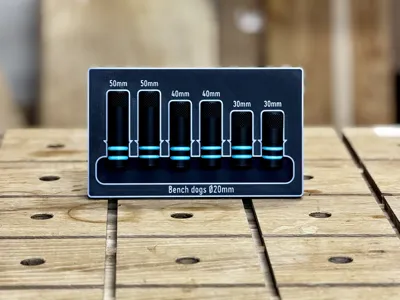
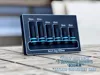
Benchdog with a twist Ø20mm NO AMS


Print Profile(2)
Bill of Materials
- M8x40 x 2: Bult
- m8x50 x 2: Bult
- m8x60 x 2: Bult
- m8_nut x 6: Nut
Description
Boost Me (for free)
I would really appreciate it if you gave me a boost. It motivates me to continue designing and posting new models.
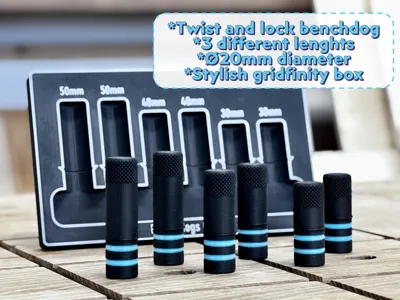
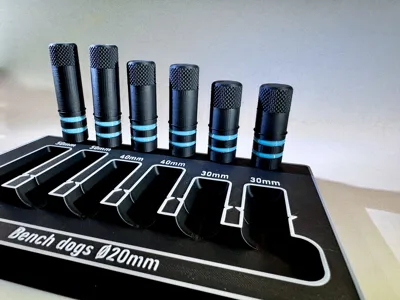
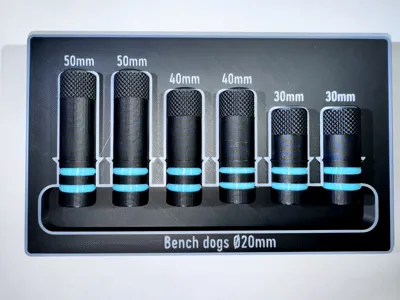
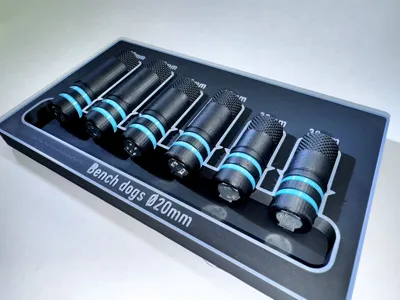
This model consists of 6 benchdogs in three different lengths with twist and lock function and a stylish gridfinity tray to store them in.
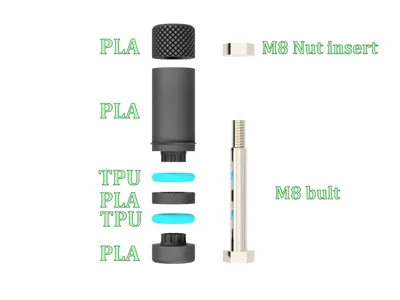
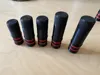
Available with two different versions of benchdogs. One with M8 steel bolt and nut and one with printed bolt and screw cap. I really recommend that you make it with steel m8 bolt. It gives a very authentic feel in both weight and function.
If you want to use the plastic bolt and screw head on printbed no. 4, you need to glue the bolts together. I split them in half to print them so they are strong enough to withstand the stress. When I printed them upright, they broke off. It is important to wait until the glue has dried so that the screw head does not get glued on as well.
Designed the tray so that it will work with gridfinity

I printed mine in sunlu black PLA matte, sunlu white PLA+ and Sainsmart turquoise TPU.
The print profile is set so you just have to put in the right filament and then press print.
Important if you print with bolt and nut insert. I have put a break on the screw top (print plate no. 5) to insert the m8 nut.
It's very simple if you haven't done it before. It will automatically pause and when it does, put the nut in and then press play on the printer.
The O-ring will be printed in TPU. For me it worked best with 2 walls with 0 infill. The print profile is set to that, if you want to change it, it's up to you.

Only the bottom part needs support, then all other parts can do without, even that is included in the print profile.
When you print the tray, I have also included a filament change pause on the last two layers to make a color change on the text.
If you are looking for a pair of clamp stands, I have a model that you might like. My benchdogs work perfectly with them.
If you like the model, I would be very happy if you give it a boost and a thumbs up. If you really want to make my day, feel free to follow me for more cool designs. Please leave a comment and a picture of your creations.
License
You shall not share, sub-license, sell, rent, host, transfer, or distribute in any way the digital or 3D printed versions of this object, nor any other derivative work of this object in its digital or physical format (including - but not limited to - remixes of this object, and hosting on other digital platforms). The objects may not be used without permission in any way whatsoever in which you charge money, or collect fees.
Comment & Rating (34)