Portable thread Chair / wood + 3D printing


Print Profile(1)

Bill of Materials
- self-tapping wood screws x 1: 9 screws per leg (3.5*20mm)
- wooden dowels x 1: 28 mm in diameter - 50cm in length
- wood board x 1: or something comparable
Description
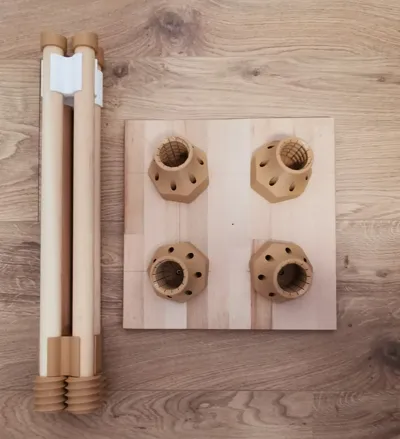
I absolutely love experimenting with my 3D printer—especially when I can combine printed parts with other materials like wood. The wooden rods attach using 3D-printed threaded connectors and clips, so you can quickly take the chair apart and take it with you or store it.
You can get creative! You don’t have to stick with four legs—using three or more supports, or even different-sized boards, you could make a bench, a small table, or something entirely unique.
For my design, I used 3.5×20 mm wood screws, with up to 9 screws per leg
(depending on how sturdy you want it, I recommend using all).
the model is designed for wooden dowels with 28 mm in diameter, and my seat board is 17.4 mm thick.
Assembly Guide: How to Build the Chair
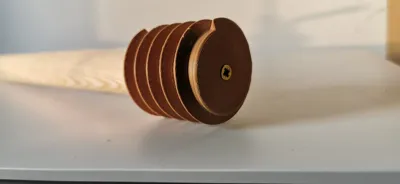
Step 1: Attach the Threaded Connectors to the Wooden Dowels
- Slide the 3D-printed threaded connectors onto the wooden dowels.
- Secure them with self-tapping wood screws.
(Tip: The connection is press-fit, meaning it expands slightly when pressed together. Don’t be afraid to tap it firmly into place!)
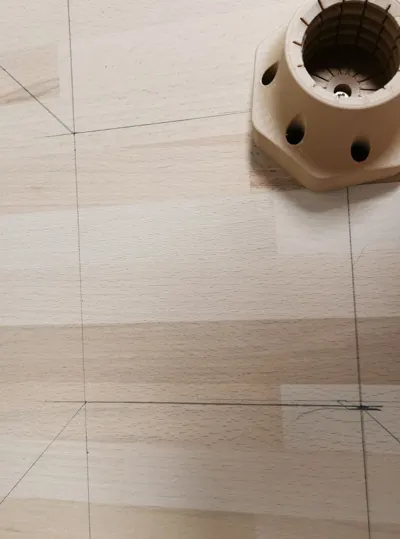
Step 2: Mount the Connectors to the Seat Board
- Mark & Align: Mark where the connectors will go on the board.
- Start with the Center Screw: Insert the middle screw first to lock the position.
- Adjust if Needed: Note that there is a 15 degree angle, so make sure the wooden dowels would point outwards.
- Insert the remaining screw: give all screws one final tighten
Step 3: Screw in the Wooden Dowels
- Twist the dowels into the threaded connectors.
(Note: The first few turns might be tight—don’t hesitate to apply a bit of force! After that, it should thread smoothly.)
Last Step: Add the Leveling Feet
Attach the 3D-printed leveling feet to the bottom of the dowels to compensate for the 15-degree angle.
This project was an absolute blast—from designing to assembling! I hope you like my model and have just as much fun building it as I did.
I’m really excited to hear your feedback, suggestions, and ideas
Your feedback means a lot to me—let me know how your build turns out! (upload pictures I really want to know what your creations look like)
License
You shall not share, sub-license, sell, rent, host, transfer, or distribute in any way the digital or 3D printed versions of this object, nor any other derivative work of this object in its digital or physical format (including - but not limited to - remixes of this object, and hosting on other digital platforms). The objects may not be used without permission in any way whatsoever in which you charge money, or collect fees.
Comment & Rating (4)