LED House Numbers 0-9 - V2 (19cm, 24cm, and 29cm)


Print Profile(1)

Description
Boost Me (for free)
If you like this model, consider giving it a boost! It’s free and helps me keep creating more models!
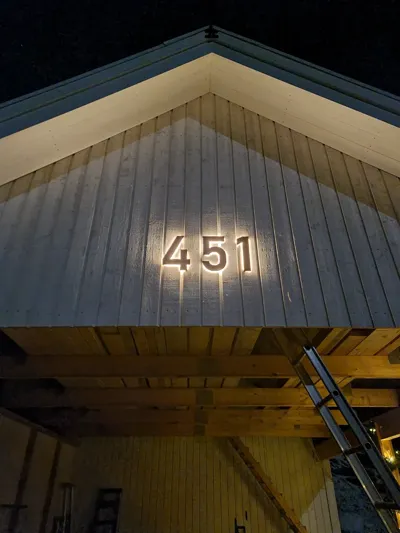
Backlit LED House Numbers - Version 2 (19cm, 24cm, and 29cm)
Introducing Version 2 of my backlit house numbers, now published under a new name. This updated version is more durable, addressing the issues of Version 1 while making significant improvements to the overall fit and design of the parts. Available in three sizes—19cm, 24cm, and 29cm (7.5in, 9.5in, and 11.5in)—these house numbers are compatible with LED strips that have a maximum width of 10mm.
To assemble, print the front part in black (or another dark color) and the back diffuser part in white. For the lighting, I recommend using waterproof 12V LED strips connected to a DC power adapter. The white diffuser evenly distributes the light, and it should be glued with super glue or silicone for a watertight seal.
For my own build, I used Esun PLA+ and applied automotive UV-resistant paint to the black parts. To minimize warping and longevity I suggest using PETG or ASA for printing.
I used cuttable IP65 LED strips, with 60-120 LEDs per meter and a 3000K warm white color temperature. To fit the curves of the numbers, I had to cut the strips. I then soldered wires between the segments of the LED strips and drilled a hole in the back (diffuser) for the wire. I left the hole undrilled initially so I could choose where the wire would exit. To ensure everything was watertight, I applied hot glue to all exposed wires and soldered connections and glued the front and back together. Ive used both silicone and super glue, and both seems to work fine. Finally, I connected a 12V DC female connector to the wires and tada, let it be light!
In summary, here’s what you’ll need:
- Printed house numbers (front and back)
- 12V IP65 LED strips (3000K warm white)
- Wire (any type of wire will work)
- Soldering iron and solder
- 12V DC adapter
- 12V DC female connector (preferably one with screw terminals)
- Hot glue
- Flux (optional, but helpful)
- Adhesive to glue the halves together
If you would like me to add letters, please like the model and post a comment with the letters you'd like included, and I'll be happy to assist you.
I will soon upload a video demonstrating the assembly and installation process for these house numbers.
Feel free to reach out if you have any questions—I'm happy to help!
License
You shall not share, sub-license, sell, rent, host, transfer, or distribute in any way the digital or 3D printed versions of this object, nor any other derivative work of this object in its digital or physical format (including - but not limited to - remixes of this object, and hosting on other digital platforms). The objects may not be used without permission in any way whatsoever in which you charge money, or collect fees.
Comment & Rating (43)