
Print Profile(1)

Description
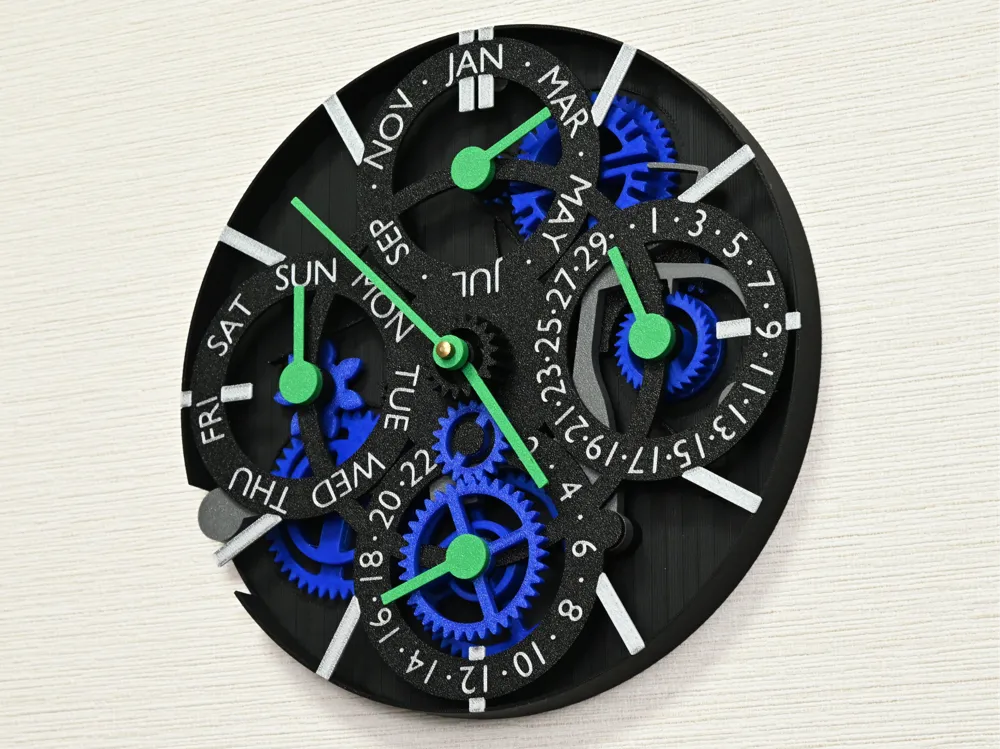
A clock with a perpetual calendar mechanism that correctly handles all types of months, including February in a leap year, has been developed. Despite the weak torque of a quartz clock movement, an improved mechanism has been designed to mechanically realize this complicated function.
The 3D model uploaded here is the specialized version using AMS for better visual quality. If you want to make this clock without multi-filament print, please take a look at the original version at
https://www.instructables.com/Quartz-movement-Based-Perpetual-Calendar-Clock/
https://www.thingiverse.com/thing:5980536
https://www.printables.com/model/457543-quartz-movement-based-perpetual-calendar-clock
Features
- The calendar advances automatically, so you do not need to adjust it until March 2100.
- It uses a commercial clock movement, so it can work for a long time without an external power supply.
- The calendar is easy to adjust by directly rotating the clock hands.
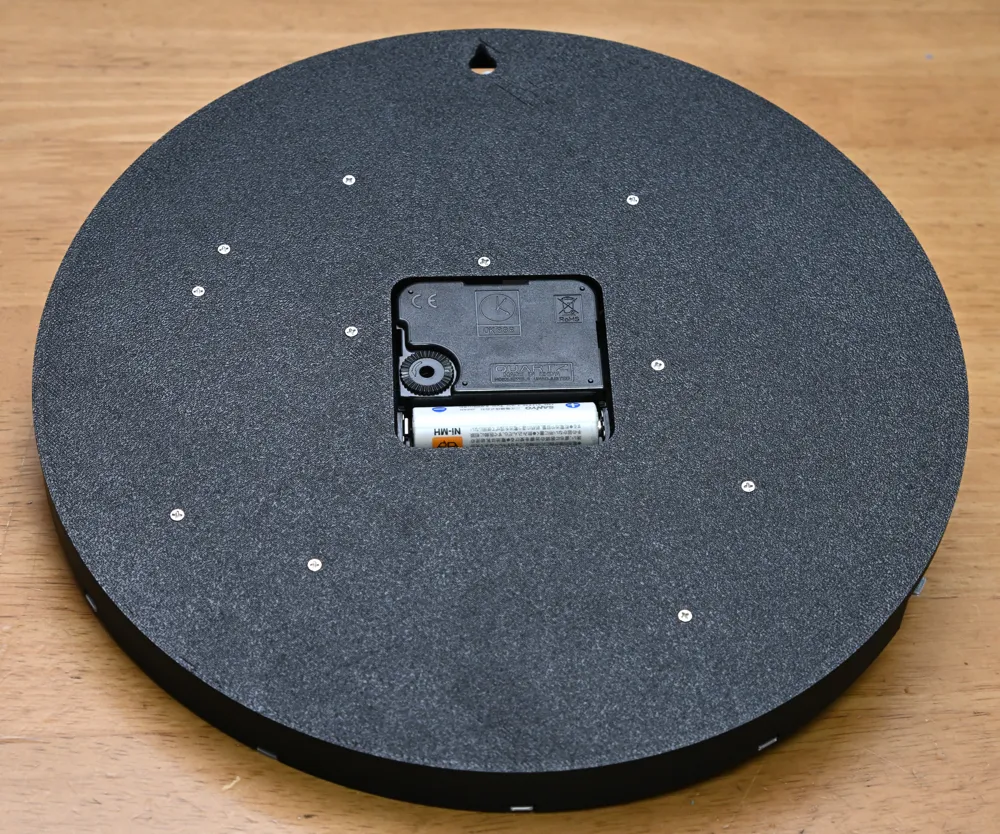
- The rear surface is flat, making it easy to hang on a wall beautifully.
- The skeleton design exposes the mechanism inside, making it easy to assemble.
- There are no visible screw heads on the front side.
- This clock is easy to print, as all parts can be printed without support structures.
Supplies
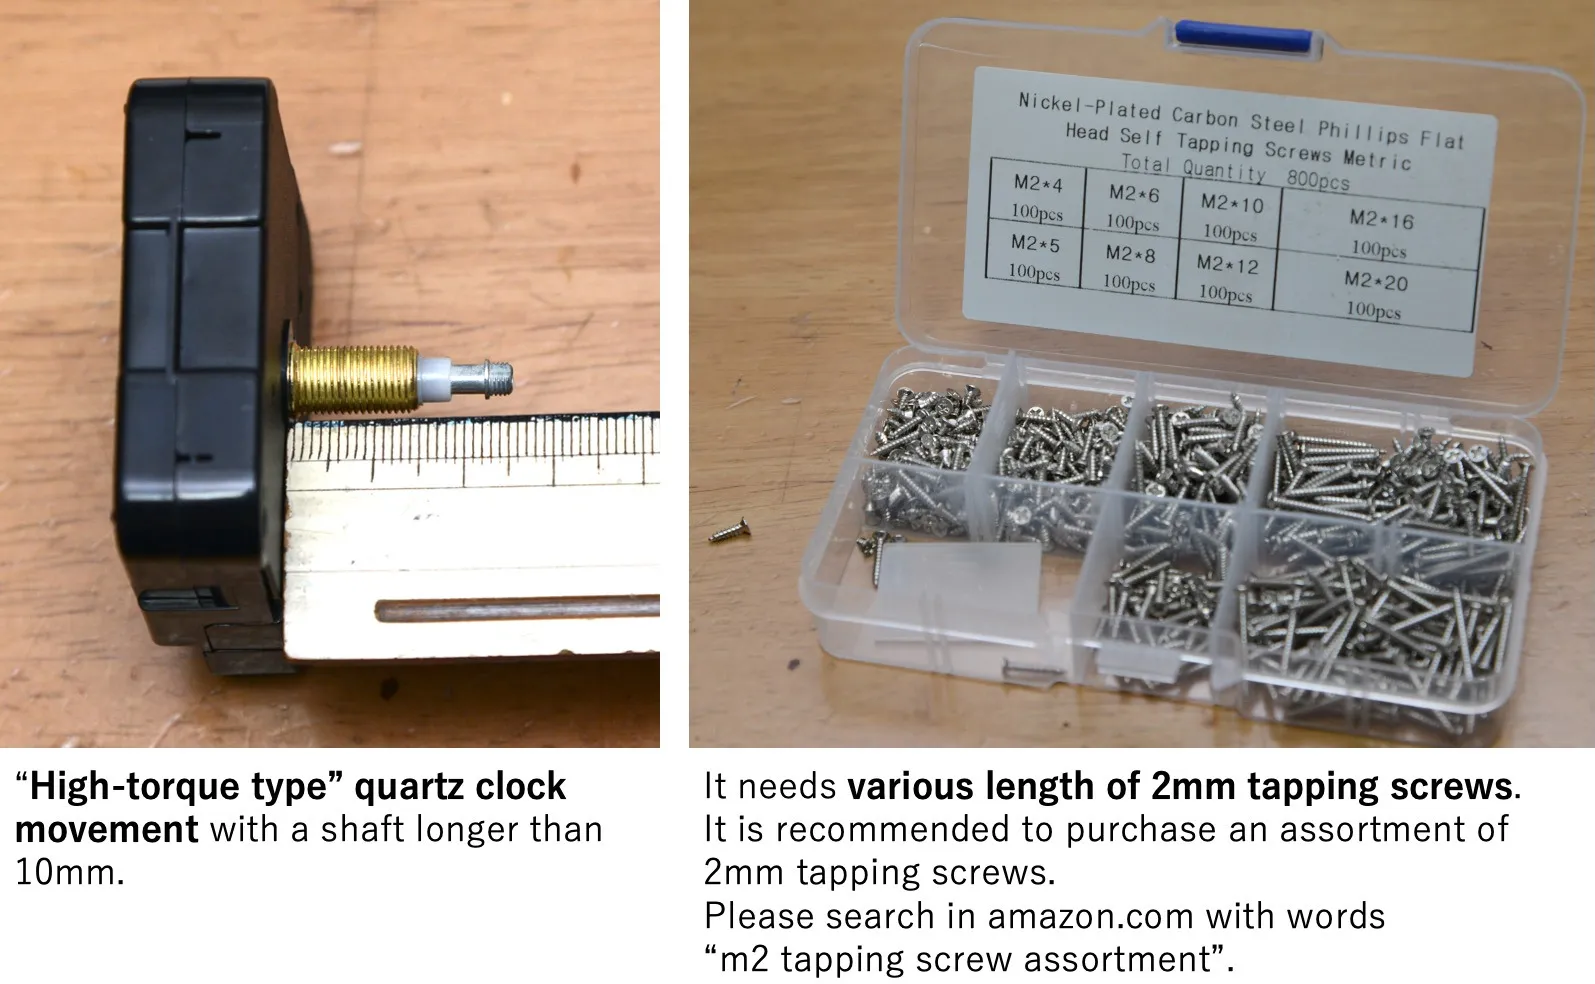
- High torque type" quartz clock movement commonly sold in online stores such as amazon.com. It comes with a long minute hand which is attached to the shaft using a cap nut. I used this one.
- An assortment of 2mm tapping screws. It is also sold in online stores. This clock uses relatively short tapping screws.
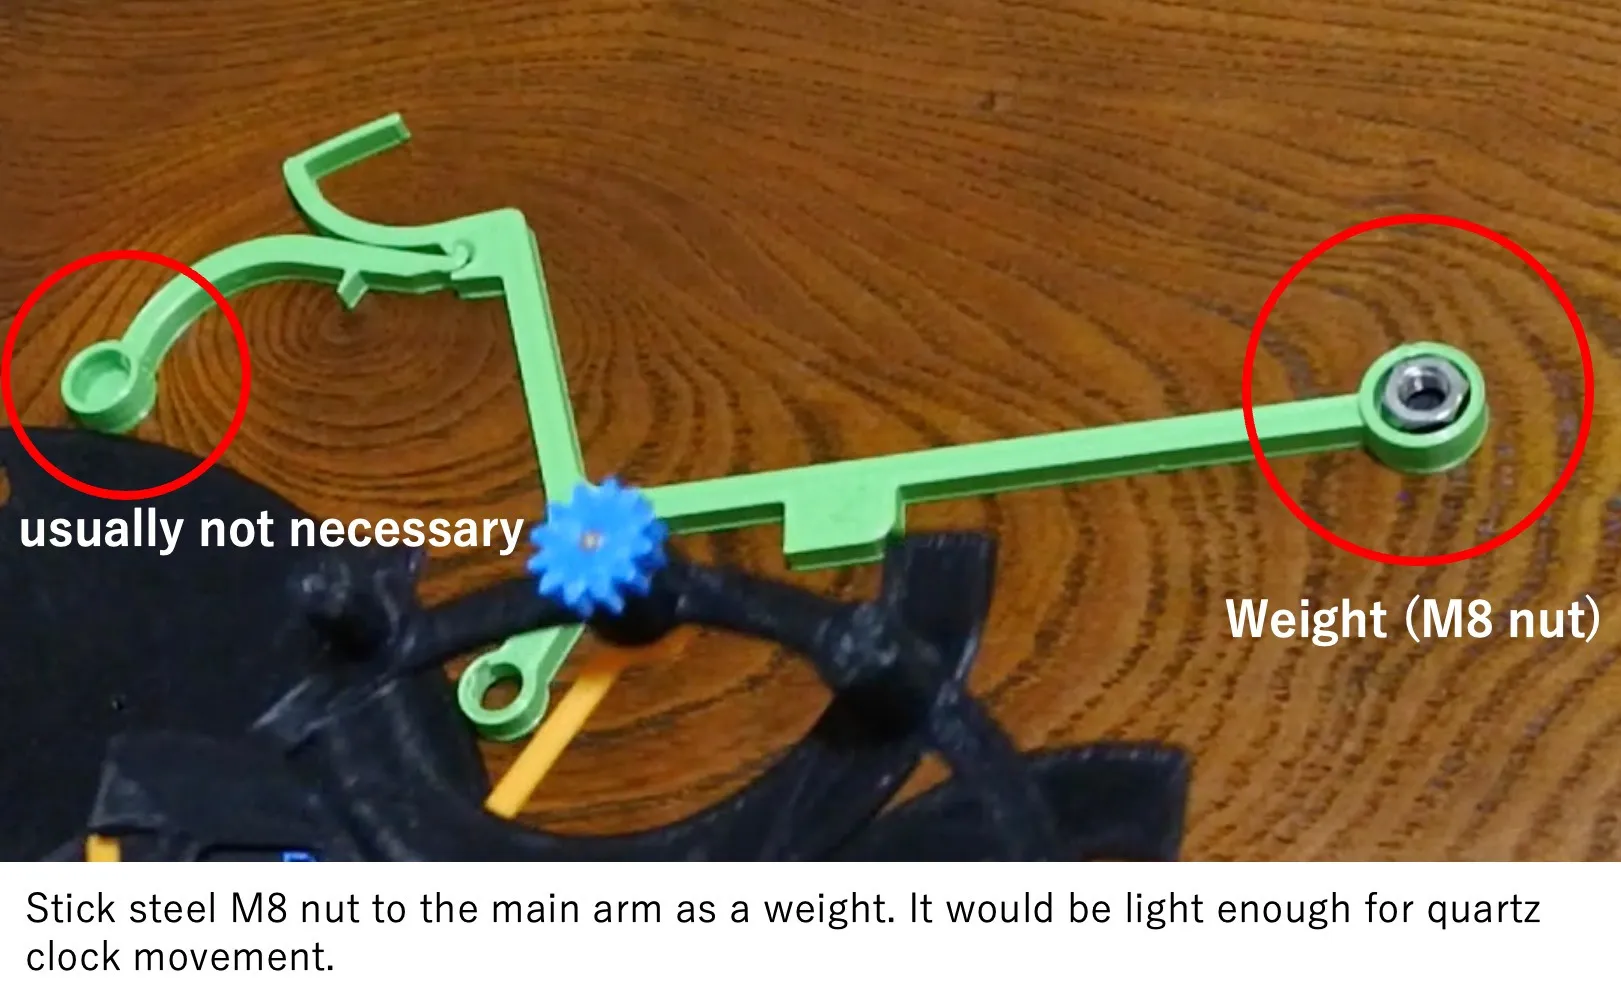
- A M8 nut made of steel or stainless (used for a weight).
How to assemble
You do not need to stick circular dials when you use AMS for multi-color printing.
Modification of the Movement
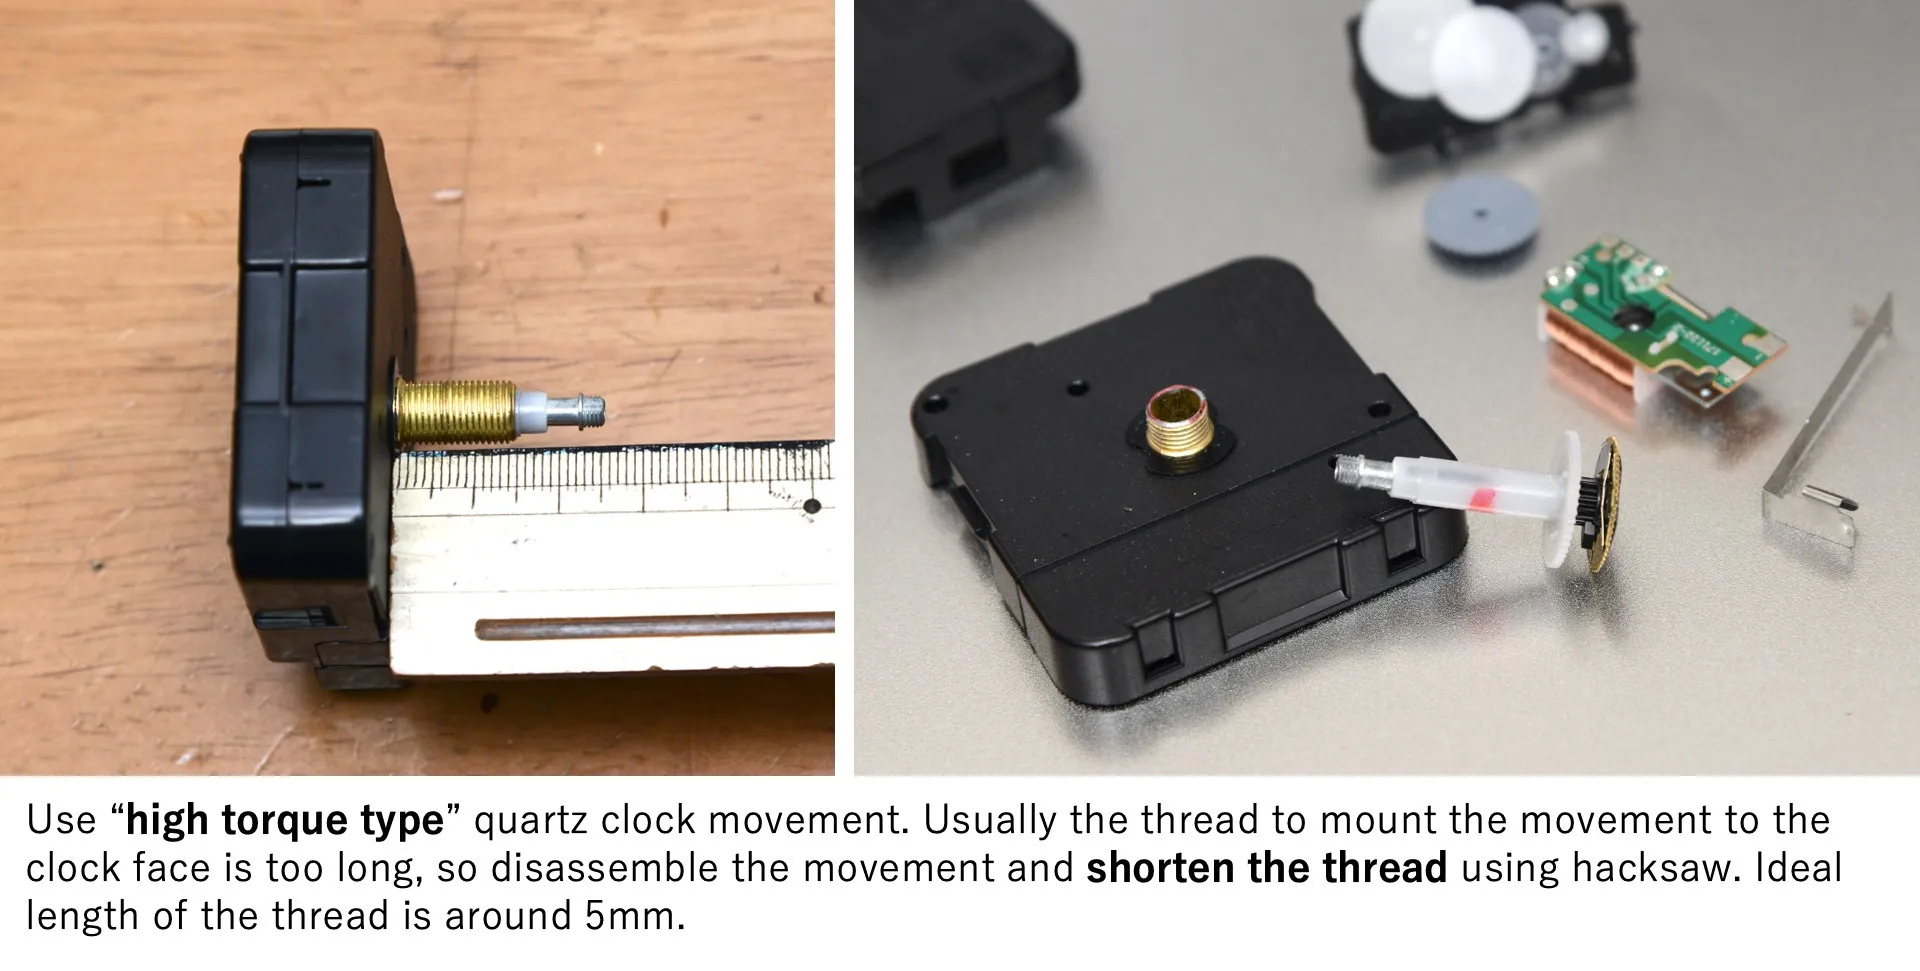
- disassemble the movement and shorten the thread using hacksaw. Ideal length of the thread is around 5mm, because the thread to mount the movement to the clock face is usually too long.
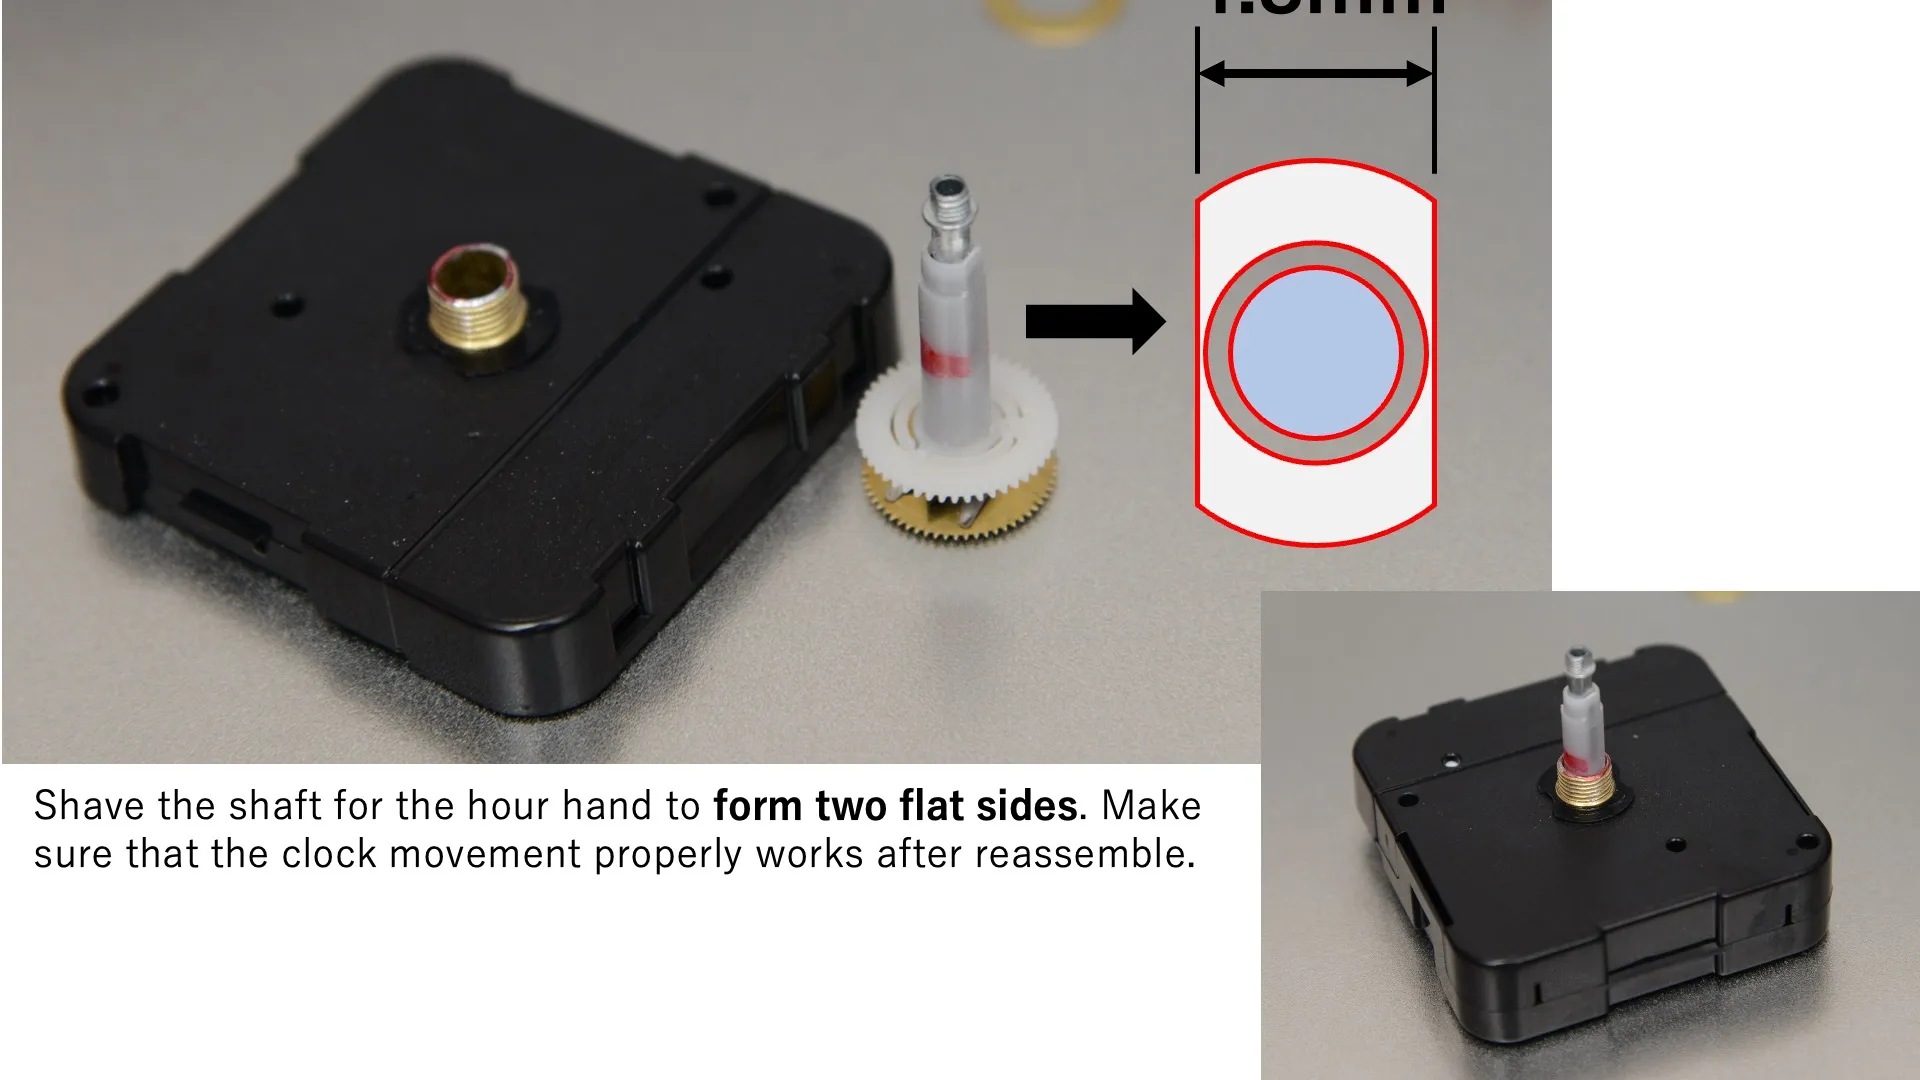
- Shave the shaft for the hour hand to form two flat sides. It is necessary to engage the gear to the shaft securely .
- Make sure that the clock movement properly works after reassemble.
Print and Assemble of the Base Unit
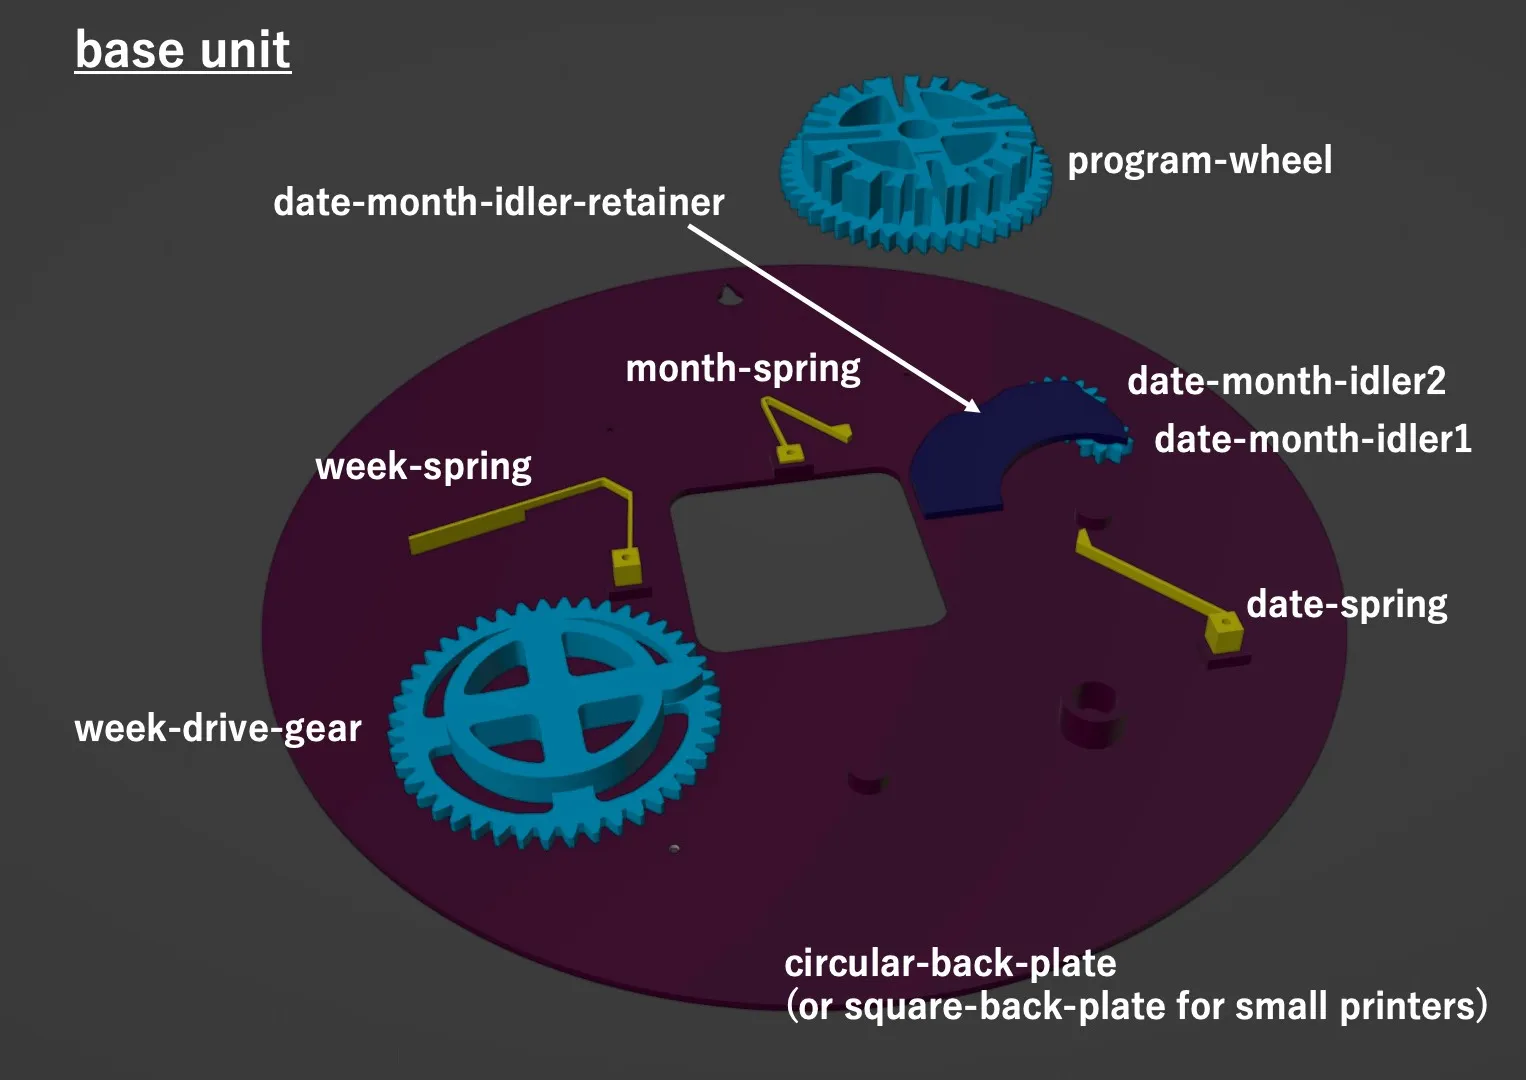
- Print the parts with supplied posture. No support structure needed.
- Remove blob and debris on gears carefully. It is very important to make the clock driven by very weak torque.
- Assemble the parts using 2mm tapping screws. Please take a look at the assembly guide video. The parts list below is listed in a same order to the video.
Print and Assemble of Front Unit
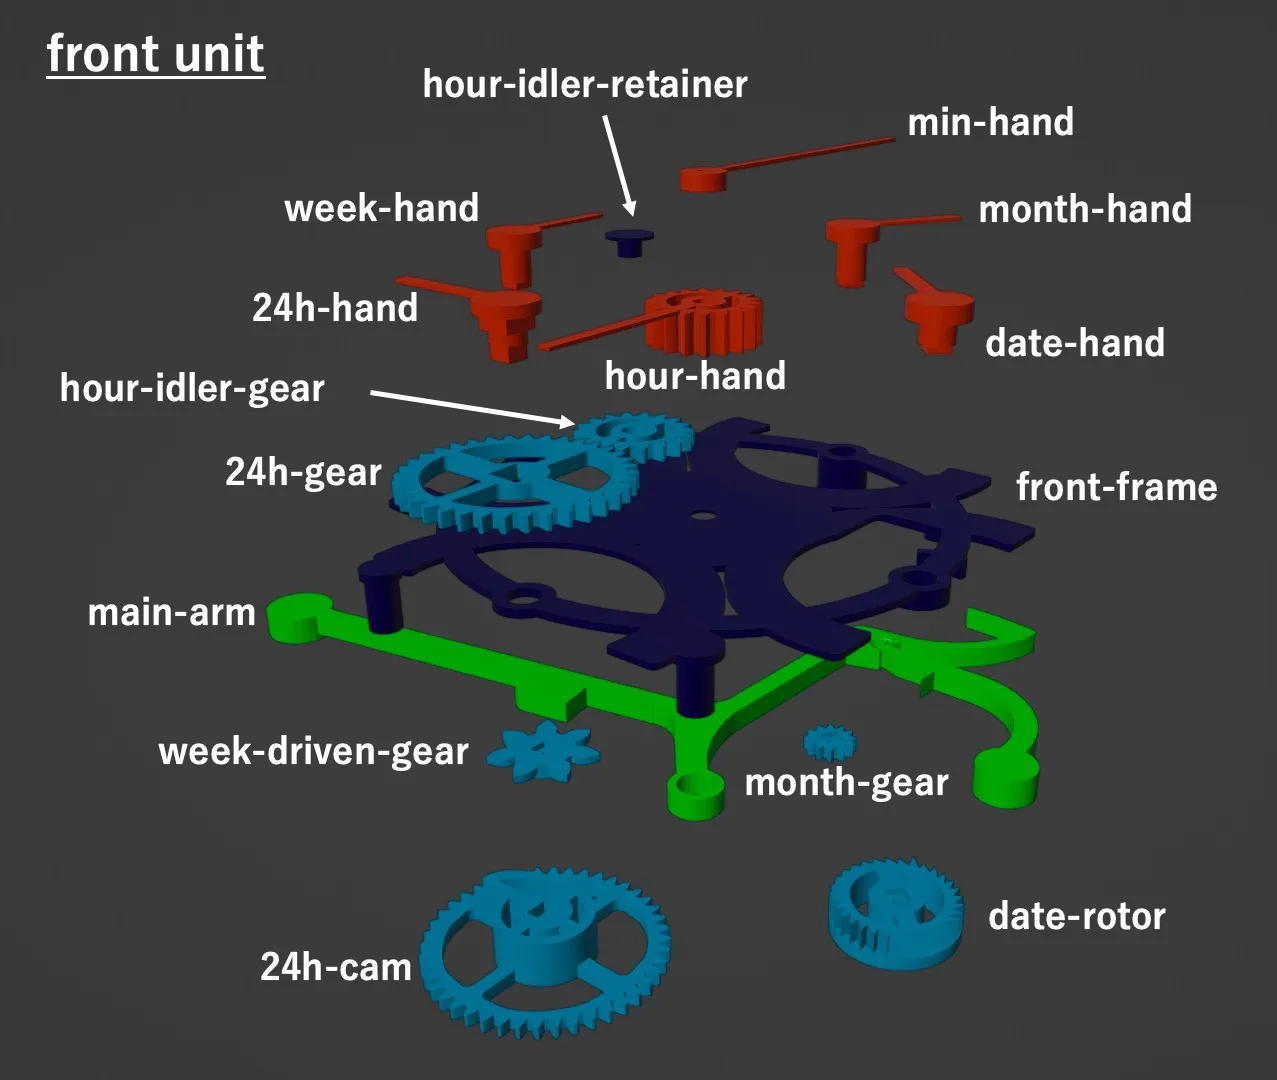
- Print the parts with supplied posture. No support structure needed.
- Remove blob and debris on gears carefully. It is very important to make the clock driven by very weak torque.
- Assemble the parts using 2mm tapping screws. Please take a look at the assembly guide video. The parts list below is listed in a same order to the video.
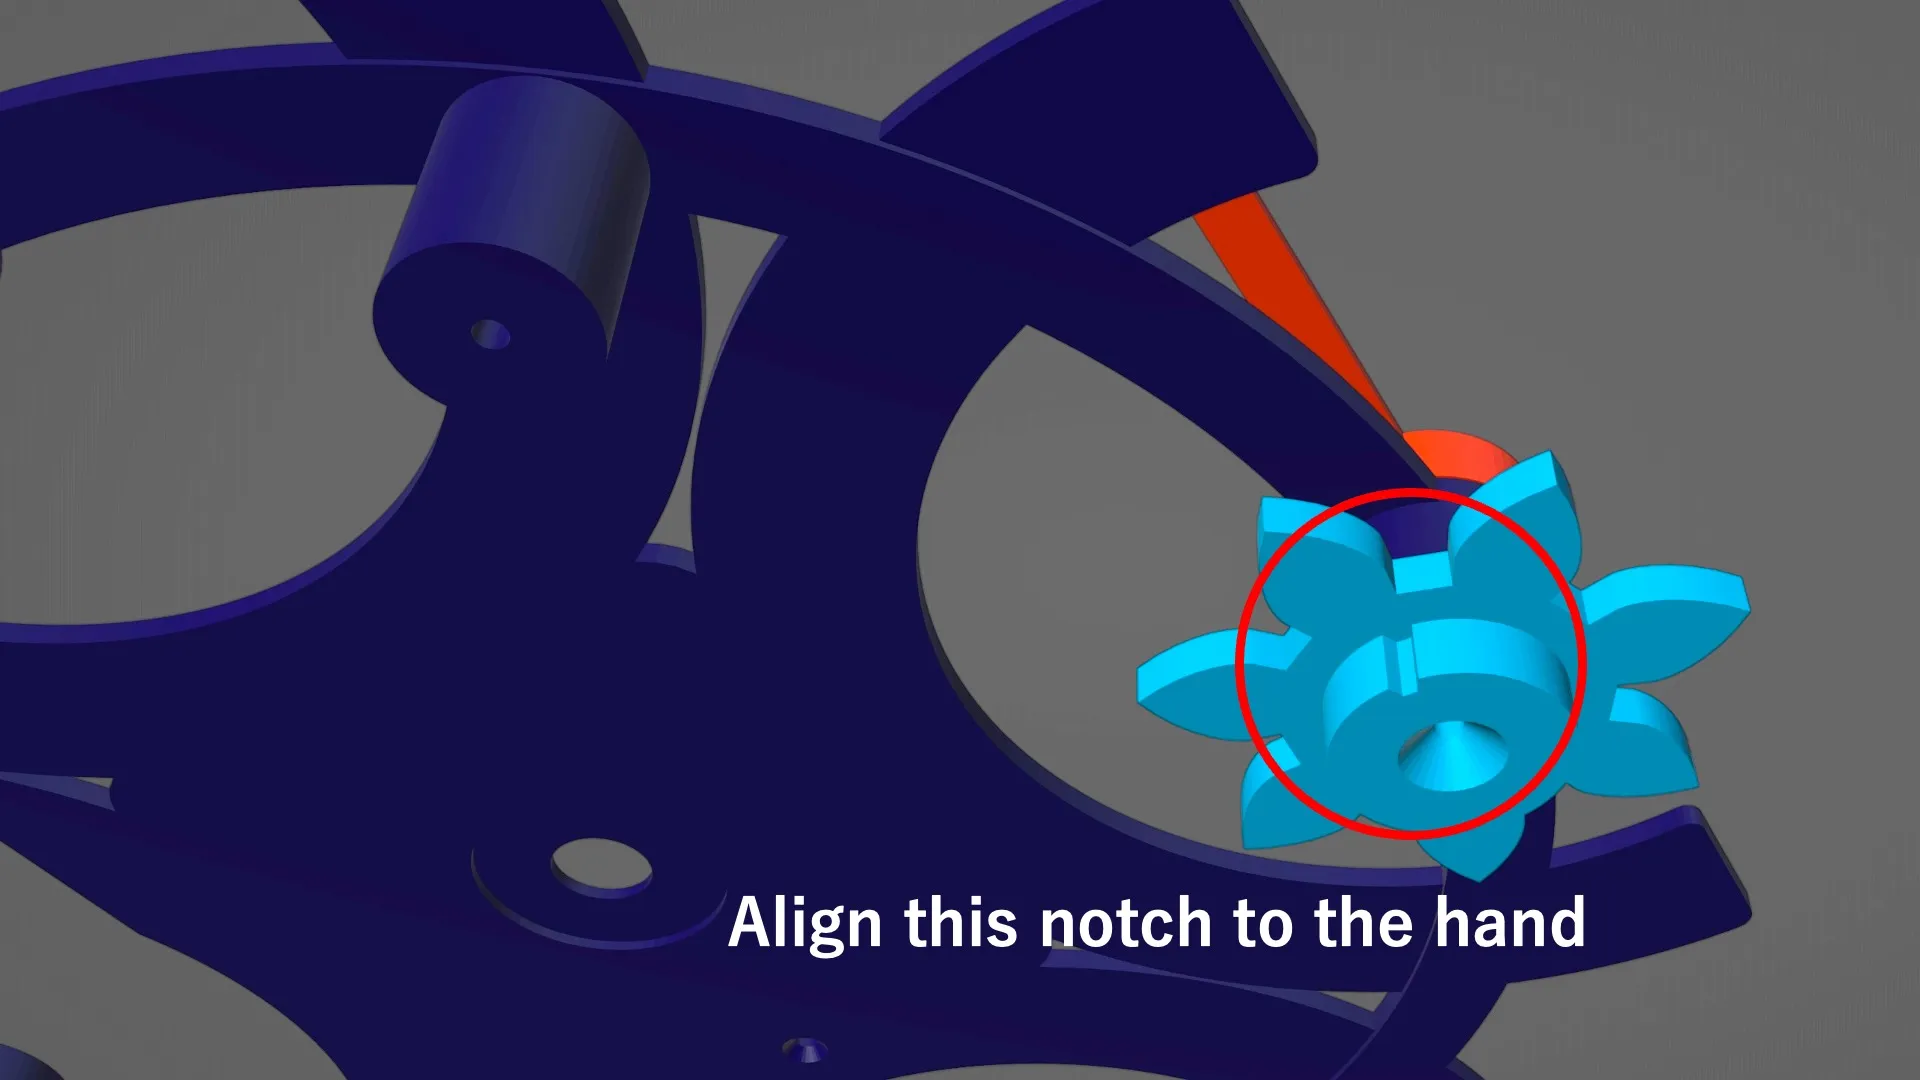
- When you attach the "week-driven-gear.stl" to the "week-hand.stl", align the notch towards the hand.
- "month-gear.stl" is 90degree rotation symmetric (12 teeth) and you do not need to care about the direction.
Installation of the Quartz Movement
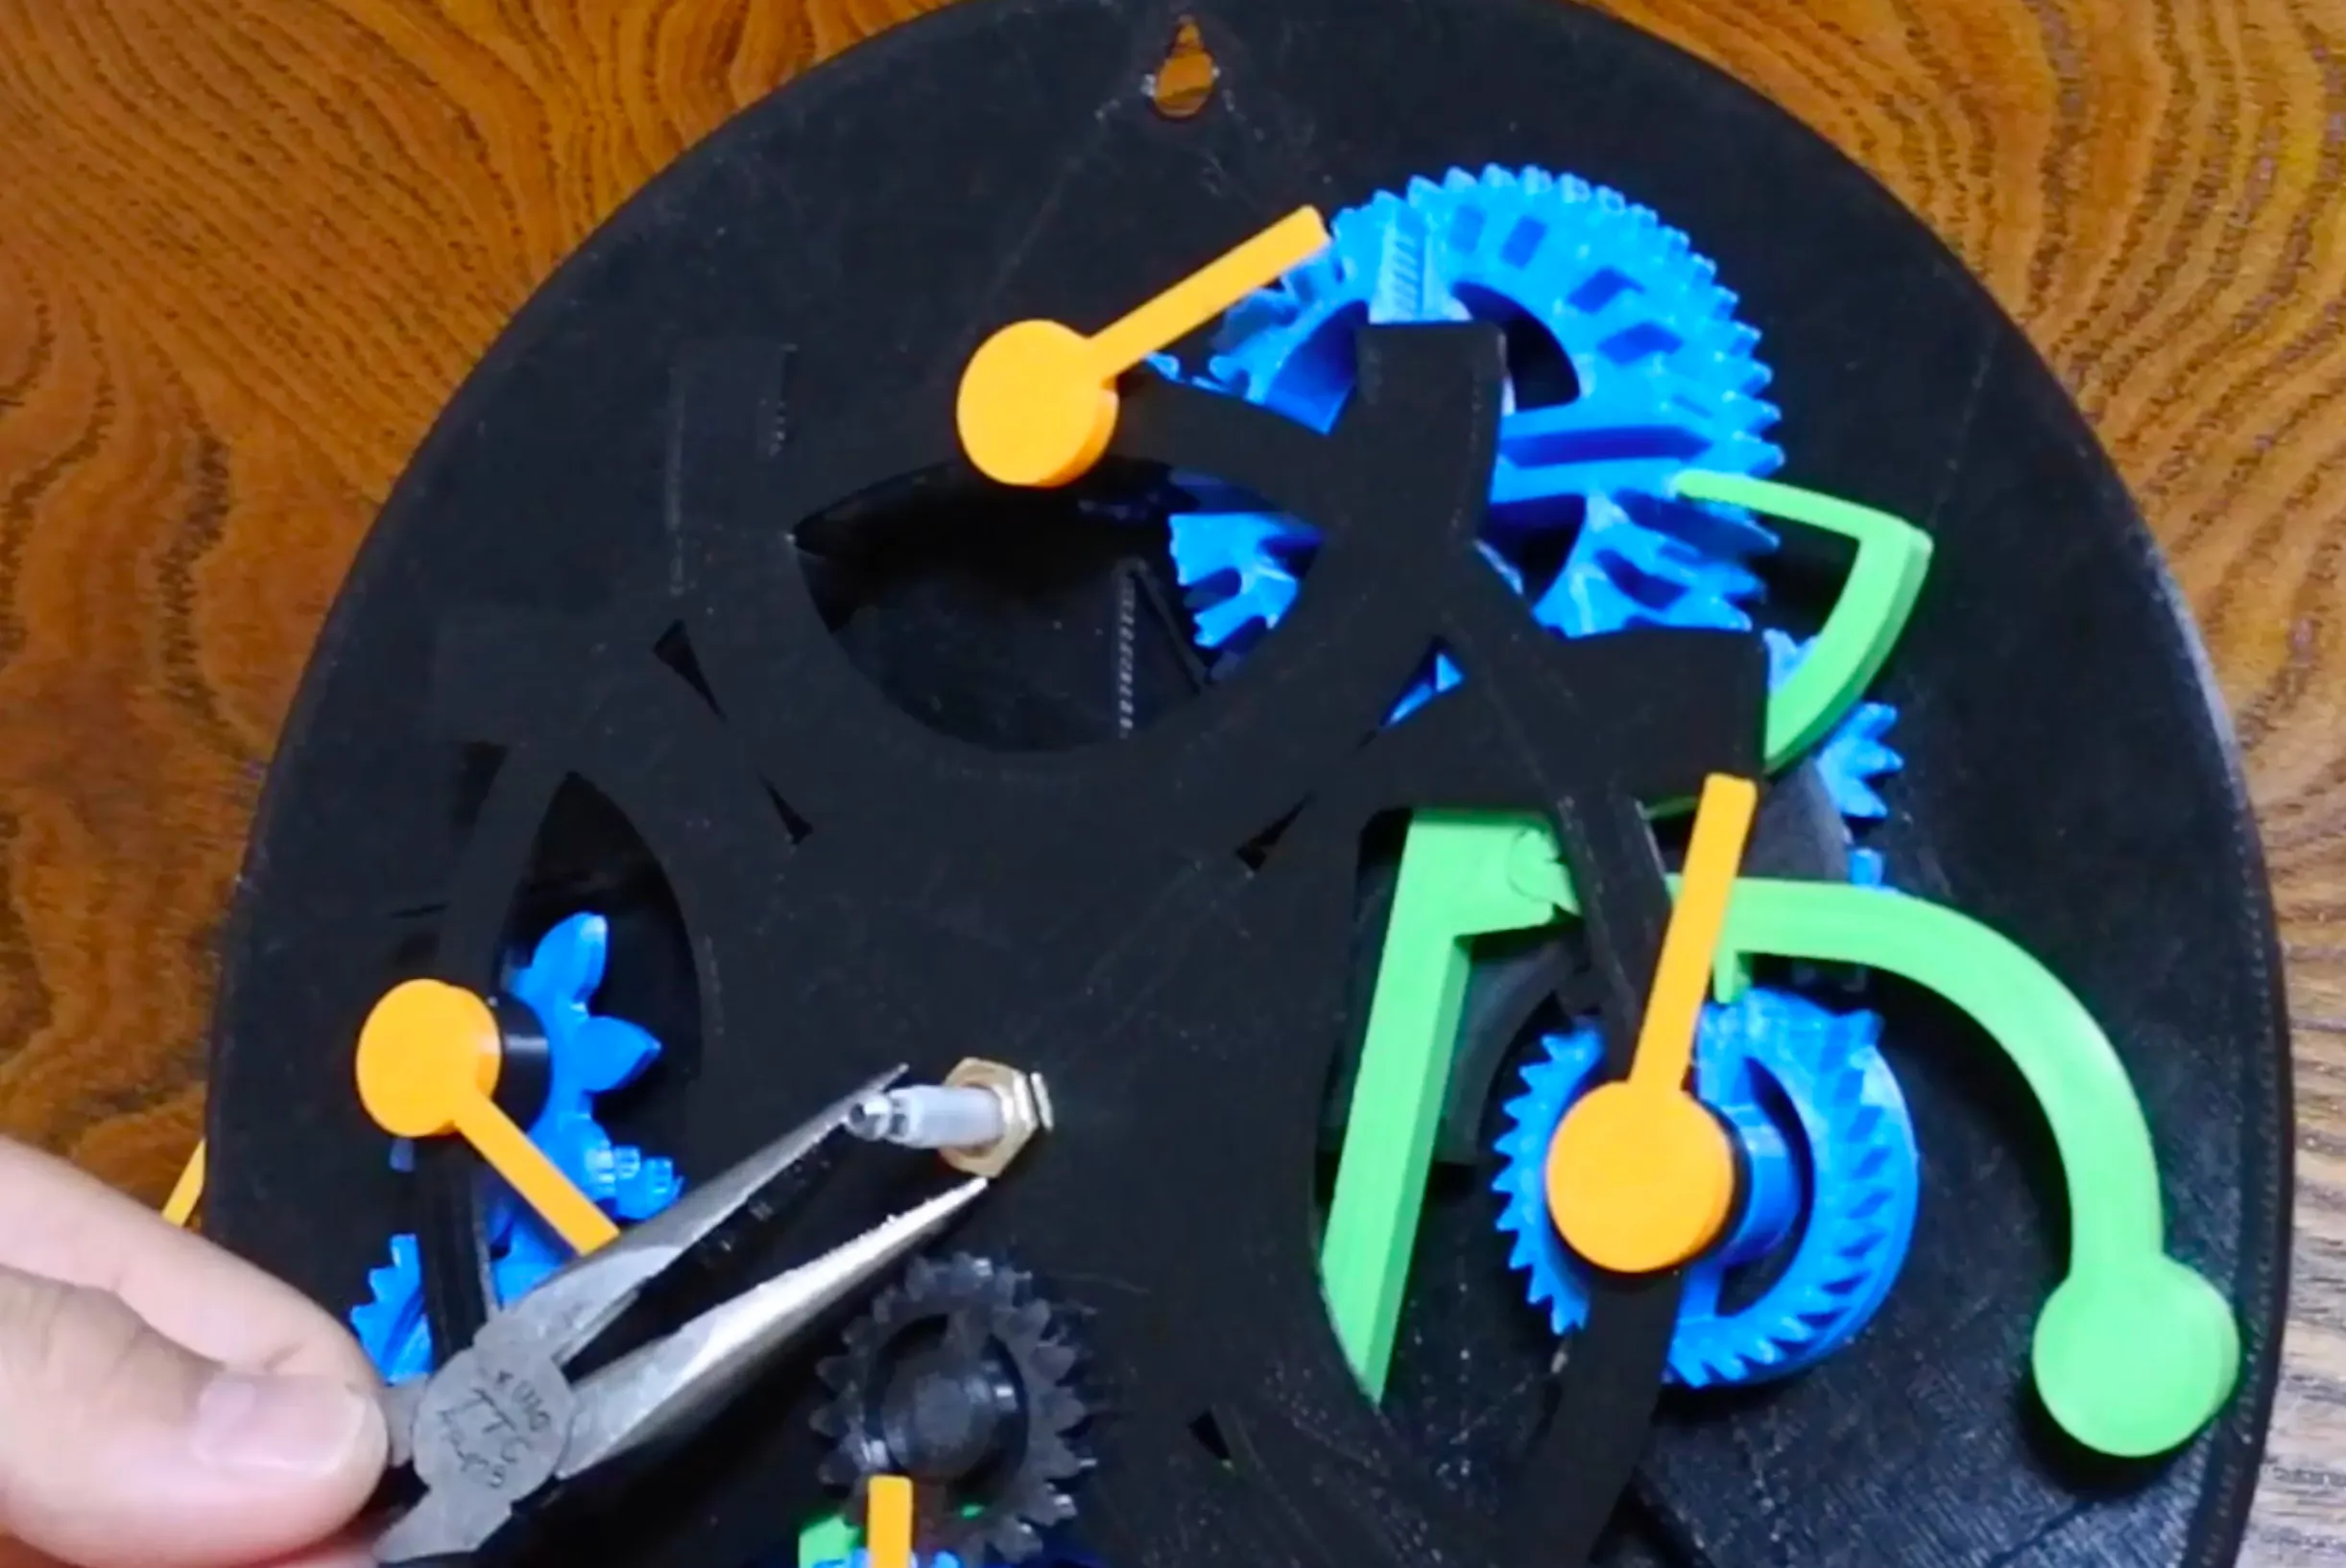
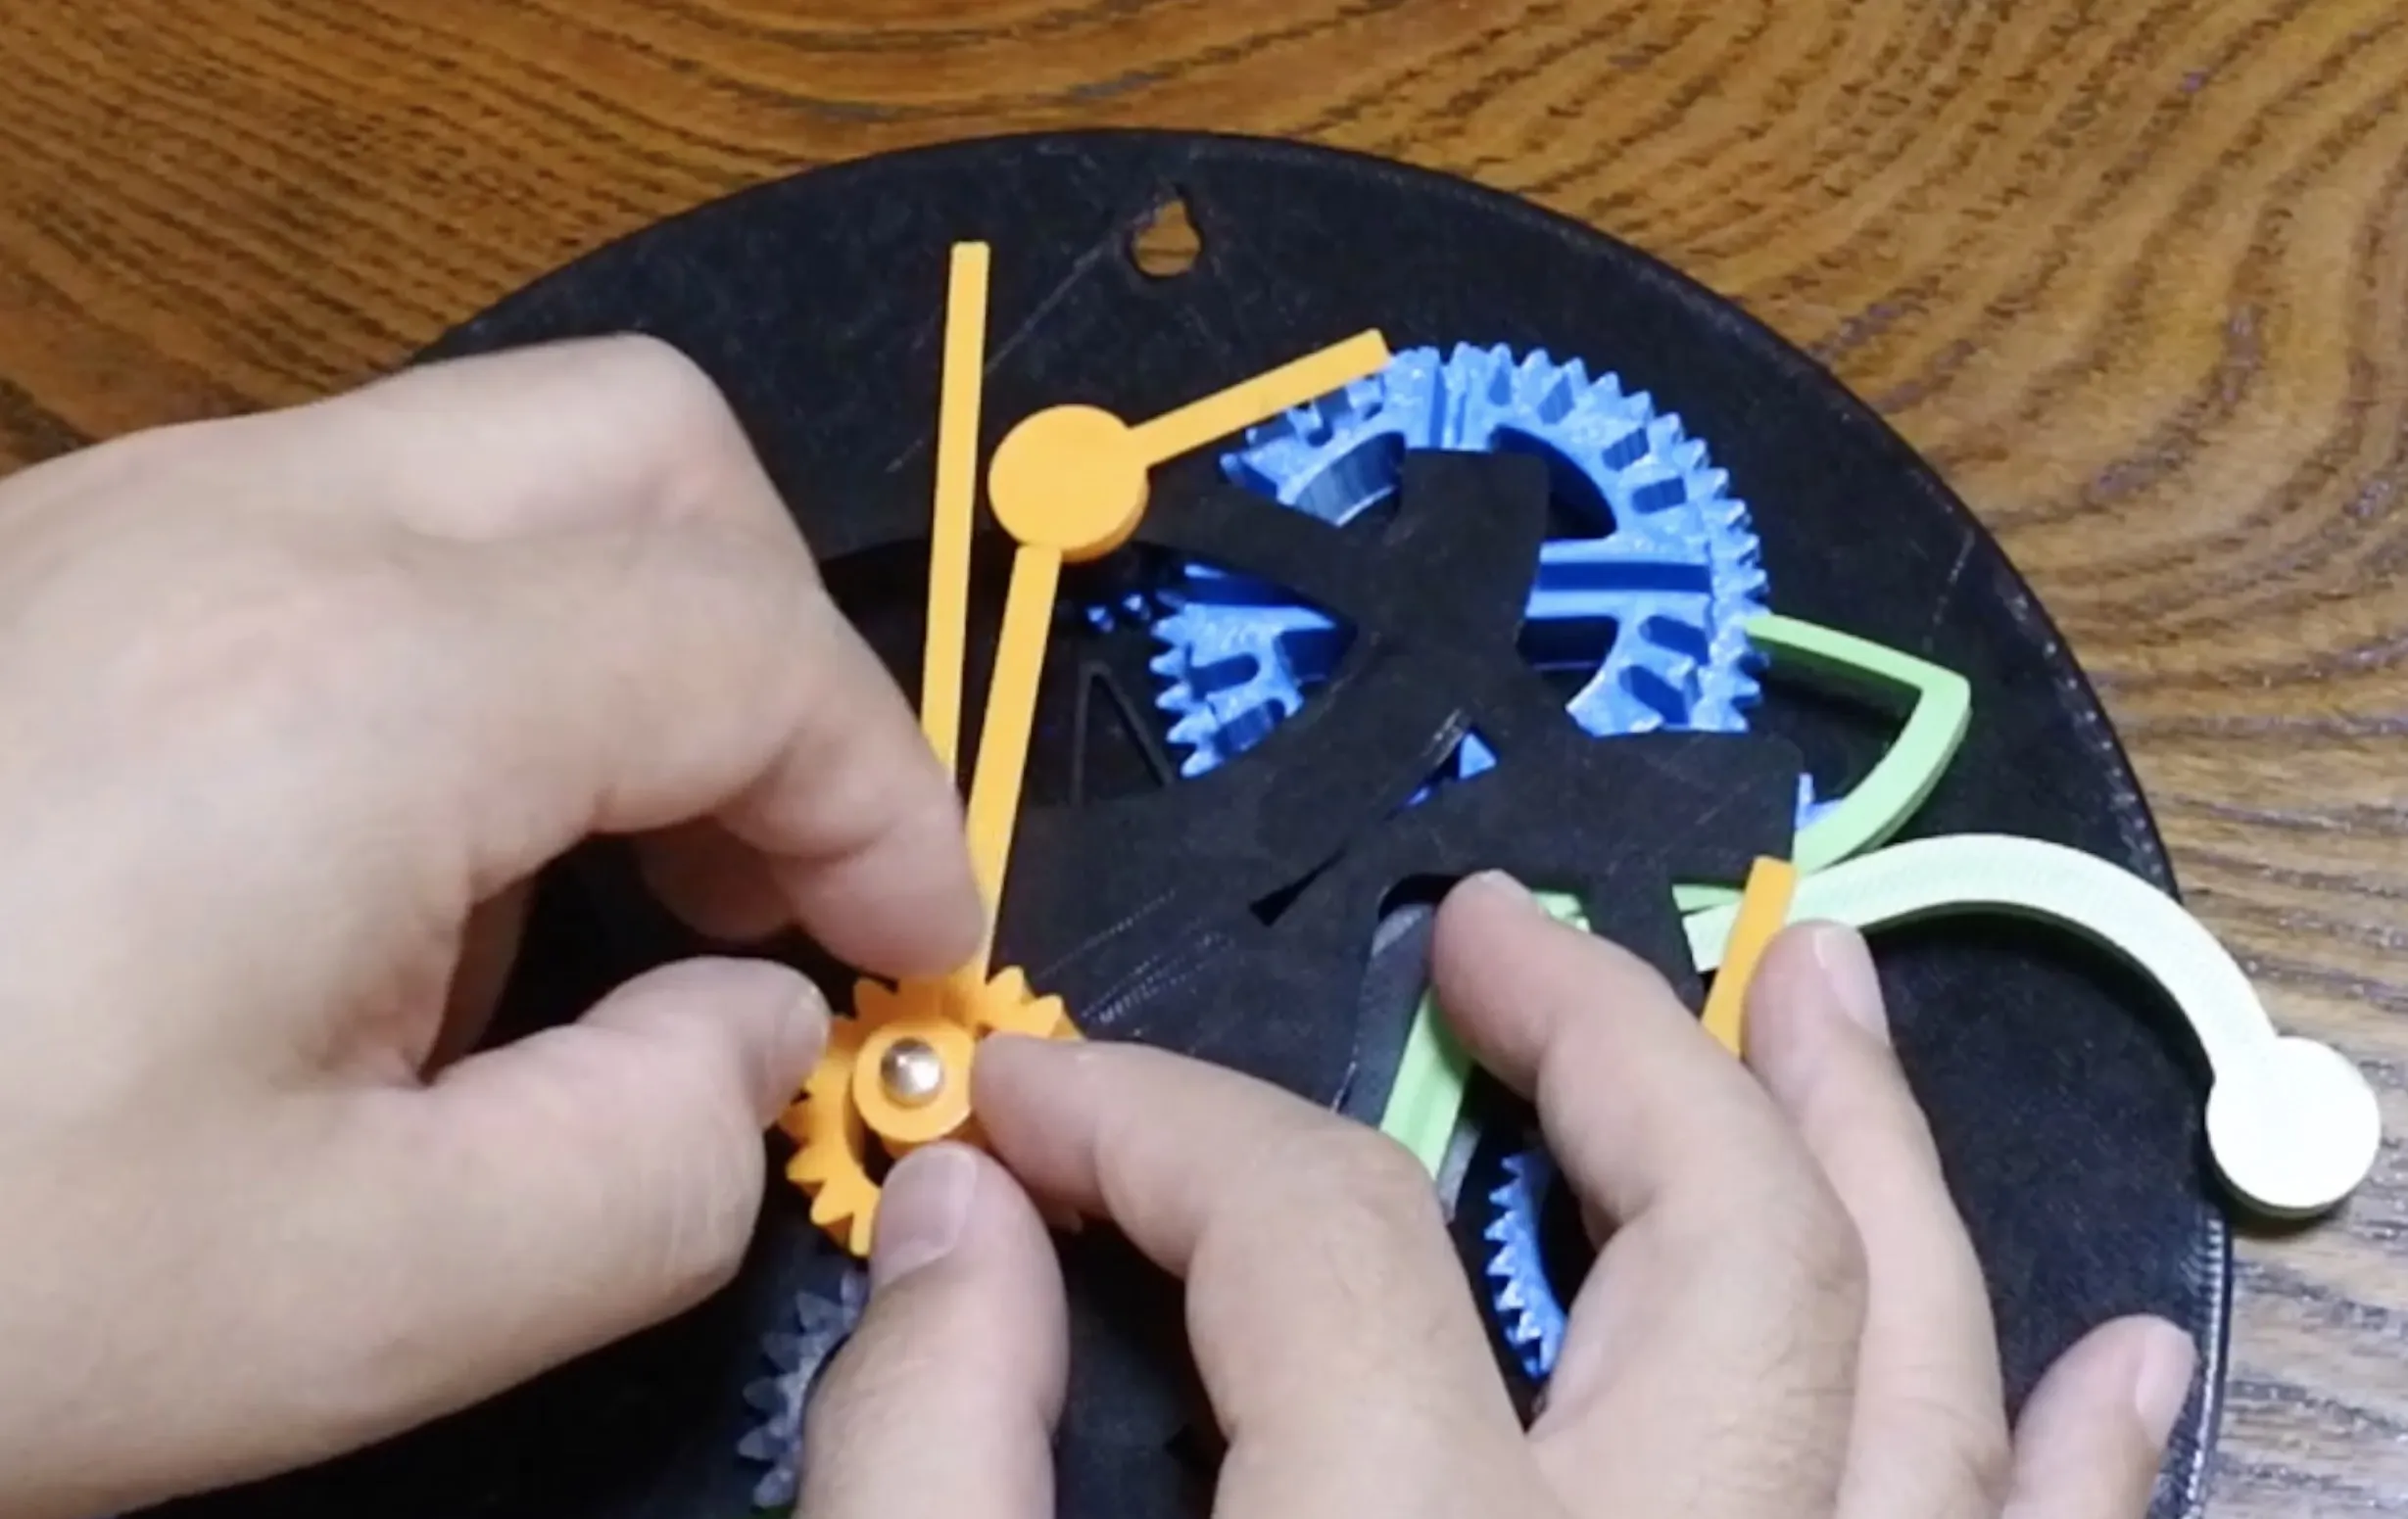
- Print the parts of minute and hour hands with supplied posture. No support structure needed.
- Attach the movement to the clock.
- Align the two hands of 12hours and 24hours when attaching the hour hand.
- Attach the minute hand using a cap nut comes with the clock movement.
Enjoy!
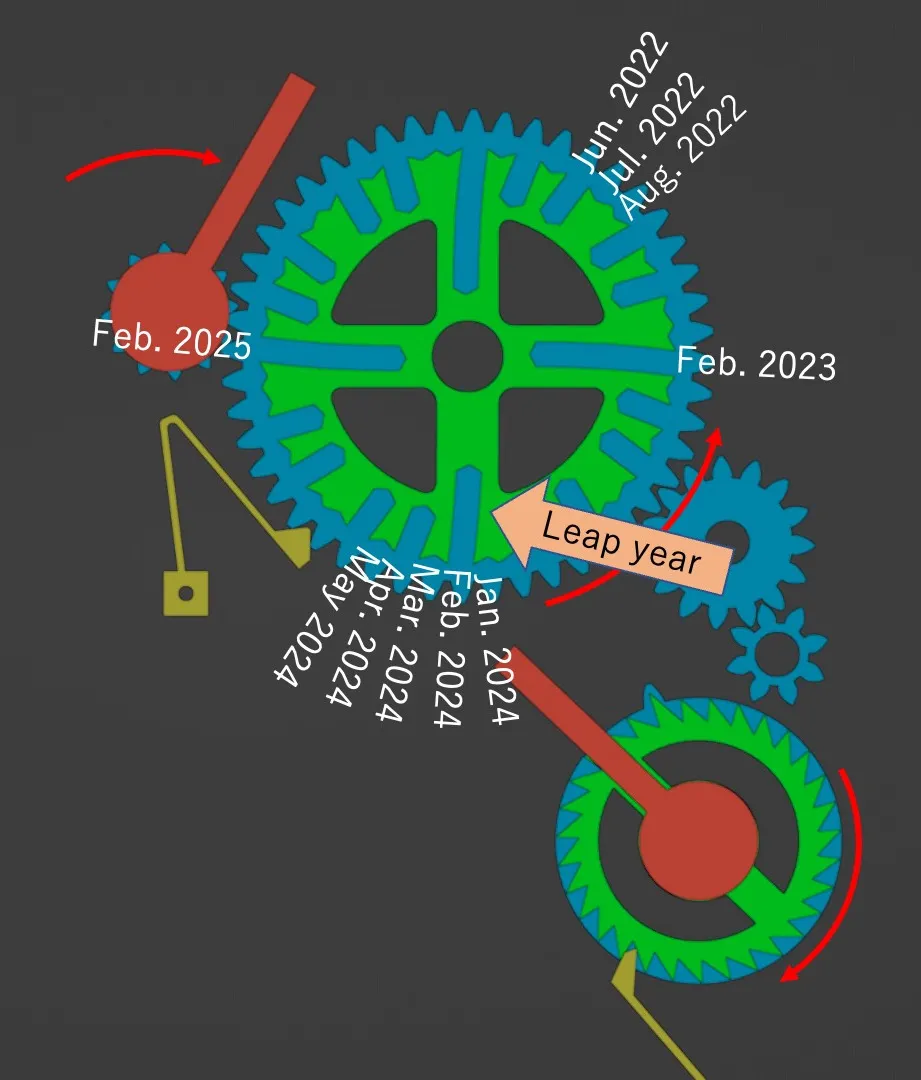
Confirm that the clock is working properly.
How to adjust the calendar
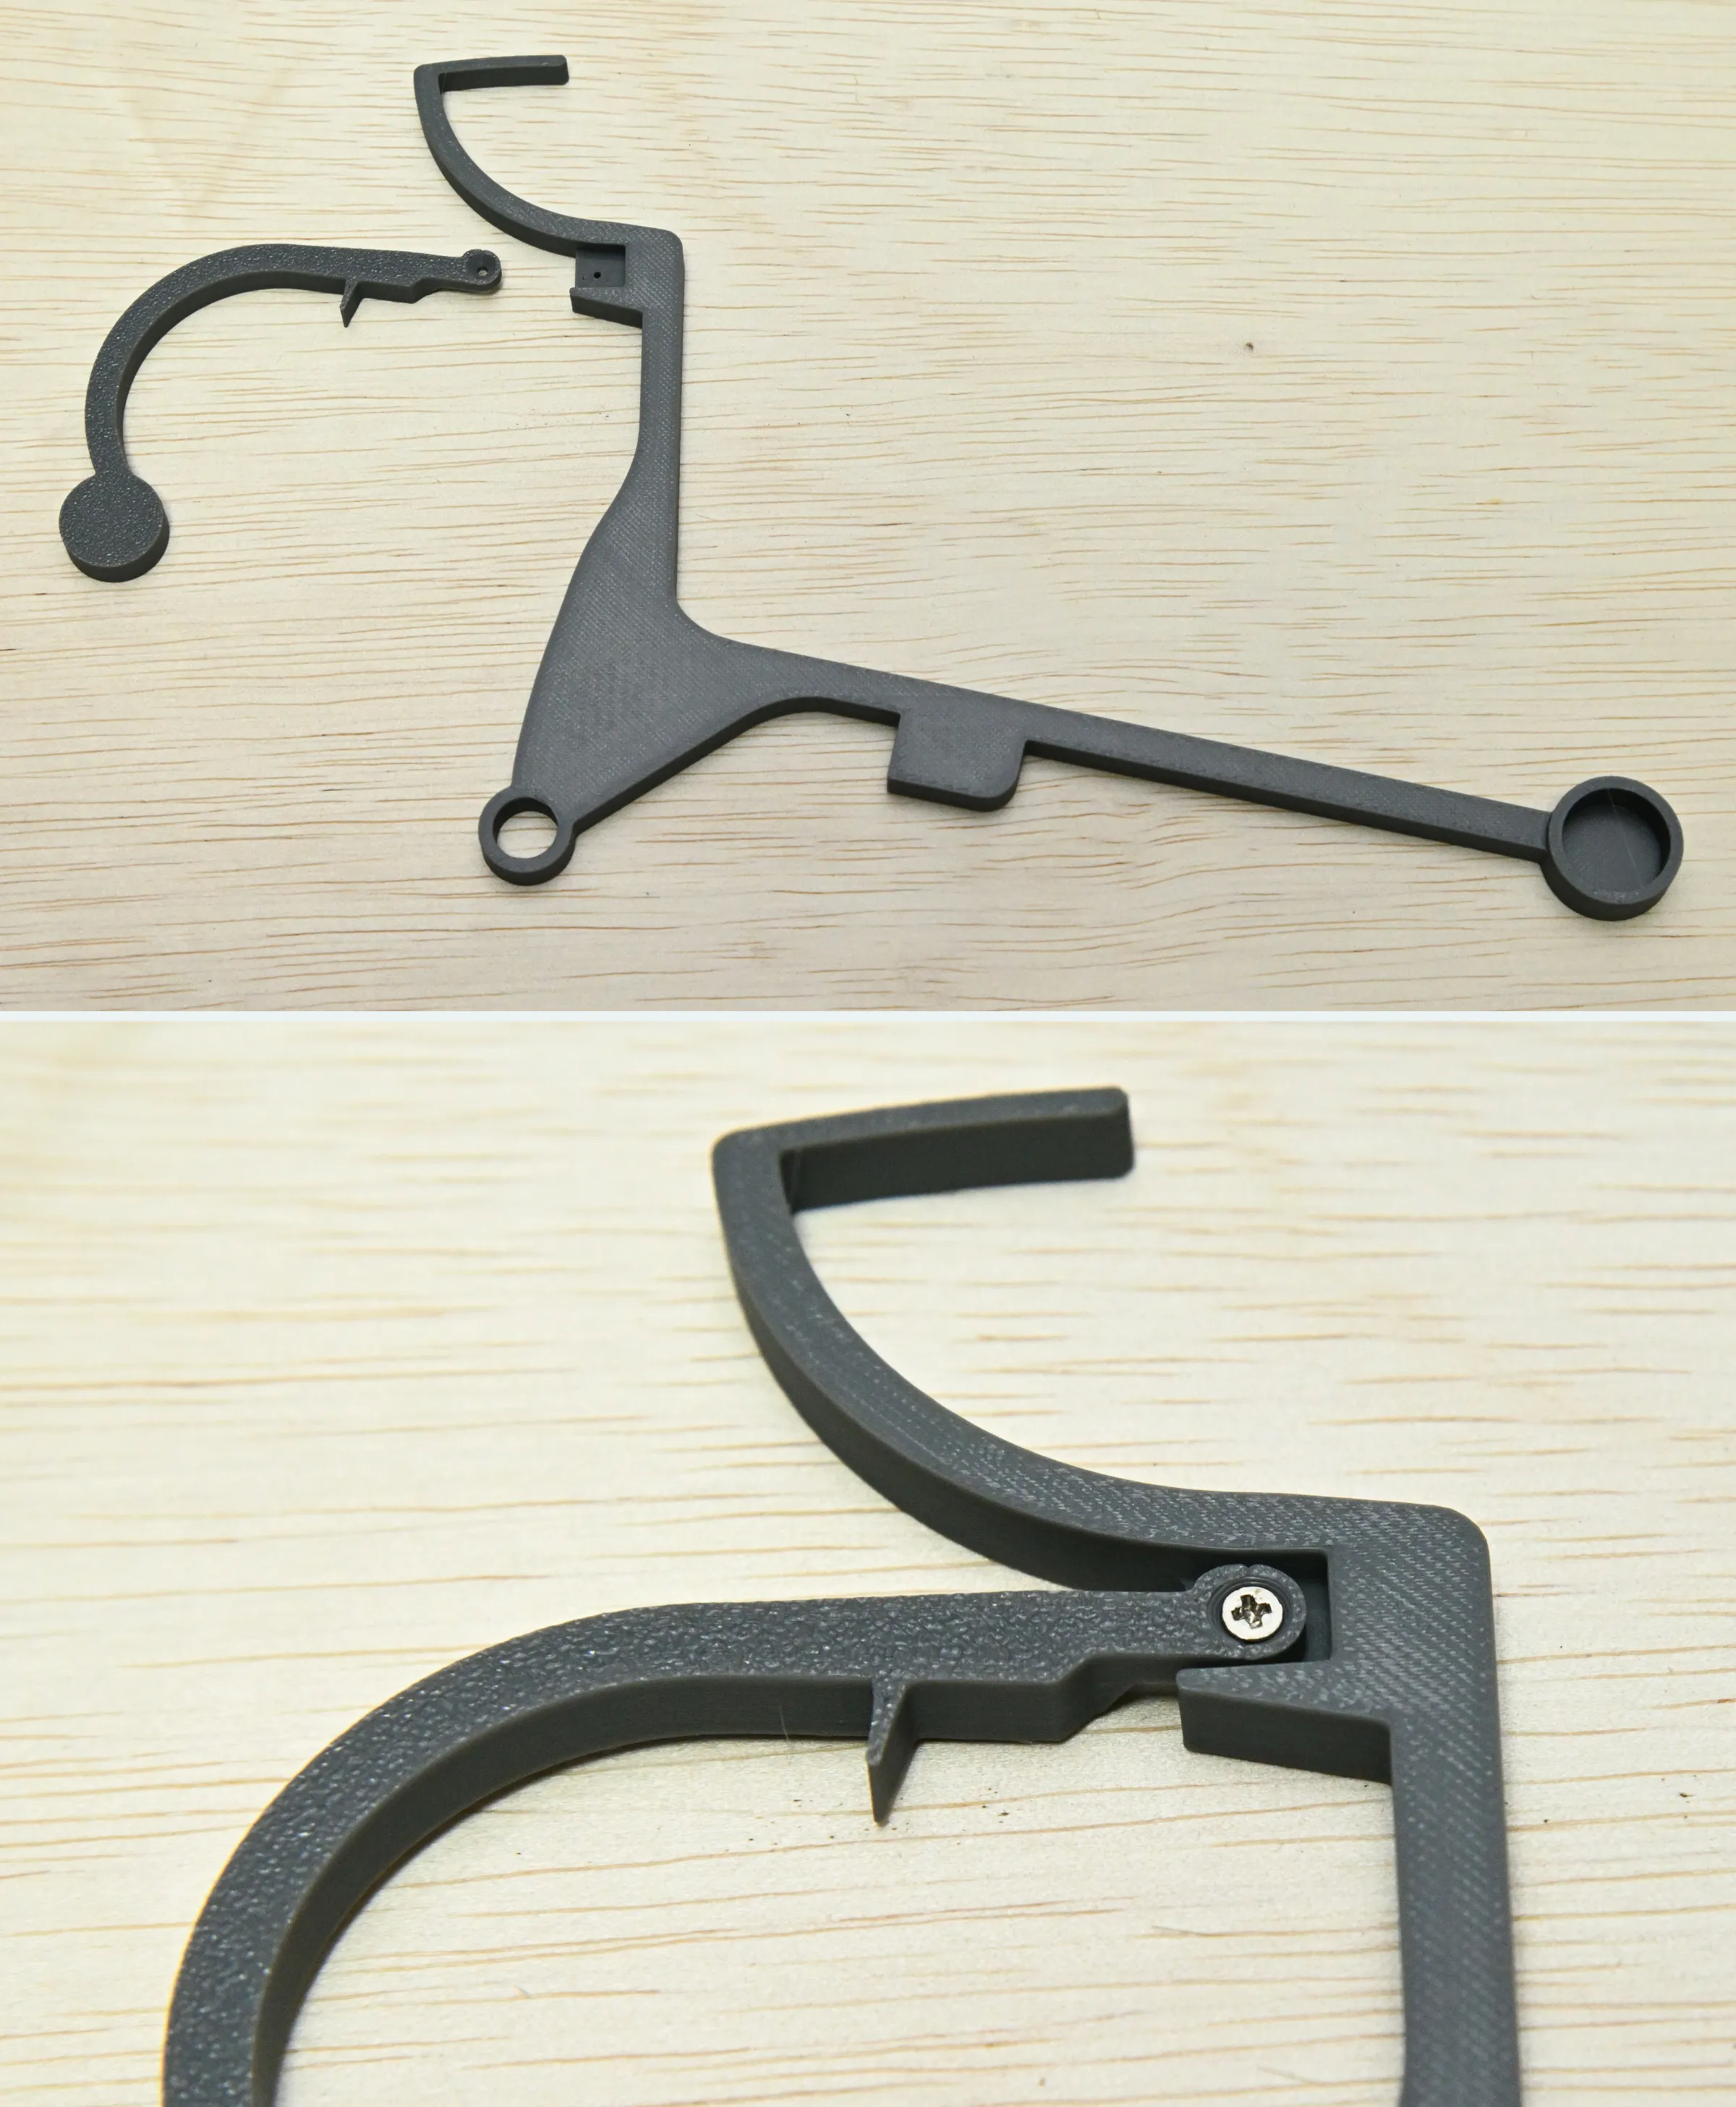
- The calendar can be advanced a day by raising the main arm (at the weight)
- The date hand can be rotated manually to quickly set the date. From 31st to 1st, the main arm should be retracted from the program wheel. It can be rotated clockwise only.
- The month hand can be rotated manually. The main arm should be retracted by raising the weight. It can be rotated to the both direction.
- The week hand can be rotated manually also. At midnight, the drive gear is engaged to the driven gear, so avoid operating it at midnight.
License



Comment & Rating (13)