Search models, users, collections, and posts

AMS 2 Pro Complete stay dry solution - V7

GIF

Print Profile(10)

All
P1S
H2S
X1E
P1P
X2D
A1
H2D Pro
H2C
P2S
X1 Carbon
X1
H2D
A1 mini
A2L

Rear silica box
Rear silica box
Designer
2.2 h
1 plate
4.9(1.2 k)

With Hygrometer - V7
Designer
8.4 h
1 plate
4.9(1.9 k)

No Hygrometer - V7
No Hygrometer - V7
Designer
8 h
1 plate
4.9(978)

**Check description for V2** In spool silica tubs
Designer
4.8 h
1 plate
4.8(183)
Click to see more

Open in Bambu Studio
Boost
3746
13140
5077
1.5 k
25.2 k
18.4 k
Released 

Bill of Materials

Maker's Supply Kits and Parts
Select all

Description

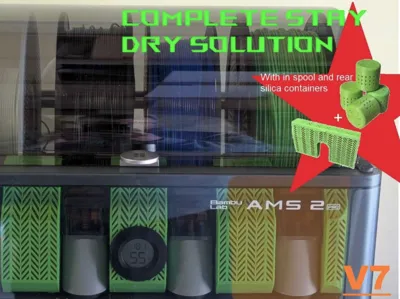
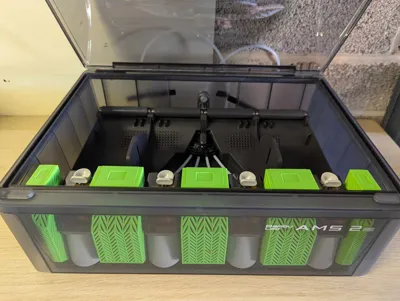
The Complete stay dry solution for the AMS 2 Pro.


These will not only help the AMS 2 Pro keep the filament dry, but since the AMS 2 PRO has a heat function, it can also be used the dry out wet silica, just be sure to print them in a filament that can take the heat.


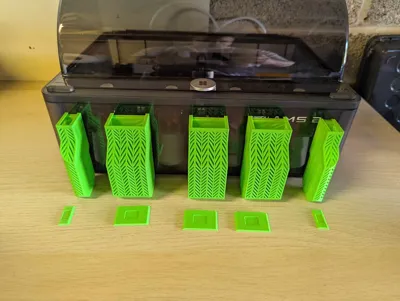
The venting / holes are just short of 2mm, some cheaper silica solutions contact broken / very small beads hat may slip through these gaps. In these cases, please gently shake the filled tub over a container to collect any broken beads that fall through. 


For the best performance I recommend Industry Standard 2-4 mm silica bead.


UK - https://amzn.to/4jeGMCF 


US - https://amzn.to/3FTKByV 


If you like to use spools larger than the recommended 202mm you may prefer my oversized spool friendly version

https://makerworld.com/en/models/1313630-ams-2-pro-dry-box-over-spec-spool-friendly#profileId-1348341 


Version 2 of the in spool silica tubs can be found here

https://makerworld.com/en/models/1705030-in-spool-dry-tubs-v2#profileId-1808538 


UPDATES - Please be sure to use the designer profiles to know you are printing the latest version.

If you have any suggestions to improve this product please let me know. See below improvements that have been made thanks to your suggestions;

V2

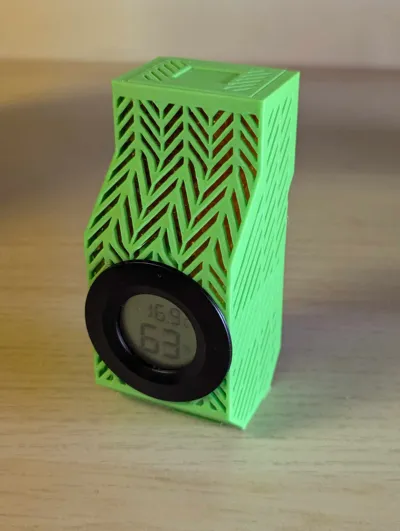
  • Added Hygrometer box.
  • Added vented lids on the larger boxes.
  • Lids on small boxes tightened.

V3

  • Added in spool silica tubs.

V4

  • Clearance between boxes and spool increased by 3mm to eliminate any rubbing on larger spools.
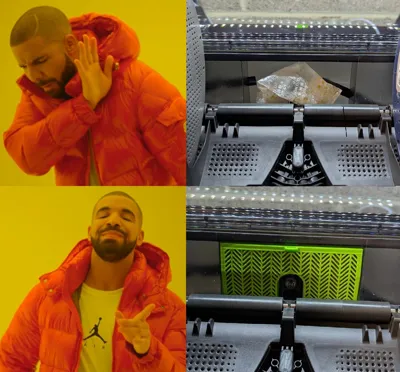
  • Redesigned back for easier fit (see gif).

V5

  • Hygrometer 2.0 added, this is stronger, fits both 12-6 and 11-5 round Hygrometers, Hygrometer is easier to insert and remove.

V6

  • Rear dry box added.

V7 - 19/04/25

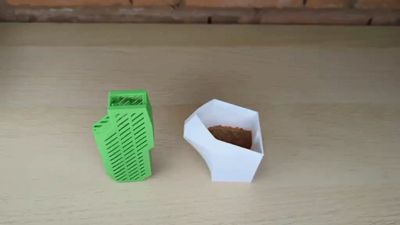
  • Funnel Jug 2.0 added.


Boost Me (for free)

If this helps you. Please let me know


This was tested in Bambu labs PETG HF. Even though I have designed the model to have some tolerance to allow different filaments (and print settings) and the varied amounts of shrinkage we see you may find it to be either too snug or too loose.

Comment & Rating (5077)

(0/1000)

Boosted
Pinned by Designer
Print Profile
With Hygrometer - V7
Theu printed great. no issues. thanks for the great design.
The profile uploader has replied
profile
12
Reply
Glorious 👌
(Edited)
profile
1
Reply
Print Profile
With Hygrometer - V7
After reading others' experience with the pods being a bit snug, and with the knowledge that I tend to use larger spools (Inland, eSun, etc., think cardboard), I opted to scale down the pods to roughly 98% of their original size. I also had to scale down the lids to about 97.5% so they would fit more easily. Overall, everything fits, but even with the larger spools I am careful about precise placement as they can rub on the pods otherwise. I think with re-sizing, the pods would be an easy drop in and forget for all users.
The profile uploader has replied
profile
29
Reply
Hello, Thank you for your feedback. If you look in the description for this design you will see an indicated link to my other design, which is aimed at those like yourself that use oversized spools. This solve the problem of these spools rubbing.
(Edited)
2
Reply
Replying to @Mohawk_Makes :
Great. Thank you for the update. I got my AMS 2 Pro really early on, so it is likely that when I printed the pods it was one of your first versions. Either way, thank you for being responsive and providing the model and revisions to the community!
(Edited)
profile
2
Reply
Replying to @user_2156087121 :
Happy to help
0
Reply
I have absolutely no idea how this is possible, but the containers don't fit into my AMS 2 Pro. I can't even force them in. I didn't change anything in the print profile (with hygrometer) or anything like that. The lids fit perfectly. Printed in PETG HF black.
(Edited)
The designer has replied
3
Reply
That is very strange, Even more so since you have seemingly fitted the hygrometer box fine, and that has identical dimension. One what dimension is it binding?
0
Reply
Replying to @Mohawk_Makes :
The hygrometer box was extremely difficult to get in, but at least it was possible. Hopefully it doesn't scratch the AMS... But the two outer boxes will only go in with great force, even though the dimensions are the same. Taking them out will certainly be even more difficult, so I'd rather not try it. Unfortunately, this version isn't spill-proof for my silica gel either, so I'll print a different model. Thanks anyway!
0
Reply
Replying to @simonluebbert :
Sorry to hear that. Just to confirm the profile settings for you PETG HF are the stock BL ones? I have some black in the stack some with run on off a see if the shinkage is any different. I also should have an update coming out this weekend that slides in easier too as I know the initial insert can be a little tight with some filaments.
1
Reply
Print Profile
With Hygrometer - V7
I printed it with ASA. This helps it stay dry inside my AMS pro 2. One of my first prints and it works great!
The profile uploader has replied
profile
5
Reply
looks great
0
Reply
Looks super, can you share the models of the other green prints you used in your picture? Thanks!
(Edited)
1
Reply
Replying to @XelationNL :
The lime green im using is sunlu petg because I wanted it more heat resistant. I'm still getting set up, but here's where I am so far....
(Edited)
1
Reply
Print Profile
No Hygrometer - V7
Very nice fit. Installed in my new p2s with ams 2 Nice to know. 500g is enough for this and if you print one for the back of the Ams 2
(Edited)
profile
17
Reply
Print Profile
With Hygrometer - V7
I printed these in PA6 GF so I can throw these in the oven without needing to take the desiccant out. The fit on the lids is a tad stiff, but it's probably cause of the material.
The profile uploader has replied
profile
10
Reply
looks great
(Edited)
1
Reply
Quite nice but they are a very tight fit and ultimately rub against some spools. One is Polymaker with a ring on the cardboard and the other is a Creality plastic spool. This interferes with rotation of the spools during printing. I may just scale down a bit an re-print as I like the design otherwise.
The designer has replied
2
Reply
Hey thanks for the feedback. thay is interesting, I've just looked at mine and I can slide a sheet of paper between the box and the BL spools. That being said it wouldn't take much to increase that gap in the design.
0
Reply
Replying to @Mohawk_Makes :
Design has been adjusted, tested and print profiles updated. Thank you for you feedback
9
Reply
Replying to @Mohawk_Makes :
Thank you for the quick response and update!
designer
1
Reply
All my prints comes out bad for this, with both ABS and PETG on my P1S.I have dried the filament, tried print speed 50% and even lower. Anyone has any suggestions?
The designer has replied
1
Reply
That sucks 😞 When did you last run a full calibration on the printer. I find that fixes many issues. Same for the giving the screws and good clean and grease.
2
Reply
that was a while ago, thanks for the suggestion I will try that and report back.
1
Reply
Replying to @Mohawk_Makes :
I tried full calibration + flowrate and flowdynamics, still the same issue :-(
1
Reply
I've tried printing these with ABS three times and the pattern fails about 3/4 of the way up on the front slope. I've tried Normal speed and Silent. Also, tried gray and black colors. In terms of fit, they bind a bit getting in and out. Not sure if there is anything else I can do to.
(Edited)
The designer has replied
0
Reply
Are you using a textured plate? Mine adhears ABS so strongly to a hot texture plate that it wouldn’t tip even in an earthquake. I have to wait for the plate to almost reach room temperature before popping it off (it’s generally self releases at that point). If you are using textured and a heated plate to ABS specs, then the plate muse be dirty. Clean it in a sink with dish soap and then a wipe with rubbing alcohol 80%+. Don’t let your fingers touch the surface afterwards.
0
Reply
sorry to hear you are having issues printing this design. Could you please try doing a full calibration on the printer to rule that out. Maybe also try a test version in cheap PLA to rule out the filament brand. In regards to fit, are you using the latest version? as they should drop in without any effort (the far left and right ones may need a tiny push)
0
Reply
Replying to @Mohawk_Makes :
I ran a full calibration, including vision encoder, a few days ago because I was printing some small functional parts. I printed the V7 version. I only printed the center one (no hygrometer). It must be pushed into position because of the slight binding. I have never printed with PLA due to the low temperature limit. Wouldn't it be impractical for this application? I take all my other desiccant holders and put them in my dryer. With ABS, I don't have to remove the desiccant. Also, I use activated alumina which requires a higher temperature to dry than silica.
0
Reply
Boosted
Print Profile
With Hygrometer - V7
Printed from PETG HF. The parts are very robust and fit perfectly into the AMS 2 Pro
Show original
profile
2
Reply
Did you use the print profile 1:1 or change anything
Show original
0
Reply
Boosted
Replying to @user_2596387248 :
I used the print profile with the hygrometer I only slightly changed the arrangement of the parts and placed the sensor on an extra plate (because it was printed from PLA) and activated supports Printed with P2S without problems
Show original
0
Reply
Replying to @tob1_n01c :
Thanks I will try it out this weekend Did you clean the print bed and apply 3D lacquer
Show original
0
Reply
Boosted
worked perfectly with designer profile in PLA Matte. It took the humidity level within my AMS from around 40% to 10% overnight. 100% worth every gram.
(Edited)
The designer has replied
designer
2
Reply
looks great
0
Reply
Do I need to consider anything when printing with PLA instead of PETG Which parameters did you set
Show original
0
Reply
also curious if you found PLA as a good fit for this? I wasn't sure if it works ok for these temperatures but I imagine it should
0
Reply

License

This user content is licensed under a Standard Digital File License.

You shall not share, sub-license, sell, rent, host, transfer, or distribute in any way the digital or 3D printed versions of this object, nor any other derivative work of this object in its digital or physical format (including - but not limited to - remixes of this object, and hosting on other digital platforms). The objects may not be used without permission in any way whatsoever in which you charge money, or collect fees.