


Print Profile(1)

Description
Boost Me (for free)
Like my work? Please consider gifting me a boost
PLEASE DOWNLOAD PROFILE AGAIN AFTER March 29th some changes were made to infill and wall loops.
This is an updated V2 version with improved fastening method.
V1 original model for more info
https://makerworld.com/en/models/1237708-modular-stool-bench-stand-side-table#profileId-1257699
Please read the instructions carefully and write if you need any more information.
Hello fellow 3d printing nerds
Just for the portable chair contest I have made some improvements to the V1 model.
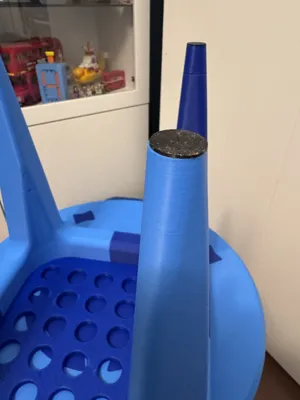
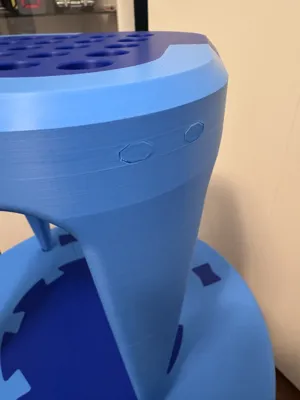
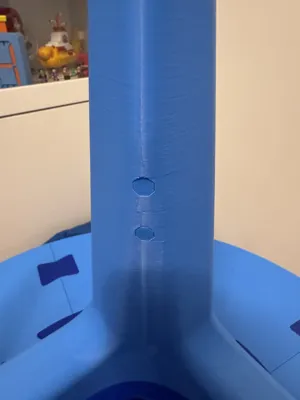
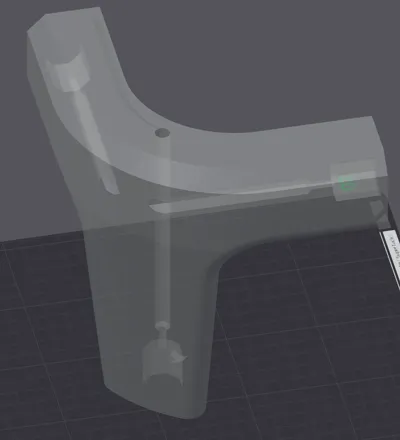
- Better joining of top corner and bottom leg via vertical through screws. (see pictures 6 and 7)
- Some adjustments to the print profile
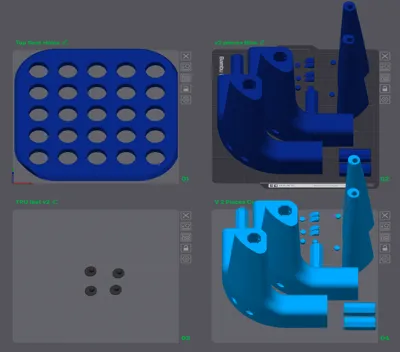
- Improved plate layout for optimized printing
- New TPU feet
Assembly is quite straightforward and self explanatory.
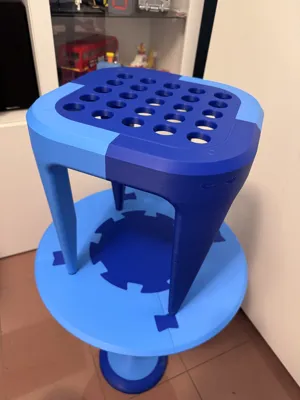
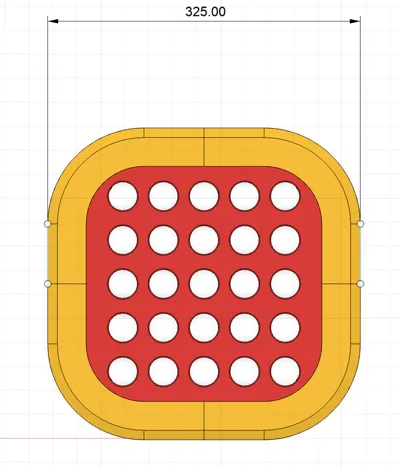
Dimensions are 325 mm x 325 mm for the top. Height is 350 mm
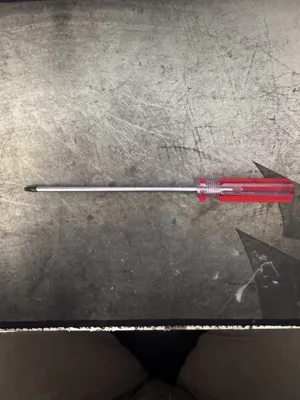
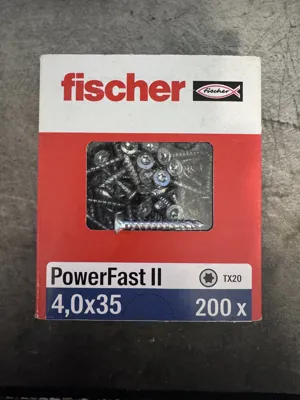
Just print all the plates and attach the pieces together with the octagonal joiners through the very long screw holes with a long screwdriver (use m4 x 35 mm).
Tighten the screws slowly until the pieces fit flush together and you hear a “click” noise. Don't over-tighten.
The extra short holes on the legs are optional. I just plug them in. Use shorter screws there if necessary (m4 x 25mm)
If the build is satisfactory insert the plug holes to finish it off. Be careful for the top round plugs!! Depending on the filament you use they could shrink and fall into the hole. Test carefully before hand and if necessary slightly scale up the part for a snug fit.
For more info check the V1 version linked above.
Recommendations:
As always, a warped print will compromise tolerances , dimensional accuracy and build quality. Always use dry high quality filament on a clean print bed. I learned the hard way using cheap 10€/kg filament resulting many failed and warped pieces that I had to throw away. My most successful prints were made with Bambu PLA on a Cool Plate Super Tack. Please also remember that this is a 3d printed piece, while all effort has been made to make it sturdy it cannot be compared to an injection molded part. Use with care.
If you have any questions or suggestions for future upgrades please write.
HAPPY PRINTING!
License
You shall not share, sub-license, sell, rent, host, transfer, or distribute in any way the digital or 3D printed versions of this object, nor any other derivative work of this object in its digital or physical format (including - but not limited to - remixes of this object, and hosting on other digital platforms). The objects may not be used without permission in any way whatsoever in which you charge money, or collect fees.
Comment & Rating (10)