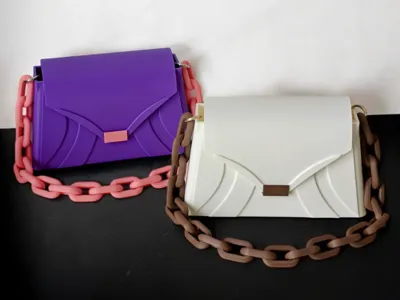
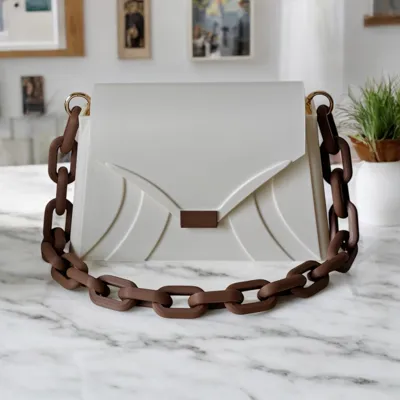
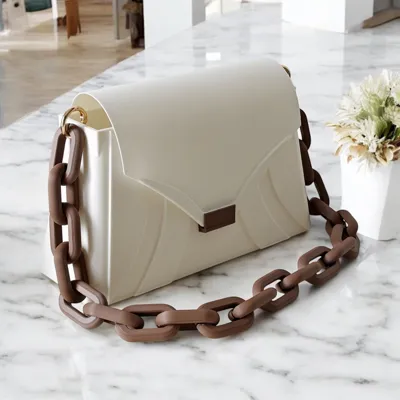
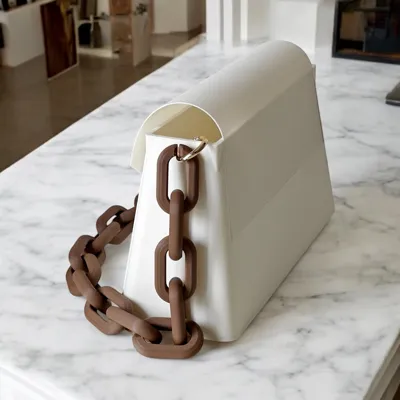
Borsa Slope - Closed Design


Print Profile(1)

Description
Boost Me (for free)
If you wish to support me, I am infinitely grateful:)
Please Read the Description Before Printing!
By following these steps, you will obtain a perfect bag, with all the pieces fitting together seamlessly. To guarantee the highest quality of printing and assembly, I have printed this bag four times, thoroughly testing it to ensure its flawless functionality. The project has been tested with PLA and PETG, both yielding excellent results; I recommend PLA!
I haven't tested TPU, but I believe it could work equally well.
⚠️ IMPORTANT! ⚠️
I have uploaded this project to give everyone the opportunity to print it and create their own bag, at no extra cost. However, I ask you to respect these simple rules:
🚫 You may not sell the project.
🚫 You may not sell the bag publicly, neither on social media, nor on marketplaces or online stores (unless you subscribe to the page).

✅ Naturally, you can print the bag for personal use and gift it to whomever you wish: wife, girlfriend, daughter, friend, or any other special person.
Membership
Want to sell it? Join us :)
Necessary Materials:
- Adhesive for PLA or PETG (recommended for optimal hold).
- Magnets 9.5 mm in diameter and 1-2 mm thick (details below).
- A toothpick or similar (useful for handling the magnets).
The magnets I used can be found in the photo. I purchased them from Leroy Merlin, a pack of 4 pieces for €1.99.
Step-by-Step Assembly
1️⃣ Closure Assembly:
- Take the bag and apply a small amount of adhesive to the back, specifically on the rectangle.
- Use sparingly and do not apply it to the edges, to prevent it from seeping out and ruining the aesthetics of the print.
- Glue the lower part of the closure, which will fit perfectly with the bag.
- Let it dry for a few hours, so that the bonding is solid and resistant.
2️⃣ Magnet Clip Installation:
- Take the small rectangular clip (the brown one in the pictures) which will be used for the magnetic closure of the bag.
- Place a 9.5 mm magnet in the dedicated hole, using a toothpick to push it well inside.
- Glue this clip onto the front rectangle of the bag. The piece has a precise shape, so you cannot go wrong.
- Ensure that the magnet is facing inward (that is, towards the inside of the bag).
3️⃣ Installation of the Second Magnet on the Closure:
- Now take the last magnet and insert it into the dedicated hole on the closure.
- Pay attention to the orientation! Ensure that the two magnets attract each other and do not repel. If you mount them incorrectly, the closure will not function correctly.
- Once glued, let it dry for a few hours.
⚠️ The bag can also be used without magnets, but keep in mind that, if you turn it upside down, it will open easily. The use of magnets ensures a more secure and practical closure.
4️⃣ Chain Assembly:
- To join the individual chain links, use the bevel with the slot present on each link.
- Slightly enlarge the ring and insert the other with a little patience. Do not enlarge it too much, to avoid deforming the piece.
- In the project you will find 20 rings, which allow you to wear the bag on your shoulder.
- If you want a longer strap, print and add more rings to reach the desired length.
🔹 Important for the chain clips:
For the clips where the chain will be inserted, do not use clips with a thickness greater than 4 mm. I have designed the holes with reduced dimensions to minimize noise during the movement of the bag.
Note: If using the Bambu Lab A1 Mini, it is necessary to resize (reduce) the bag, the closure, and the clip. The chains do not need to be resized.
To obtain optimal quality, I recommend printing at low speed. This will help improve the precision of the details and achieve a cleaner finish.
Once the assembly is complete, your bag will be ready to use!
Those who print the bag can share a photo of their creation! I am happy to see the colors you have chosen :)
License
You shall not share, sub-license, sell, rent, host, transfer, or distribute in any way the digital or 3D printed versions of this object, nor any other derivative work of this object in its digital or physical format (including - but not limited to - remixes of this object, and hosting on other digital platforms). The objects may not be used without permission in any way whatsoever in which you charge money, or collect fees.
Comment & Rating (111)