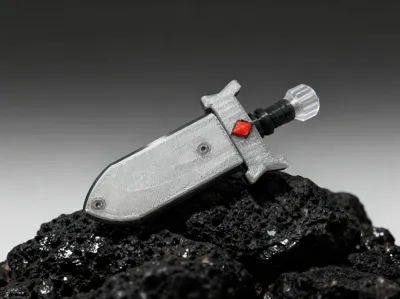
Fidget EDC Durandal Slider and Spinner Sacred Sword


Print Profile(1)

Description
Personal Compendium No. 44, Difficulty: ⭐⭐⭐⭐
This project originated from a personal need. I desired a mechanical fidget toy shaped like a sword, balancing aesthetics and functionality. Thus, this sword, christened Durandal, was born. The name is fitting, as Durandal is depicted as a broken sword, impossible to fully draw, mirroring its design. Its internal structure draws inspiration from a distinguished creator's Sword EDC Mechanical Fidget Toy by Qika Mo - MakerWorld design, which I deconstructed and redesigned. Leveraging the unique slicing capabilities of 3D printing, I achieved exquisite texturing and a high level of refinement. However, assembly requires numerous components; thus, I’m open-sourcing it for those who relish a challenge.
PETG printing necessitates adhesive; otherwise, failure is highly probable!
Required Accessories:
- Three M1.2 x 6mm countersunk screws
- Four 2mm x 9mm locating pins
- Two 3mm glass or steel beads
- Two 0.3 x 3 x 5 or 0.25 x 3 x 5 springs (length adjustment may be required)
- One 3 x 6 x 2.5mm miniature free-spinning bearing (available on platforms like PDD in packs of ten for around 11 yuan)
- Four M2 x 6mm countersunk, pan head, or countersunk screws (countersunk with a hex socket provides a more refined appearance)
- Two identical screwdrivers for counter-rotating the four M2 x 6mm countersunk screws
Component Overview:

Assembly Steps:
① Insert the blade into the handle and secure using two M1.2 x 6mm countersunk pan head screws.
② Use four 2mm x 9mm locating pins to secure the parts on the handle, simultaneously installing the gem bezel and gems.
③ Insert springs and beads into the blade's apertures. Attach the outer casing with the track, and insert the hollow pillar into the holes for temporary securing.
④ Attach the two textured outer plates to the casing, tightening the hollow pillar with four M2 x 6mm pan head screws, using two screwdrivers to counter-rotate them for a robust structure.
⑤ Fit the bearing onto the sword's tail and secure it using an M1.2 x 6mm countersunk pan head screw and a locking component.
⑥ Finally, attach the rear rotating wheel to complete the assembly.

License
You shall not share, sub-license, sell, rent, host, transfer, or distribute in any way the digital or 3D printed versions of this object, nor any other derivative work of this object in its digital or physical format (including - but not limited to - remixes of this object, and hosting on other digital platforms). The objects may not be used without permission in any way whatsoever in which you charge money, or collect fees.
Comment & Rating (0)