Search models, users, collections, and posts

Meter Clock

Print Profile(2)

All
P1S
P1P
X1
X1 Carbon
X1E
A1
H2D
H2D Pro
H2S
P2S
H2C
X2D
A2L

Case with FUZZY texture to black parts
Designer
11.4 h
3 plates
5.0(1)

Case with NO fuzzy skin added
Designer
8.9 h
3 plates

Open in Bambu Studio
Boost
70
138
9
6
38
6
Released 

Description

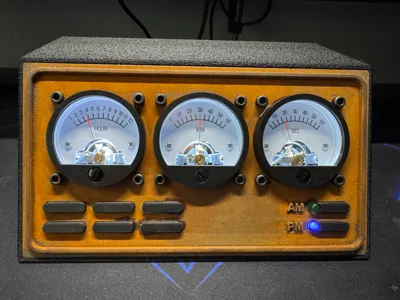
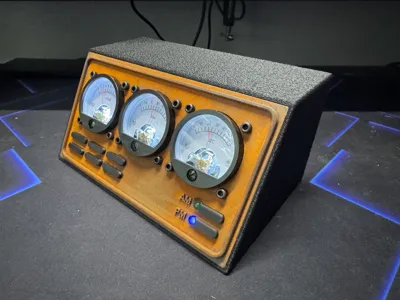
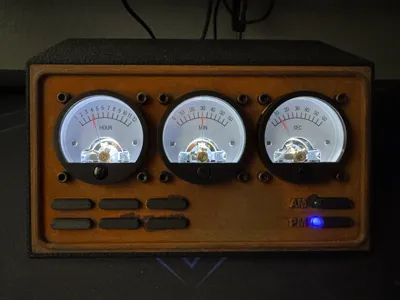
This is a meter clock I designed using an Arduino Nano, TinyRTC, LED's, and three 300V AC volt meters.


The front has two buttons to set the minute and hour and two led's that switch from AM to PM.


The Arduino code for this project can be found HERE.


Update 5/31/25: Uploaded the BOM.


FULL INSTRUCTIONS COMING SOON!


In the meantime you can refer to THESE INSTRUCTIONS of a somewhat similar build.  Please note that his code will work for this build; however, the AM and PM LED's will not light up.


Documentation (1)

Other Files (1)
Meter Clock BOM.pdf

Comment & Rating (9)

(0/1000)

Boosted
I love it! Thank you very much! Works very nice! I had to use 4.3k resistors for modifying the instruments to get them in full scale range. Used yellow LED's for display lightning as this looks "older" I think. Tryed to give it a retro-military style, printed in PLA-CF black & olive.
(Edited)
3
Reply
It looks nice, but maybe look at my idea for (more vintage/industrial/steampunk/dieselpunk look) backlight for these meters: https://makerworld.com/en/models/1837301-so45-analog-meter-backlight-by-led-filament#profileId-1962486
The designer has replied
1
Reply
oh wow. I didnt think about doing the lighting like that but now im going to have to!
0
Reply
Hi, and thank you for designing this clock. This is my first time doing anything with arduino, but I got the thing partially working, I can't adjust the time, I checked the inputs for the hour and minutes, and with a meter between a pwr wite and each input, I get 1.9v when the button is pushed. The voltages on the guages doesn't change, the only one that changes is the seconds guage. Does anyone have any ideas of what I may have done wrong? The buttons are also going to the proper input pins as described in the code. Thanks for any input in advance. I'll include a picture.
0
Reply
Love your design ! How did you achieve the rusty design ? I printed my front cover as "old gold". Gonna post mine once it is assembled.
0
Reply
I used this filament that contains iron. https://a.co/d/0edS0fbw once printed the model needs to be lightly sanded and submerged in peroxide for 12+ hours then set out overnight to air dry. The next day you will find that it is rusty.
0
Reply
When will the assembly instructions be available
Show original
1
Reply
So Cool!
0
Reply
Boosted
Nice project, but wiring instruction or photo at least should be fine :)
0
Reply
Print Profile
Case with FUZZY texture to black parts
0
Reply
No more

License

This user content is licensed under a Standard Digital File License.

You shall not share, sub-license, sell, rent, host, transfer, or distribute in any way the digital or 3D printed versions of this object, nor any other derivative work of this object in its digital or physical format (including - but not limited to - remixes of this object, and hosting on other digital platforms). The objects may not be used without permission in any way whatsoever in which you charge money, or collect fees.