Trumpet Practice Tool


Print Profile(2)


Description
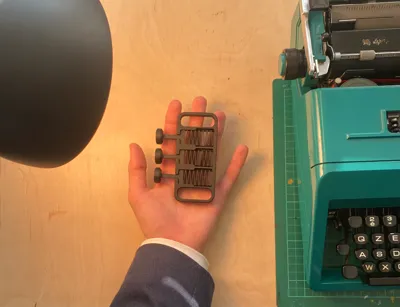
This is the Trumpet Practice Tool. I have been developing it for a while, and now I have finally been able to make it fully 3D printed!
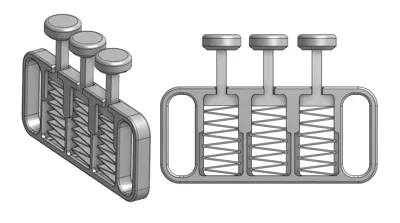
The design is based off the general dimensions of trumpet valves (made to replicate the spacing, the area of contact with the valves, and the travel of the valves themselves), and also nearly perfectly replicates the resistance of a trumpet spring as well. In short, the experience of using this tool is barely distinguishable from a trumpet itself.
The design is made to make no noise when used, so that you can use it to practice Trumpet fingerings on the go, in class, or even in bed at night when other are fast sleep.
The design is so slim that it can fit in a pocket or small luggage spaces, making it the perfect travel accessory for any trumpet player or aspiring musician (or anyone that enjoys fidget toys).
It is a smaller, more compact version than any other alternative on the market, and takes very little to print!
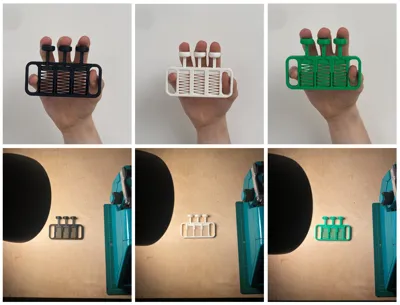
The purpose of the removable springs is for longevity; at the end of the spring's lifetime, once it no longer gives the same resistance it once did, you can easily reprint and swap out the valves without having to waste filament on the rest of the piece. In addition, you can print in different colors and customize the tool to your own liking- it gives you such a wide range of possible designs, each piece interchangeable with another.
Printing Details:
Having printed in different materials, I have personally found PLA Basic to be the best plastic for this tool (PETG too), as the smooth, shiny finish will reduce the resistance between the walls of the valves and the case. PLA Matte aesthetically looks the best, though it will take some usage before the resistance will begin to feel “correct”.
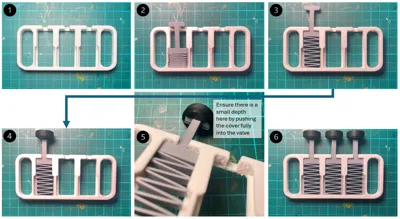
How to Assemble:
- Compress the spring
- Slide the spring and valve into the slot in the case
- Let the spring extend
- Push the valve cover onto the top of the valve so that there is no room left to push
- Repeat for all springs
Refer to diagram in photo library
License
You shall not share, sub-license, sell, rent, host, transfer, or distribute in any way the digital or 3D printed versions of this object, nor any other derivative work of this object in its digital or physical format (including - but not limited to - remixes of this object, and hosting on other digital platforms). The objects may not be used without permission in any way whatsoever in which you charge money, or collect fees.
Comment & Rating (283)