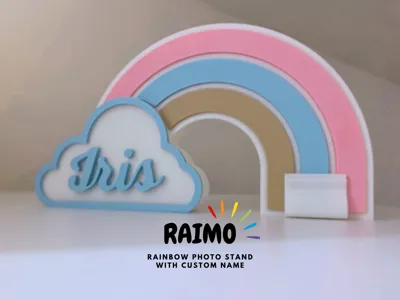
RAIMO - Rainbow Photo Stand with Custom Name


Print Profile(1)

Description
If you like this model, check out my other kids' designs here!
 HUGRI - Bear-shaped childrens hanger
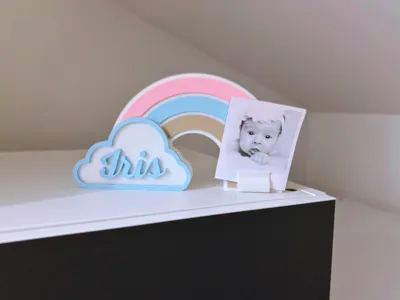
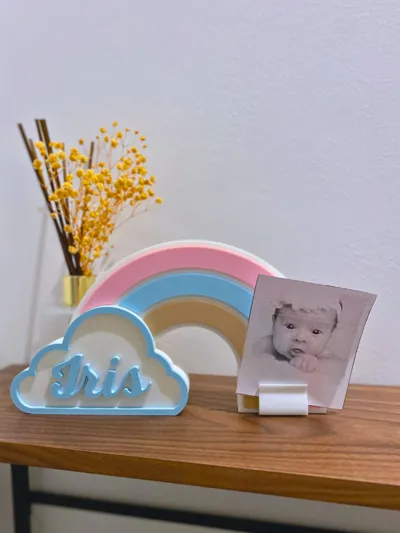
Personalized Rainbow Photo Frame for Kids 🌈📸
This Rainbow Photo Frame was originally designed as a small gift for a friend who recently had a daughter, and I thought I'd share it. It's a cute and functional piece that works as both a photo holder and a decorative display. While it seems perfect for a children's room or nursery, it can also be a charming addition to other spaces!
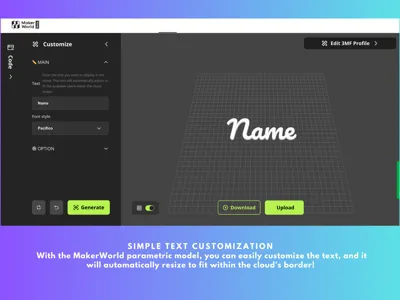
The OpenSCAD parametric model allows you to easily customize the name inside the cloud. The text size adjusts automatically based on the length of the name, ensuring it fits perfectly. No need for manual resizing—just enter the name, and the model will handle the rest.
Key Features:
- Customizable Name: Easily personalize the cloud by adding a name of your choice. The model automatically adjusts the text to fit the cloud perfectly. There are 10 different fonts available, allowing you to select the one that best matches the mood you're going for—whether playful, elegant, or bold. 📝
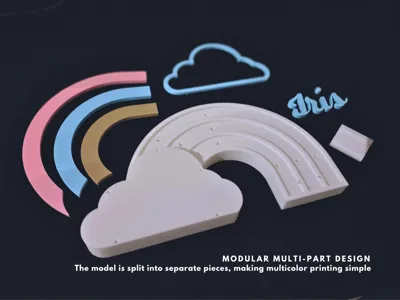
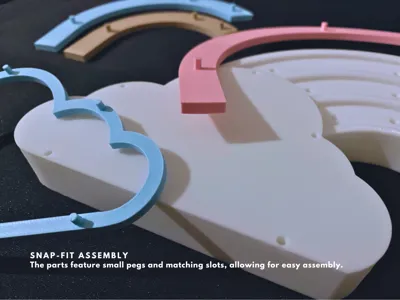
- Easy to Assemble: All parts snap together seamlessly—no tools needed! The model consists of a base, rainbow strips, cloud border, and a photo clip, each designed with predefined slots for easy assembly
- Multi-color Options: Print each part in different colors to create a vibrant, custom look that fits your child’s room decor. 🌈
- Dimensions: ~L 248mm × H 136mm × D 18mm (23mm for the cloud)
How It Works:
- Personalize the Name: Open the OpenSCAD model and enter the name you want to display in the cloud. The text will automatically resize to fit inside the cloud based on the name length and the selected font. ✍️
- Download and Print: After setting your name, download the STL file for the text and import it into your slicer software. I suggest importing it alongside the cloud border and strip M parts in your print bed. Select your desired colors and print each part separately. 🖨️🌈
- Assemble: Once printed, the parts snap together easily, with pre-designed slots for a perfect fit. For the name, apply a bit of glue and position it manually in the cloud.
- Printing Tip: For the best result, print the name face-down on a textured PEI print bed for a nice surface effect. 🌟
License
You shall not share, sub-license, sell, rent, host, transfer, or distribute in any way the digital or 3D printed versions of this object, nor any other derivative work of this object in its digital or physical format (including - but not limited to - remixes of this object, and hosting on other digital platforms). The objects may not be used without permission in any way whatsoever in which you charge money, or collect fees.
Comment & Rating (60)