Large-Sized Chinese Hexagonal Palace Lantern


Print Profile(1)

Description
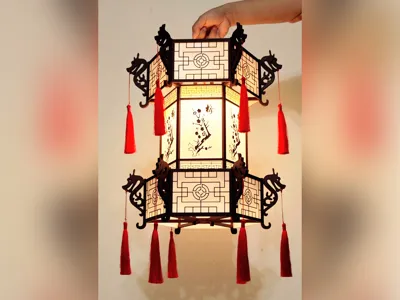
This is a large hexagonal palace lantern, approximately 65 cm in height and 55 cm in width and length. The lantern frame is 3D printed using Bambu Lab wood PLA, while the paper panels are printed in a thin layer of PLA, combining exquisite traditional design with modern craftsmanship. The lantern features intricate hollow patterns and dragon-shaped ornaments, along with panels decorated with traditional floral motifs. Red tassels hang around the lantern, enhancing its elegant and auspicious appearance.
Assembly Instructions
Plates To Print
| ||
| Plate 1 - Print 3 plates | Plate 2 - Print 1 plate | Plate 3 - Print 6 plates |
Assemble Plate 01
Plate 01 contains four parts - A, B, C, and D.
Part A consists of 4 pieces
Part B consists of 4 pieces
Part C consists of 4 pieces
Part D consists of 2 pieces | |
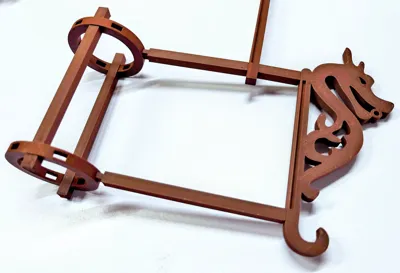
Uppper Section: Connect each part accordingly, ensuring to align the groove and side orientations correctly. | |
Lower Section: Connect each part accordingly, ensuring to align the groove and side orientations correctly. | |
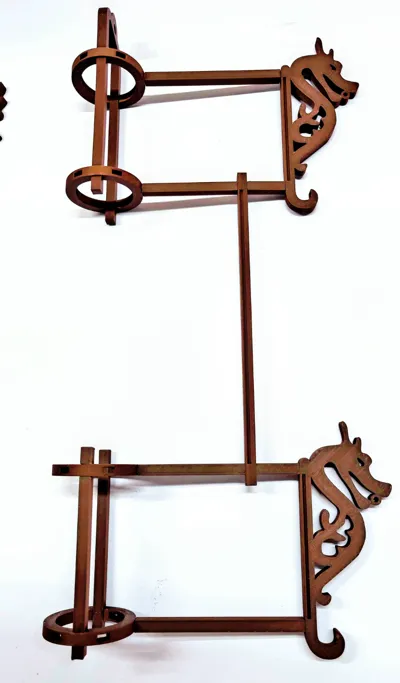
Connect Upper & Lower Sections: Ensure the connection between Part C and Part D matches the image on the left.
Ensure the thin and thick edge orientation of Part D is correct. | |
| The image on the left shows the complete assembly of the two sections. | |
| Complete the assembly of the remaining lantern frame accordingly. |
Assemble Plate 02
Plate 02 contains three parts - E, F, and G.
Part E consists of 2 pieces
Part F consists of 4 pieces
Part G consists of 1 pieces | |
| As shown in the image, insert Part F into Part G and move it to the left until the two grooves align. | |
| Insert the other Part F into Part G and align the two grooves to match the image on the left. | |
| Assembly Part E to Part F like the image on the left. | |
| Assembly another Part F to Part E like the image on the left. |
Joining Plate 1 & Plate 2
| Plate 03 consists of 5 panels. | |
| Insert the panel into the groove of the frame as shown in the image. | |
| Insert the small panel into the groove located at the bottom of the middle frame. | |
| Insert the middle panel into the groove of the center frame. | |
| Insert the remaining panels as shown in the image on the left. | |
| Repeat the process to install the panels on the remaining five sides. |
License
You shall not share, sub-license, sell, rent, host, transfer, or distribute in any way the digital or 3D printed versions of this object, nor any other derivative work of this object in its digital or physical format (including - but not limited to - remixes of this object, and hosting on other digital platforms). The objects may not be used without permission in any way whatsoever in which you charge money, or collect fees.
Comment & Rating (13)