Bass Guitar


Print Profile(1)

Bill of Materials


- BassGuitarKit x 1: https://www.amazon.com/dp/B0DF63TNFF?ref_=ppx_hzsearch_conn_dt_b_fed_asin_title_2
- 4-40 Screws x 1: https://www.amazon.com/dp/B0C1NXJ6B9?ref_=ppx_hzsearch_conn_dt_b_fed_asin_title_1
- 2-56 Screws x 1: https://www.amazon.com/dp/B07JZ2GCYG?ref_=ppx_hzsearch_conn_dt_b_fed_asin_title_2
- 4-40 Inserts x 1: https://www.amazon.com/dp/B0CG4M8HC5?ref_=ppx_hzsearch_conn_dt_b_fed_asin_title_2
- 2-56 Inserts x 1: https://www.amazon.com/dp/B07JZ2GCYG?ref_=ppx_hzsearch_conn_dt_b_fed_asin_title_1
- Stainless Steel 304 Rods - 1/4in diameter and ~8in long x 1: https://www.amazon.com/dp/B0DFCBGG16?ref=ppx_yo2ov_dt_b_fed_asin_title&th=1
Description
🎉 The design has been updated and the scale has been corrected and tested! The material required is the same. The revised design introduces two steel rods for strength and durability.
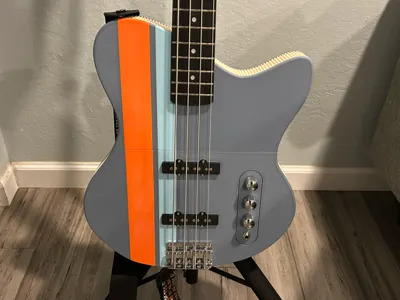
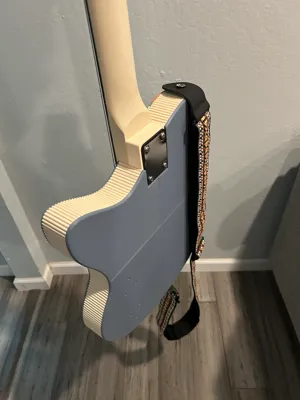
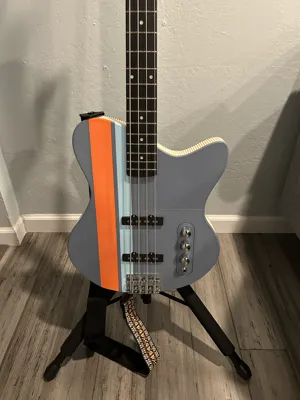
Welcome to the comprehensive guide on building your very own 3D‑printed bass guitar! In this project, we’ll use Bambu Labs PETG HF, PLA Basic, and PLA Matte filament and a carefully engineered design that features a streamlined neck-to-bridge distance of ~11+ inches and a robust outer shell with 7 perimeter walls. The bass kit I used came with a metal plate on the back to distribute loads from the neck joint, this will help long‑term stability and reducing the risk of bending or creep.
This guitar is design for the following bass guitar kit found on Amazon: https://www.amazon.com/dp/B0DF63TNFF?ref_=ppx_hzsearch_conn_dt_b_fed_asin_title_2&th=1
Below, you’ll find step‑by‑step instructions on how to print the guitar body, insert key hardware components, and assemble your instrument.
Step‑by‑Step Printing Instructions
1. Prepare the 3D Model Files
Download Files: Retrieve the STL (or equivalent) files for the bass guitar and get familiar with the design. I recommend confirming that components from your amazon kit matches the dimensions within the model. I designed these models based on the one I purchased. I do not know how much variability there is between guitars.
- Review Design Details: Confirm that the model includes the following features:
- Measure steel rod length and diameter before printing. Adjust the hole based on the rods you received.
- Confirm that the neck will fit in the pocket.
- Mounting holes pre‑designed for brass heat‑set inserts.
- The holes for the neck are through holes and is designed to be used with the metal plate for maximum durability.
2. Set Up in Bambu Studio
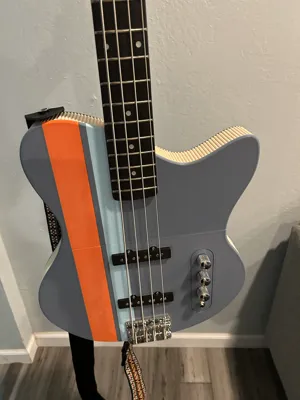
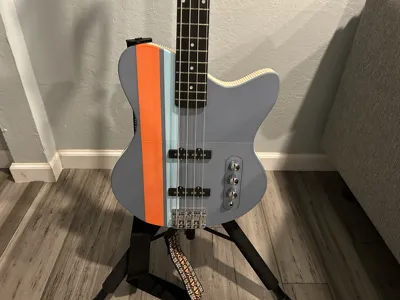
- Material: Bambu Labs PETG HF for the internal body components, PLA Basic for dark blue plates on the front and back of the guitar, PLA Matte for the light blue stripes, PETG HF for the orange stripes.
- Layer Height: Set to 0.2 mm for a good balance of resolution and speed.
- Infill: Use 25% infill – this provides weight reduction while keeping the structure light.
- Perimeters (Wall Loops): Configure the slicer for 7 perimeters to create a robust outer shell. This is already set in Bambu Studio for the primary structural components.
- Additional Settings: Dry out the PETG prior to use for best printing quality. Use the Bambu Labs recommended temperatures and speeds for PETG HF as outlined in the filament’s datasheet. Ensure that your print bed is properly prepared (with a PEI or textured PEI surface and glue if needed).
3. Print the Guitar Body
- Start the Print: Launch your print job and monitor the first few layers to ensure proper adhesion.
- Post‑Processing: Once printed, remove any support structures carefully. Lightly sand any rough edges if necessary (only on the internal surfaces that aren't seen).
- Fit Check: Check the fit of all the bass guitar components before proceeding. Make adjustments to 3D printed parts if needed.
- Heat‑Set Inserts: Use a heat‑set tool to install brass inserts at the designated mounting points for the bridge and neck attachments. The brass inserts used are for 4-40 and 2-56 screw sizes. There are ~28 total 4-40 inserts and 6 total 2-56 threaded inserts. The only location the 2-56 inserts are used is for the dark blue control plate.
- Screwing the Components together: First screw all the internal components together to form the internal body structure of the guitar. These are all the cream colored components.
- Bottom Plates: super glue the bottom plates to the guitar first.
- Top Plates: super glue the top plates starting with large dark blue plates on the right and move sequentially to the left. This is important so all the plates fit together properly.
Assembling the Kit Components
4. Prepare the Neck
Watch this video to learn how to prep the guitar neck:
5. Reinforce with the Metal Plate
- Metal Plate Preparation: The metal plate should come with a plastic piece that is placed between the 3D printed guitar and the metal plate. It also comes with the screws required to attach the neck.
- Attach the Plate: Position the plate on the back side of the printed body. Secure it using four screws that pass through the PETG into the wooden neck. This plate will distribute the tensile load from the neck screws, reducing local stresses in the plastic.
6. Assemble the Bridge
- Mount the Bridge:
- With brass inserts already in place on the guitar body, position the bridge so that its mounting holes align.
- Secure the bridge with the seven 4‑40 screws. The wide distribution of screws (and the accompanying metal plate backing) ensures the string tension load is well spread across the body.
7. Final Assembly and Setup
- Tuners: Attach the tuners.
- Stringing: Once the main assembly is complete, install your four bass strings. The design assumes each string exerts approximately 30 lbs of tension, totaling 120 lbs.
- String Guide: If a pilot hole isn't present for the string guide for the “D” and “G” string, drill a pilot hole.
- Tuning & Setup: Tune the guitar and check the action. The reinforced neck joint and metal plate should keep the structure rigid under string tension. Adjust the bridge and truss rod according to your setup needs.
- Inspect: Look over all fasteners (screws, inserts, and neck bolts) to ensure they’re tight and the assembly is stable.
Tips for Success
- Dimensional Review: Review the part dimensions from the kit, threaded inserts, and steel rods to ensure everything has enough clearance.
- Component Alignment: It is important to check all components with the center/main body print first. Make sure the pickups fit and the string will align with the neck. You may need to adjust the hole position on the print to account for the variability in hole placement in the guitar kit you purchased. Do not glue until you know everything will align.
- Monitor Print Quality: Ensure that your 3D printer is well-calibrated to minimize layer adhesion issues.
- Reinforce Strategically: The metal plate not only reinforces the neck joint but also provides a backup against long‑term creep. Check periodically for any signs of stress or loosening.
- Environmental Control: Keep your guitar in a stable temperature environment.
- Patience: For this project patience is your ally! Take your time and enjoy the process. It is easy to make mistakes if you rush it.
By following these step‑by‑step instructions, you’ll have a durable, and custom 3D‑printed guitar! Enjoy the build process and the unique sound of your handcrafted instrument!
Boost Me (for free)
If you like this bass, please consider giving me a boost!

Boost Me (for free)
If you enjoy my work, please give me a boost to keep the designs coming!
Membership
Join the calculatingzero community and unlock access to exclusive 3D model licenses and members only assembly tips. Your subscription directly supports original creations, helps fund new prototypes, and gives you the freedom to sell licensed prints of my designs. Let’s build, print, and grow together! 🚀
License
You shall not share, sub-license, sell, rent, host, transfer, or distribute in any way the digital or 3D printed versions of this object, nor any other derivative work of this object in its digital or physical format (including - but not limited to - remixes of this object, and hosting on other digital platforms). The objects may not be used without permission in any way whatsoever in which you charge money, or collect fees.
Comment & Rating (55)